How Do I Set Up User Security?
Review the Setting Up Your Organization checklist to ensure that the organization is set up properly.
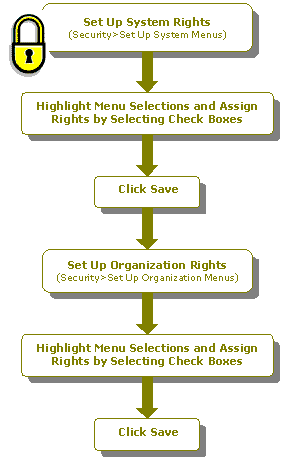
Perform the following steps with Administrative user rights, to set up user security:
- Set up system rights for users. To do this, open the Security>Set Up System Menus form and select the desired user from the ID drop-down list.
- Double click on an item (or single click on the plus (+) sign) to expand the outline.
- Highlight the menu or menu selection to assign rights, and then click the check boxes to indicate which rights to assign this user. Some rights depend on other rights; you will usually need View rights to perform other tasks (Editing, Deleting, Adding, and Processing).
- Click
 .
. - Set up organization rights for the groups and users. To do this, open the Security>Set Up Organization Menus form and select "User" from the Type drop-down list.
- Select the desired user from the ID drop-down list. Note that rights are assigned to the selected user for the active organization.
- Double click on an item (or single click on the plus (+) sign) to expand the outline.
- Highlight the menu or menu selection to assign rights, and then click the check boxes to indicate which rights to assign this user. Save any changes.
- If you need to set up organization security for a group, select "Group" from the Type drop-down list.
- Select the desired group from the ID drop-down list.
- Double click on an item (or single click on the plus (+) sign) to expand the outline.
- Highlight the menu or menu selection to assign rights, and then click the check boxes to indicate which rights to assign this group.
- Click
 .
.
Note: If a user does not have rights to a menu selection, it does not appear in the system.
