How Do I Set Up the Accounts Receivable Billing Module?
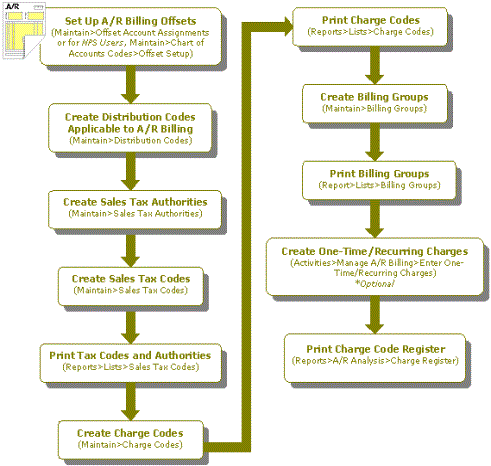
Accounts Receivable consists of two modules-A/R Reporting and A/R Billing. A/R Reporting can be used on its own, but must be installed to use A/R Billing. The following is a checklist for setting up the Accounts Receivable Billing module:
Note: Review the Setting Up Accounts Receivable Reporting checklist before continuing with these steps.
- Set up the ARB - A/R Billing offsets. (Maintain>Offset Account Assignments).
- Create distribution codes applicable to A/R Billing (Maintain>Distribution Codes).
- Create sales tax authorities for all entities served by your organization (Maintain>Accounts Receivable>Sales Tax Authorities).
- If necessary, make changes to customer records to make the customer taxable or subject to finance charges. Review the Setting Up Sales Tax checklist for specifics about sales tax information.
- Create sales tax codes (Maintain>Accounts Receivable>Sales Tax Codes).
- Print a list of sales tax codes and their authorities (Reports>Accounts Receivable>Sales Tax Codes).
- Create charge codes including calculation information (Maintain>Accounts Receivable>Charge Codes).
- Print a list of charge codes (Reports>Accounts Receivable>Charge Codes).
- Create billing groups and assign default charges (Maintain>Accounts Receivable>Billing Groups).
- Print a list of billing groups (Reports>Accounts Receivable>Billing Groups).
- (Optional) Enter or update exceptions or adjustments to charges (Activities>Accounts Receivable>Enter One-Time/Recurring Charges or Maintain>Accounts Receivable>Billing Groups>
 Enter One-Time/Recurring Charges).
 - Print a complete charge code register (Reports>Accounts Receivable>Charge Register).
Note: Refer to the Setting Up Customer to Receive Emailed Invoices/Statements checklist to set up SMTP email, create default email templates for invoices and statements, and enter customers email information.
