Manage Paid Invoices
Review your invoices that have already been paid, either through manual payments (printed checks) or automated payments.
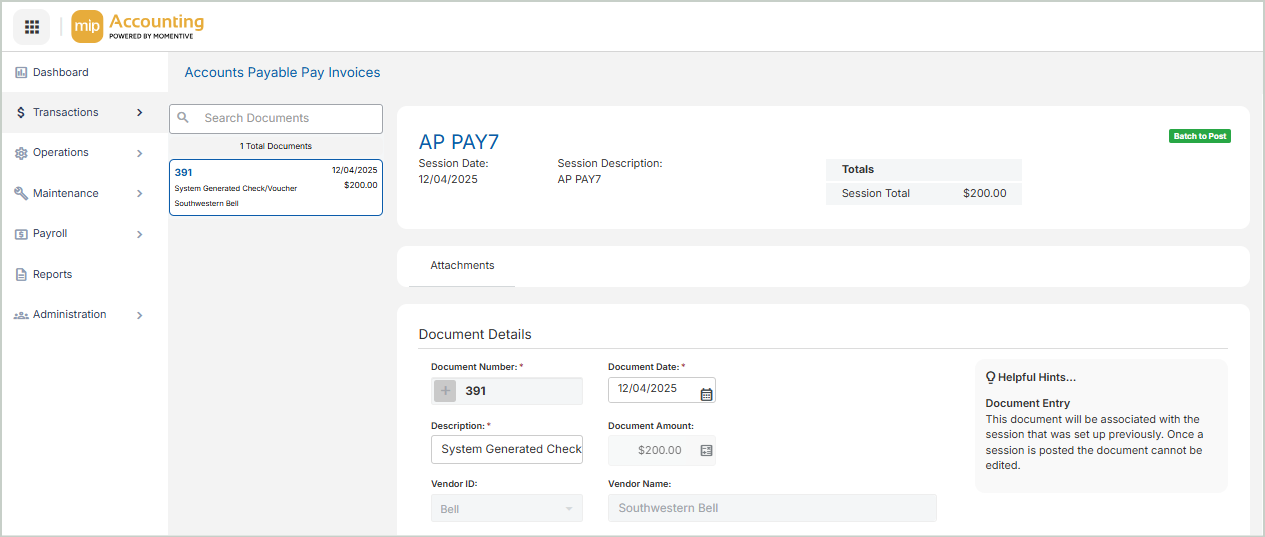
Document Details
Select a document from the Document List on the left-hand side of the page to view its details.
Document Number: The unique ID for the invoice
Document Date: The date specific to this document
Description: Automatically populates depending on how the invoice was paid
Document Amount: The amount of the invoice
Vendor ID: The vendor associated with the invoice
Vendor Name: The name of the vendor
Check Address: The vendor's check address
Payee: The person or organization to receive the payment
Transactions
In order to save or post an entry, every line item must include all required account codes (segments) for the organization, an invoice or credit number, a debit or credit amount, an effective date, an entry type, and a description. These fields appear on all transaction entry forms.
![]()
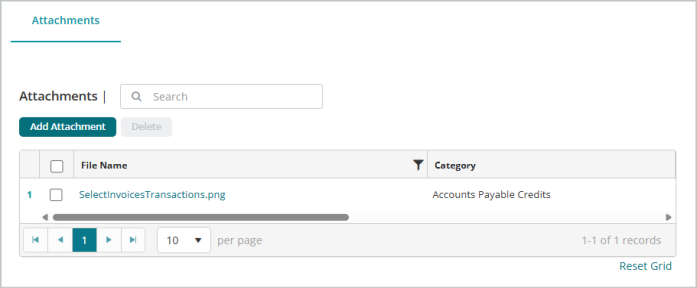
Add Attachments
Once you've selected a document, you can perform the following action:
Use the Attachments tab to add supporting documentation to your session document.
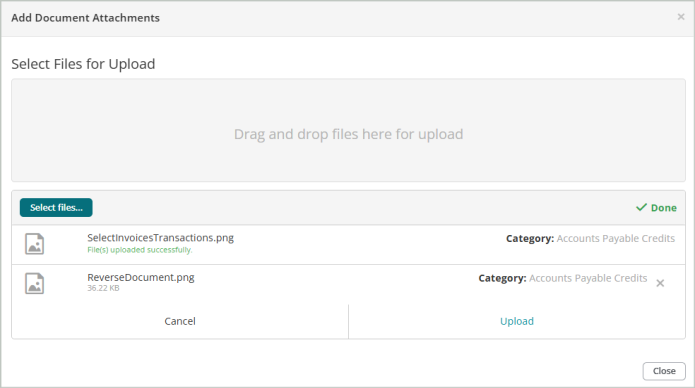
Steps:
-
Select Add Attachment.
-
You can either drag and drop files to upload or Select files... from your file explorer.
-
Select Upload after you add the attachment.
-
You'll receive a message that the File(s) upload successfully.
-
Close the window. The document you attached will display in your list of attachments.
Save & Post
Save the document when you’re finished editing document details and transactions. You have two save options:
-
Save - Saves the current document and keeps it open for further editing.
-
Save & Close - Saves the current document and returns you to the sessions page.
Delete - Deletes the current document (does not delete the entire session).
You can Post the session through the Unposted Sessions grid on the Pay Invoice Sessions page.