Add / Edit Chart of Accounts Codes
Create chart of accounts codes for your organization. The chart of accounts is the foundation of your accounting system, organizing all your financial activity into segments - such as funds, departments, or programs - for accurate tracking, reporting, and budgeting.
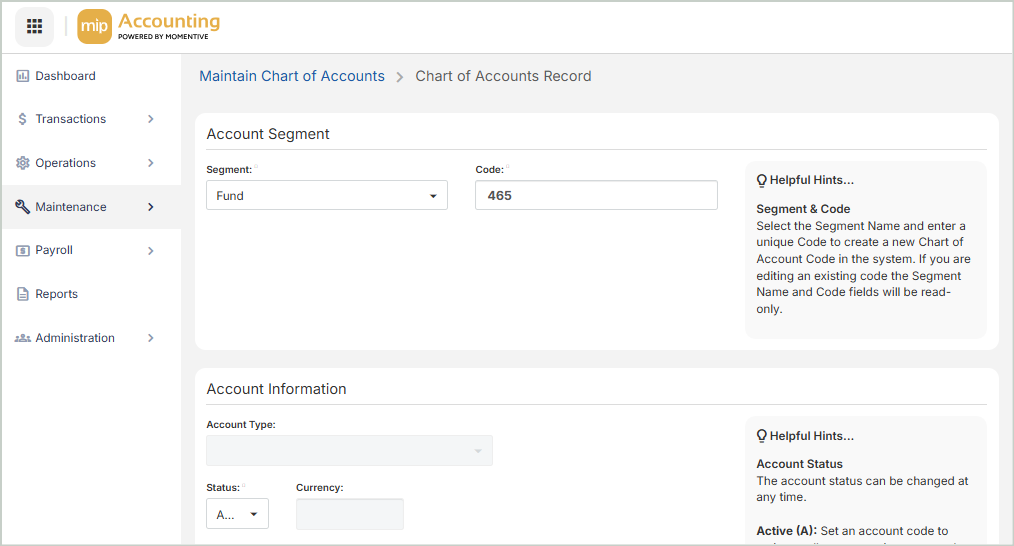
Account Segment
Segment: Select the segment name.
Code: Enter a unique code for the segment.
Account Information
Account Type: Displays the account type.
Status: Select the account code status. The status can be changed at any time.
Currency: Displays the currency type.
Title: Enter the account code title.
Short Title: Enter an account code short title. The short title defaults to the first fifteen characters of the title, or you can create your own title.
Account Details
Designation Code: Select the account code designation.
Form 990 Line Number: Select the account code Form 990 line number.
Last Check Number: Enter the last check number before the reorder point.
Check Reorder Point: Enter the check reorder point.
Required Account Assignments: Required account assignments can be assigned to any GL account code except for the following account types:
- Net Assets/Equity - NAE
- Revenues - REV
- Expenses/Expenditure - EXP
If you're setting up a GL code that's an Interfund Transfer - IFT account type, it's highly recommended that all available segments be assigned as required accounts.
Grant Administration
When creating or editing a Grant segment, the following sections will display to enter grant information.
Stage: Select the stage that is appropriate for this grant. Use Pre-award (PR) during the application process; Post-award (PO) after a grant has been awarded; and Close-out (CL) when a grant has been completed.
Recipient Award Number: Enter the grant award number assigned to your grant by the grantor.
Recipient Award Type: Enter your own unique award type. This is an internal classification that you create to assist in sorting and grouping on reports.
Project Director: Enter the name of the person in your organization that is responsible for implementing the grant.
Notification Date: Enter or select the date that your organization was informed that you were being awarded this grant.
Grant Period Start Date/Grant Period End Date: Enter the terms of the grant; the start and end dates.
Extended Date: If applicable, enter the date (beyond the grant period) to which the grantor has agreed to extend, so that your organization can complete the grant.
Projected Award Amount: Enter the full funding amount available for this grant.
Payment Method: Enter the —A (Advanced Payment) or R (Reimbursement)—your organization will receive funds from the grantor.
Cost Sharing Percentage: Enter the percentage of cost expected from your organization by the grantor. It is common for the grantee to match some portion of the contribution made by the grantor.
Indirect Cost Rate: Enter the percentage of reimbursement for indirect costs (such as administrative personnel or office rental) acquired by your organization.
Next Reporting Date: Enter the next date that a performance report is due to the grantor.
Last Reporting Date: Enter the last date that a performance report was submitted to the grantor.
Audit Required: Select this check box if the grant requires that you have an independent audit performed.
Grant Sponsor: Enter the name of the entity issuing the grant.
Grant Grantor ID: Enter the ID assigned to this grant by the grantor.
Grant Official: Enter the contact person; that is, the person that administers the business aspects of the grant.
Position: Enter the Grant Official's job title.
Grantor Address, City, State/Province, Zipcode, Country, Phone, Fax, Email: Enter the street address, city, state or province, postal code, and country for the official. Also enter a telephone number, fax number, and email address.
Program Official: Enter the grantor's representative with specialized knowledge in the area relating to the grant. This person ensures that your organization is implementing the grant properly and achieving the intended results.
Customer ID: Select any customer ID associated with this grant. This is used with the AR Reporting module.
Model Account
Select the Model Account you'd like to use and the account to assign to. The system will use the model account to pattern assignments for the account being created or updated.
For example, if the model account is assigned to 20 account code combinations, the system will add 20 new combinations substituting the new or updated account for the model account in the combination.
You can view the assignments before saving them. If you don’t like the assignments, uncheck the box before saving
Once you're finished with your edits, Save your changes.