Enter Cash Receipts
Use cash receipts to record and apply payments received, such as customer payments on outstanding invoices.
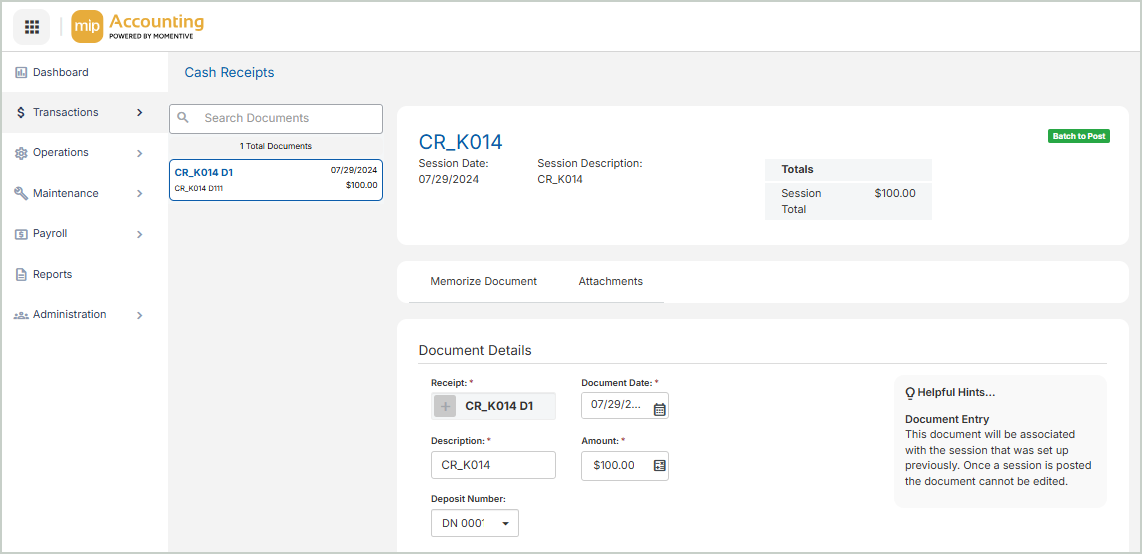
Enter Document Details
To edit or view an existing document, select it from the Document List on the left-hand side of the page.
To create a new document, enter the Document Details:
Receipt: Enter a unique ID for the receipt, or select the + button to generate one automatically. We recommend using only alphabetic characters (A–Z) or numeric characters (0–9) for your entry.
Document Date: Enter a date specific to this document.
Description: Enter information you'd like to record about the document.
Amount: Enter the amount of the receipt. The document amount and the net of the transaction lines must equal if the session status is BP.
Deposit Number: Select a or enter a deposit number that includes this receipt. This number can be used to group multiple receipts for one deposit slip.
Recipient ID: Select the recipient to associate with the cash receipt.
Recipient Name: Automatically populates after selecting the Recipient ID.
Enter Transactions
In order to save or post an entry, every line item must include all required account codes (segments) for the organization, an invoice or credit number, a debit or credit amount, an effective date, an entry type, and a description. These fields appear on all transaction entry forms.
![]()
Copy | Reverse | Recall Memorized Document
Before you create or select a document, you can perform the following actions:
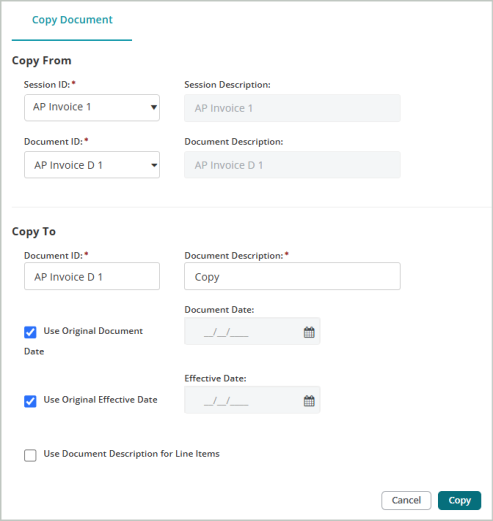
Use the Copy Document tab to copy a posted document from an existing session and add it to the current session. The copied document will be added to the session as an unposted document.
Steps:
Copy From
-
Select the Session ID and Document ID of the posted session that you want to copy.
Copy To
-
Enter the Document ID of the document that you want to copy the information to. Enter a Document Description for the new document you're creating.
-
If you want to use the same Document Date and Effective Date as the original, leave these options selected. If you want to use different dates, un-select these options and enter different dates.
-
Use Document Description for Line Items: If you want the Document Description you entered above to display as the description in the transaction entry grid, select this option.
-
Select Copy to complete the process. The copied document is added to the session as an unposted document.
Use the Reverse Document tab to reverse a document from a previous session to a current session. The reversed document will be added to the session as an unposted document.

Steps:
Reverse From
-
Select the Session ID and Document ID of the posted session that you want to reverse.
Reverse To
-
Enter the Document ID of the document that you want to reverse. Enter a Document Description for the reversed document you're creating
-
If you want to use the same Document Date and Effective Date as the original, leave these options selected. If you want to use different dates, un-select these options and enter different dates.
-
Use Document Description for Line Items: If you want the Document Description you entered above to display as the description in the transaction entry grid, select this option.
-
Refund Using Cash GL Code: Select the Cash GL Code to clear the non-balancing and Restriction segments of the cash line. This field is only available in a Accounts Payable Credit (APM) session.
-
Select Reverse to complete the process. The reversed document is added to the session as an unposted document.
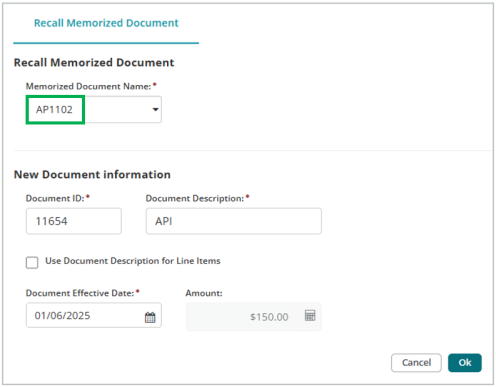
Use the Recall Memorized Document tab to recall a previously memorized document to include in the current session. You must Memorize a Document first before you can recall it in this session.

Steps:
Recall Memorized Document
-
Select the name of the document that you memorized in a previous session to recall in this session.
New Document Information
-
The Document ID, Document Description, Document Date, and Document Effective Date will auto-populate based on the memorized document you selected above. You can leave these as-is or enter new values. Note that the Document ID can't be the same as an existing ID in this session.
-
Amount: If the document you're recalling was memorized as Actual Amounts, the amount displayed can't be changed. If you memorized the original document using Percentages, enter the amount you want the system to apply. The system uses the percentages from the original document.
-
Use Document Description for Line Items: If you want the Document Description you entered above to display as the description in the transaction entry grid, select this option.
-
Select OK to complete the process. The recalled document is added to the session as an unposted document.
Memorize Document | Add Attachments
Once you've created or selected a document, you can perform the following actions:
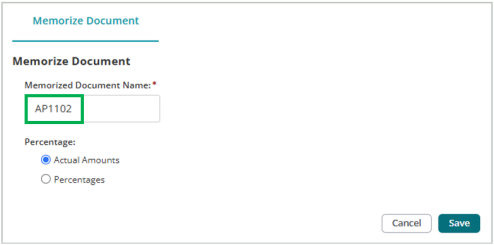
Use the Memorize Document tab to memorize an unposted document (under a new name) to use from session to session. When recalled, the system will reproduce the document you enter here just as you memorized it.
Steps:
-
Enter a name for the memorized document. The name you enter here will be used later, when you recall the memorized document in a different session.
-
Select either Actual Amounts or Percentages for your memorized document. If you select percentages, the system converts the amount for each line item to percentages (100% for Debit and 100% for Credit). Use percentages if the currency amounts for the document vary each time it's recalled.
-
Select Save to complete the process.
-
When you open a new session, select Recall Memorized Document. The memorized document that you just created will be available to select from the drop-down list.
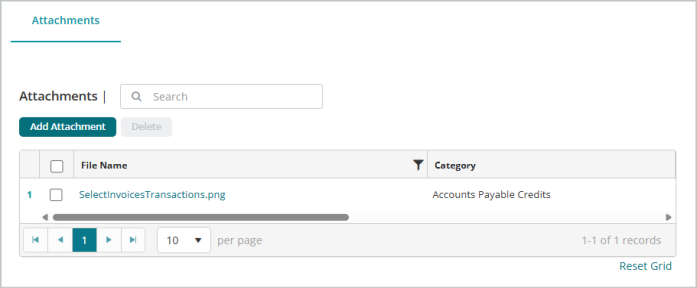
Use the Attachments tab to add supporting documentation to your session document.
Steps:
-
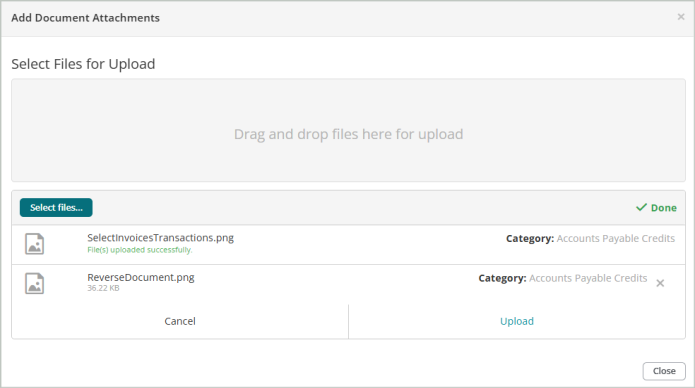
Select Add Attachment.
-
You can either drag and drop files to upload or Select files... from your file explorer.
-
Select Upload after you add the attachment.
-
You'll receive a message that the File(s) upload successfully.
-
Close the window. The document you attached will display in your list of attachments.
Save & Post
Save the document when you’re finished entering document details and transactions. You have three save options:
-
Save - Saves the current document and keeps it open for further editing.
-
Save & New - Saves the current document and opens a new blank document.
-
Save & Close - Saves the current document and returns you to the sessions page.
Delete - Deletes the current document (does not delete the entire session).
You can Post the session through the Unposted Sessions grid on the sessions page.