Import Data
Importing allows you to take data from an external file and import it into MIP; an alternative to entering data manually in MIP. Use this form to select the definition file (.DEF) and associated data files - fixed width or comma separated variable (.TXT or .CSV) to be imported to the system. Definition files map to data files to be imported, while data files contain the actual data being imported.
Note: Our Client Services Team can help build your definition file and provide training on using the import files. Please contact your customer account manager for information on how to receive training.
Overview of Importing Data
What kind of data can be imported?
-
Set up items - chart of account codes, distribution codes, vendor information, customer information.
-
Historical transactions or beginning balances - typically imported during the implementation of MIP.
-
Transactions - journal vouchers, cash disbursements, cash receipts, AP invoices, budget transactions, payroll transactions.
What files are needed to import data?
-
Data File (.CSV or .TXT) - contains all of the data that you want to import into MIP. It will vary depending on which information you are importing. For example, you’ll have different columns for importing transactions vs. maintenance items.
-
Definition File (.DEF) - a translator or "map" that tells MIP how to read the data file and where to put the information into MIP. This file can originate from a 3rd party application or MIP itself.
Setting Up Your Data File
Data files must be formatted one of two ways in order to be read by the system; either Comma Separated Variable (CSV) or Fixed-Width (FW) format. Each of these formats is read differently by the definition files.
It's easy to produce a file in the CSV format with most software programs. Data is separated by commas in this format.
In the Fixed-Width (FW) format, similar data appears in the same position of each line of data.
CSV Data Sample
The following lines of data are formatted for a CSV data file. Notice that there are commas between each field:
01-101-40001-101-101-1,04/06/2001,C,1000,FAS Fund-CA
01-101-11001,04/06/2001,D,1000,FAS Fund-CA
01-101-40001-101-101-1,04/06/2001,C,1000,Travel-CA
01-101-11001,04/06/2001,D,1000,Travel-CA
Fixed-Width Data Sample
The following lines of data are formatted for a fixed-width data file. Notice that spaces are used to line the fields up in the same position:
01 101 40001 101 101 1 04/06/2001 C 1000 FAS Fund-CA
01 101 11001 04/06/2001 D 1000 FAS Fund-CA
01 101 40001 101 101 1 04/06/2001 C 1000 Travel-CA
01 101 11001 04/06/2001 D 1000 Travel-CA
Sections of the .DEF File
The definition file (.DEF) describes how to interpret the information contained in the separate data file. The definition and data files can have any file name.
Note: When you're reviewing a definition file, if a line is preceded by REM, this line is ignored because the system considers it a remark or comment.
If you're using an existing, master definition file as a starting point, copy the file and change the segments to match your Chart of Accounts structure. This will allow you to maintain the original files that work with the sample data NTO, for future reference. Also note that the master and sample files get replaced with any system upgrade.
Every definition file contains both the Environment and Context sections. The File, Context ID Position, File Type, Transaction Line, and Formatting statements are part of the Environment section, while the Context ID statement makes up the Context section.
Note: This sample .DEF file contains a predefined error exception file name in the Environment Section - 1: File Statement.
1: File Statement
FILE,{Record Type},{Path and Filename of Data File}, , {Path and Filename of Error Exception File}
2: Context ID Position Statement
CONTEXTIDPOSITION,{Column Position/Field},{Field Length},{Default Value}
3: File Type Statement
FILETYPE,{POSLEN OR CSV}
4: Transaction Line Statement
TRANSACTION_READ,{Method}
5: Formatting Statements
DISCARDFIRSTNRECORDS,{# of rows to be ignored}GEN_CODING
APPLY_OFFSETS
CLEANLINE_READ,{1 Enables}SUPPRESSWARNINGS
SEGMENTNOTSTRING
USEDISTCODE
UPDATEITEM
UPDATETS
PREVALIDATE
6: Context ID Statement - CSV Formatting or 6: Context ID Statement - Fixed-Width Formatting
CSV:
CONTEXT,{Record Type},{Header or Detail},{Context ID}{Context Type}_{Field Name},{Field Position in CSV},{Default Value},{Date Mask},{Position in String},{Field Length},{Decimal Places}ENDCONTEXT
Fixed-Width:
CONTEXT,{Record Type},{Header or Detail},{Context ID}{Context Type}_{Field Name},{Starting Column},{Field Length},{Default Value},{Decimal Places},{Date Mask}ENDCONTEXT
Note: The following illustration outlines the statements and sections of a definition file. It is NOT intended to represent an actual definition file. For example, the UPDATEITEM formatting statement nor the UPDATETS formatting statement should not be used with this type of CSV file, but this is the correct placement for either statement. This illustration is combining multiple statements into one example; therefore, its focus is on the placement of the statements, not the data.
Steps to Import Data
Once your data and definition files are properly developed, follow the steps below to import your data into MIP:
-
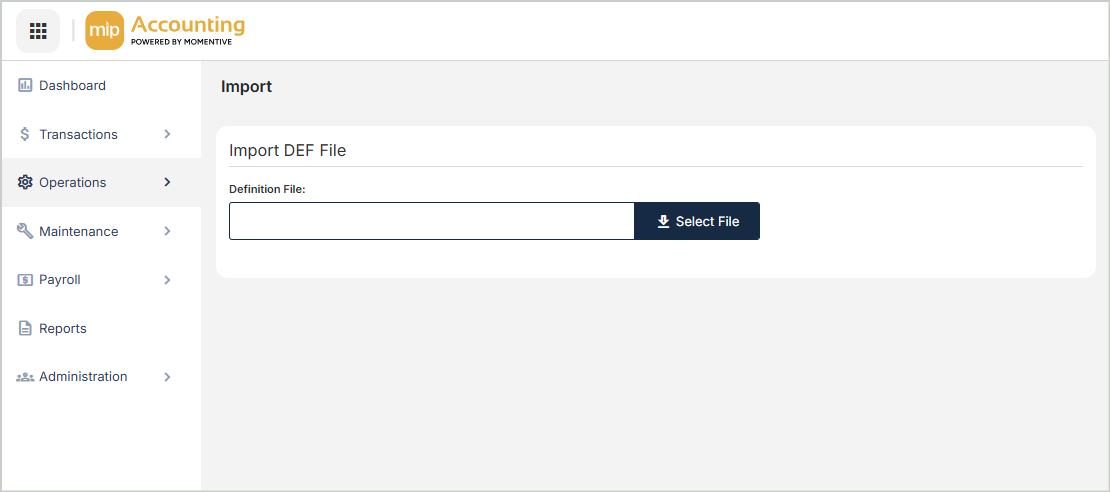
Import your DEF File
-
Under Import DEF File, click on Select File.
-
Browse to the location where your definition file is saved.
-
Select the definition file to import.
-
-
Import your Data File
-
Under Import CSV Files, click on Select File.
-
Browse to the location where your definition file is saved.
-
Select the data file to import.
-
-
Upload your data
-
Select Upload at the bottom of the page to start the import process.
-
If your data imports successfully, a notification displays.
-
Verify the information by opening the appropriate form to be certain all fields imported correctly.
-
Error Logs
If any errors were encountered during import, the system displays a warning message followed by an Import Error Log. Make note of the error before closing this log.
- Data File - The system displays the data file name.
- Data Type - The system displays the type of data that could not be imported.
- Action - The system displays both warnings and errors by listing "Imported or "Not Imported", respectively. Although the message for warnings is "Imported," the system still informs you of the warning.
- Code/ID - The system displays what context detail line in the definition file is causing the error.
- Field Edited - The system displays a description of the Code/ID (if available) causing the error.
- Field Value - The system displays what is in the data file for that particular context detail.
- Message - You'll receive a message as to why the import is giving you an error or warning.
