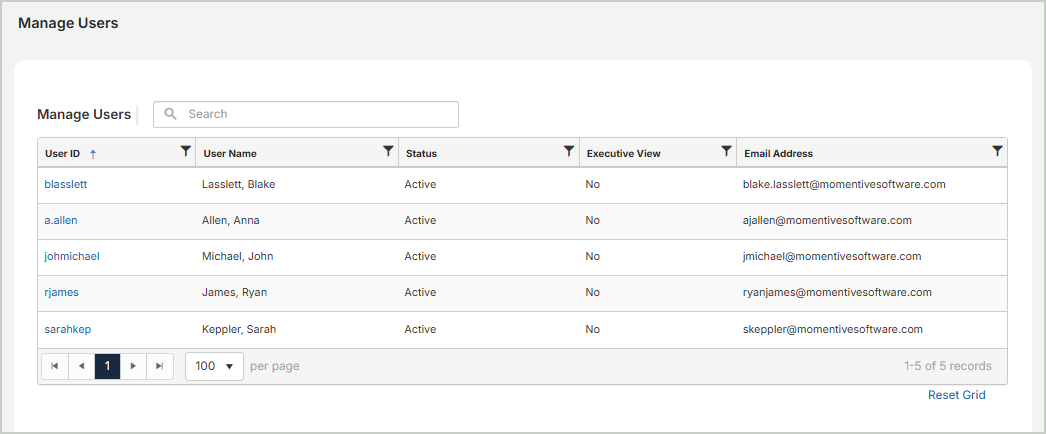
Manage Users
Use the Manage Users section to view all users who have access to the system and set their permissions.
Note: Users cannot be created within MIP. To create a user, sign in to the MIP User Portal and select Users & Groups.
Select a tab below to learn more about each setting.
- User Details
- Organizations
- User Groups
- User Rights
- Account Level Security
Use the User Details tab to view user account details and change a user's status.
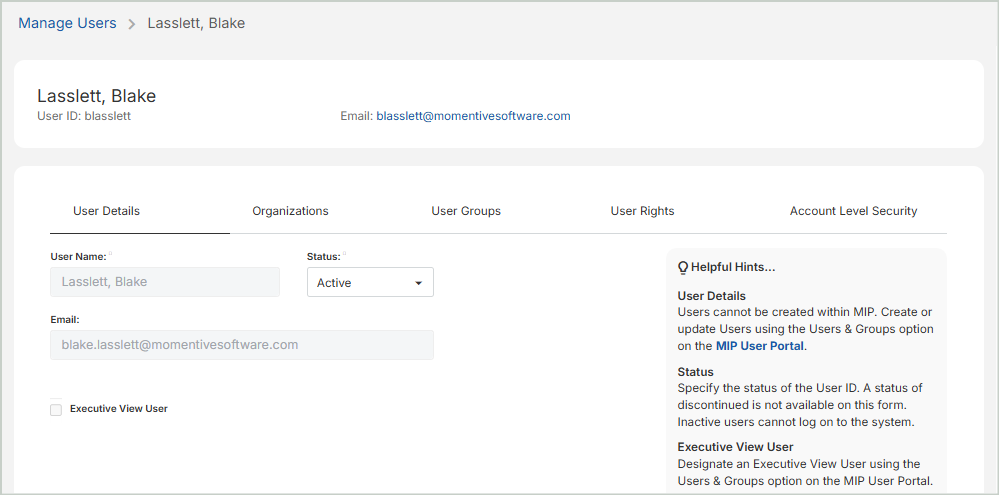
User Name: The unique ID for the user
Email: The user's email address
Status: Select the user's status. Available options include:
- Active: User can log in and is available for selection in data entry and reporting.
- Inactive: User cannot log in but remains available for reporting. A notification appears when selecting an inactive user, but selection is still allowed.
Executive View User: Select this option to designate the user as an Executive View User. These users have limited security rights and can only access features such as dashboards, reports, and budgets. Executive View Users are set up through the MIP User Portal.
Once you're finished with your edits, Save your changes.
Use the Organizations tab to select the organizations that a user should have access to.

Select the organizations in the grid to grant the user access to specific organizations. To deny access, simply deselect the organizations.
Once you're finished with your edits, Save your changes.
Use the User Groups tab to view all user groups this user belongs to. Assigning users to specific groups must be done through the MIP User Portal.
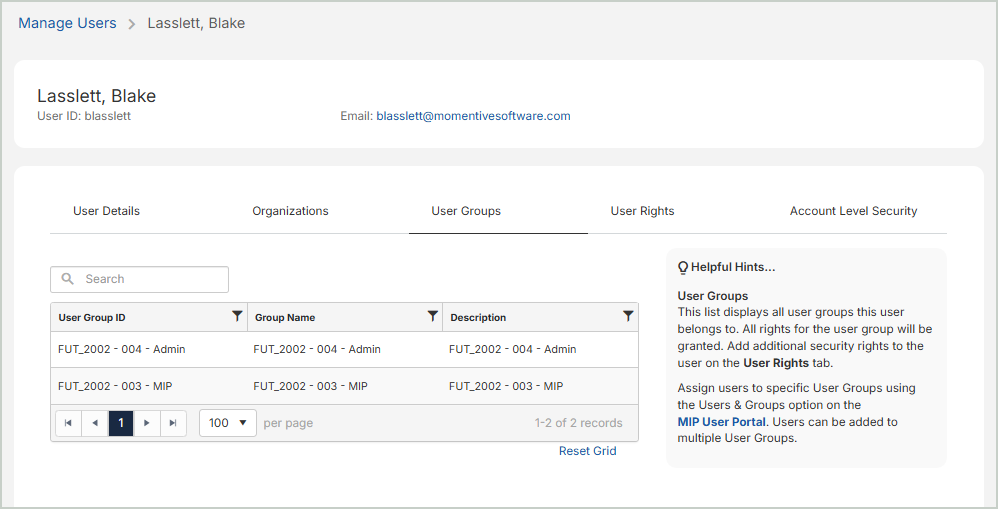
User Group ID: The ID for the user group
Group Name: The name of the user group
Description: A short description of the user group
Use the User Rights tab to set specific user rights for each module in your organization.
Note: A user's rights are granted at the individual level, however they can also be inherited from a user group they belong to. Use the checkboxes to grant or deny individual rights on this page. Green check marks indicate rights inherited from a user group and can't be edited from this page.
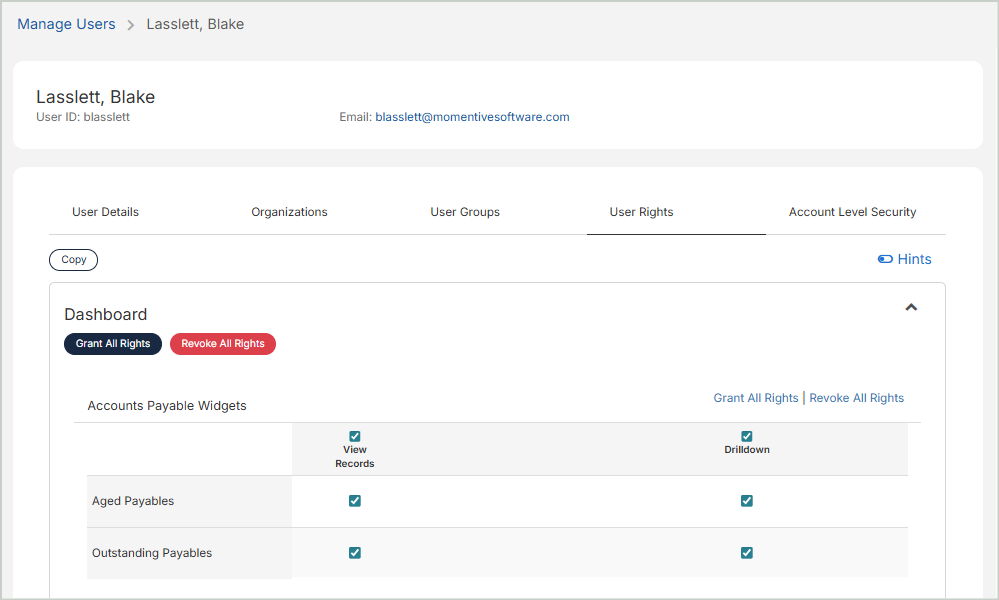
Expand a module to access the module level user group settings.
-
Set the permissions (view, edit, delete, etc.) for each individual module function by selecting the checkboxes for each.
-
Grant All Rights: Grants all rights for a module for the user group
-
Revoke All Rights: Revokes all rights in a module for the user group
Copy: Select to copy the rights from one user group to the selected user group.
Once you're finished with your edits, Save your changes.
Executive View Users have limited available security rights. By default, they'll be limited to the following:
Dashboards
Executive View Users will have the ability to view and drill down dashboard widgets.
Display Balances
Executive View Users will have the ability to view Account Balances, Available Budget Balances, Vendor Balances, and Customer Balances. They will also have all applicable rights for related reports.
If an Executive View User is assigned to a User Group that allows more security rights than the Executive View User default security rights, the Executive View User will only have the default Executive View User rights and not the User Group rights.
Use the Account Level Security tab to set user rights on the account level.
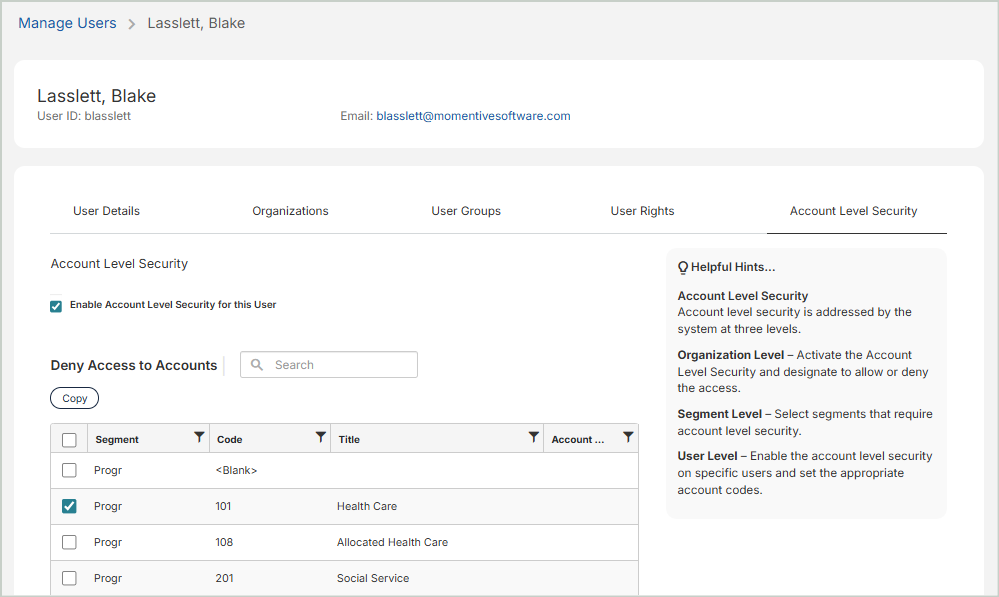
Enable Account Level Security for this User: Select this option to restrict the user’s access to specific accounts. If this option is not selected, the user will have access to all accounts. You can configure account-level security settings in advance, but they won’t take effect until this option is selected.
Copy: Use this option to copy account security settings from another user to the selected user.
Allow / Deny Access to Accounts
Segment: All account segments for the active organization
Code: The account code number
Title: The name or title of the account code
Account Type: Indicates the type of account, such as CSH (Cash) or ARO (Accounts Receivable)
Once you're finished with your edits, Save your changes.