Set Up Multifactor Authentication (MFA)
Multifactor Authentication (MFA) adds an extra layer of security by requiring two verification steps to log in to your account. When you sign in to a Momentive product, you'll be asked to enter a passcode from your authenticator app or email to successfully log in. You only need to set up MFA once. After setup, just open your authenticator app or email during login to get your passcode. See Troubleshooting and FAQs at the bottom of this page.
Multifactor Authentication (MFA) is now required to access the User Portal.
-
If you’ve already set up MFA for a Momentive product, you can continue using the same credentials to sign in to the User Portal.
-
If you haven’t set up MFA yet, you’ll be prompted to complete the MFA setup when signing into the User Portal or any Momentive product.
-
For MIP Modern – After signing in to the User Portal using MFA, you will not need to re-enter an MFA passcode when accessing MIP Modern through the portal.
-
For all other products – After signing in to the User Portal using MFA, you will still need to enter a separate MFA passcode when accessing all other products through the portal.
Follow the steps below to set up MFA:
1. Download an authenticator app on your mobile device
2. Log in to your Momentive Software product
3. Open the MFA setup email & start setup
5. Scan the QR code using your authenticator app
7. Return to the login page of your Momentive Software product
8. Enter your MFA passcode from your authenticator app or email
1. Download an authenticator app on your mobile device
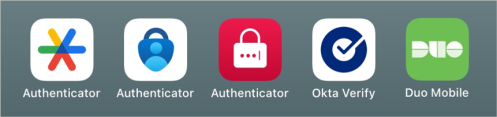
Authenticator apps generate a unique one-time code each time you log in to a Momentive Software product to confirm that it's you signing in. You can choose from a variety of free-to-use authenticator apps.
Download one of these authenticator apps on your mobile device. You can find these in your mobile device's app store (Google Play for Android or App Store for Apple).
-
Google Authenticator
-
Microsoft Authenticator
-
LastPass Authenticator
-
Okta Verify
-
Duo Mobile
Can't use a mobile device?
If you can't use a mobile device, still continue with the setup process below. See step 8 for how to log in to your Momentive product without a mobile device.
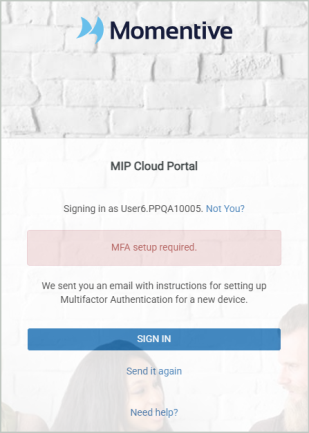
2. Log in to your Momentive Software product
-
Log in to your product as you normally would by entering your username and password.
-
If you haven't set up MFA yet, you'll be prompted to do so.
-
An email will be sent to you with a link to start the MFA setup.
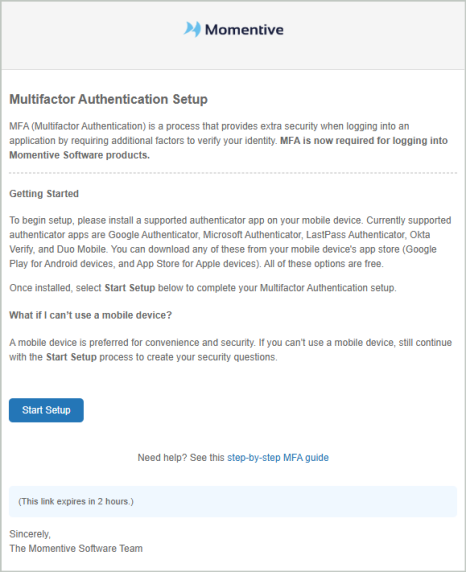
3. Open the MFA setup email & start setup
-
Open the email from your inbox, and select Start Setup to begin the setup process.
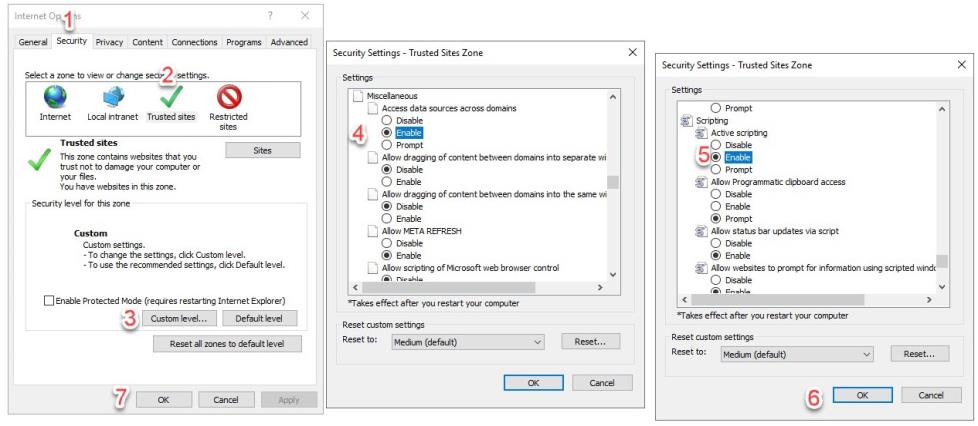
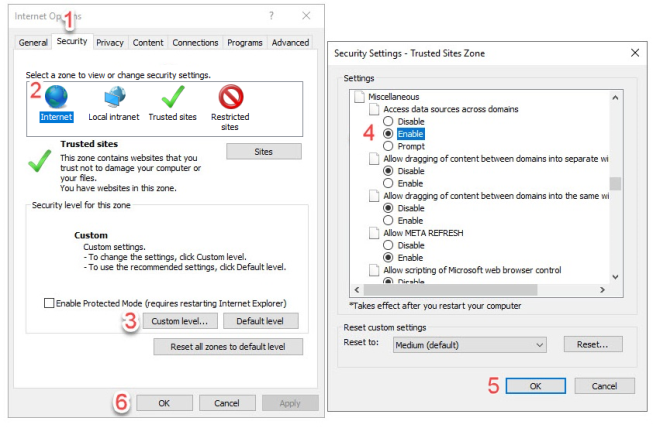
Some Internet Explorer 11 users will not be able to set up MFA unless they make edits in their browser by going to Tools > Internet Options (usually indicated by a gear icon in the top right corner of the browser window).
Note: Make sure to follow both processes below.
From the Internet Options pop-up window, follow the steps outlined below:
-
Open the Security tab.
-
Select Trusted Sites.
-
Select the Custom level... button.
-
Scroll until you see the Miscellaneous category. Under "Access data sources across domains", select the Enable option.
-
Scroll until you see the Scripting category. Under "Active scripting", select the Enable option.
-
After making both selections, select OK. This will close the pop-up window.
-
Select OK again to exit the Internet Options pop-up window.
Now we'll repeat the process, but instead of making changes under the Trusted Sites category, we'll make changes under the Internet category.
From the Internet Options pop-up window, follow the steps outlined below:
-
Open the Security tab.
-
Select Internet.
-
Select the Custom level... button.
-
Scroll until you see the Miscellaneous category. Under "Access data sources across domains", select the Enable option.
-
Select OK. This will close the pop-up window.
-
Select OK again to exit the Internet Options pop-up window.
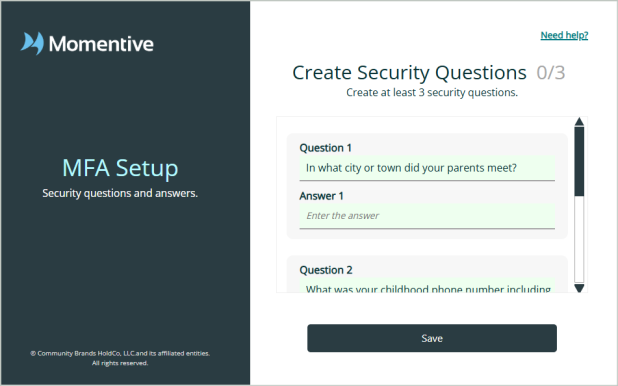
4. Create security questions
You'll be asked to create three security questions. These will be used to verify your identity if you ever get locked out in the future.
-
Answer the provided questions or enter questions of your own.
-
Save to continue.
5. Scan the QR code using your authenticator app
After you've completed your security questions and answers, the next page will display a QR code. If you don't have a mobile device, you can skip this step.
-
Open your authenticator app on your mobile device.
-
Choose to add an account and scan a QR code.
-
Point your device's camera over the QR code to link your account.
You can use this same account to log in to any Momentive Software product that requires Multifactor Authentication.
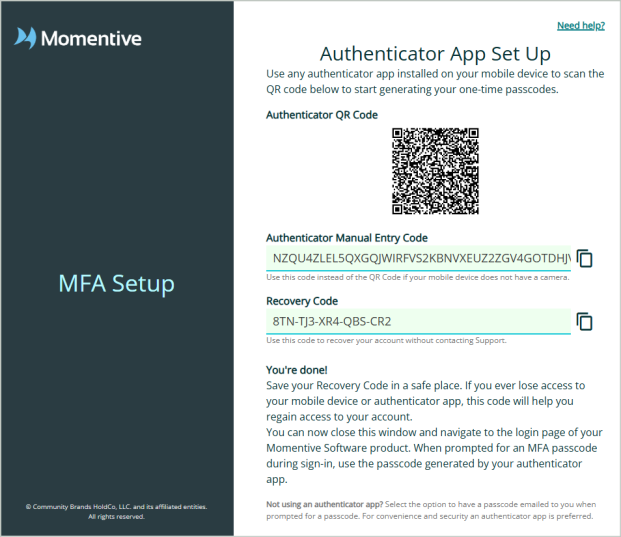
Since the setup key is quite long, you can copy the Authenticator Manual Entry Code and paste it into an email that you can open on your device. Then copy the key from your email and paste it into your authenticator app.
Note: If you're using a remote app launch from your desktop, you'll receive this QR code in an email when you select "Send me a setup email" during login. For remote app users, enter the "Authenticator Manual Code" into your authenticator app.
6. Save your recovery code
Note the Recovery Code provided on this page.
-
Save this recovery code in a safe place. If you ever lose access to your device, this code will help you regain access to your account.
7. Return to the login page of your Momentive Software product
Now that your authenticator app is registered with MFA, you're ready to login to your Momentive product using MFA.
-
Navigate back to the login page.
-
Enter your username and password. You'll then be prompted to enter your MFA passcode.
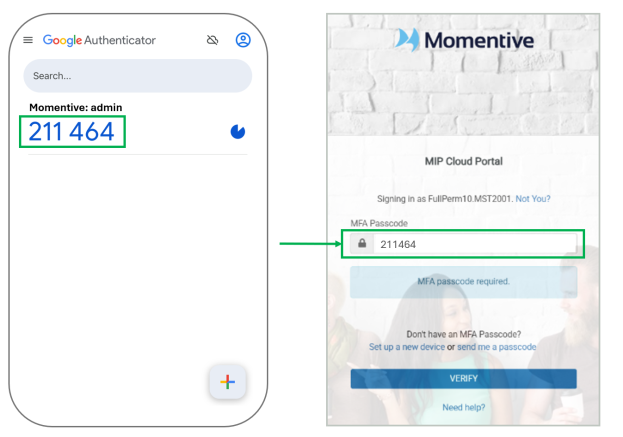
8. Enter your MFA passcode from your authenticator app or email
During login, you'll be prompted to enter your MFA passcode.
If you have a mobile device:
-
Open your app and enter the current code when prompted. A new code will regenerate every 30 seconds, but once you start entering a code you have a few minutes to complete the entry. You’ll be signed in once the code is accepted.
If you don't have a mobile device:
-
Select send me a passcode. An email will be sent to you with a passcode to enter into the login page.

Troubleshooting and FAQs
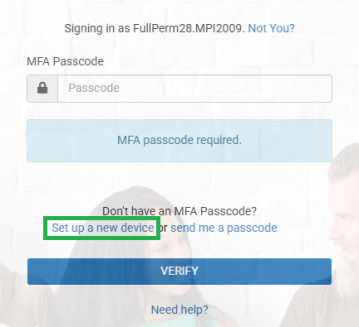
If you no longer have access to the device that was registered for MFA or you want to use a new device, follow these steps:
-
Log in to your Momentive product as you normally would by entering your username and password.
-
Select Set up a new device. An email will be sent to you with a link to start the MFA setup.
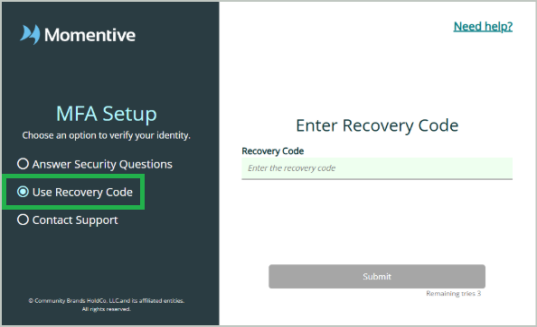
You'll be prompted with three options to verify your identity and register your new device:
Option A - Answer the security questions that you created when you first set up MFA. If you can't remember the answers to your questions, you can enter your recovery code instead (Option B below).

Option B - Enter the Recovery Code that was generated for you when you first set up MFA. If you don't have your recovery code, you can contact support to help you recover your account (Option C below).
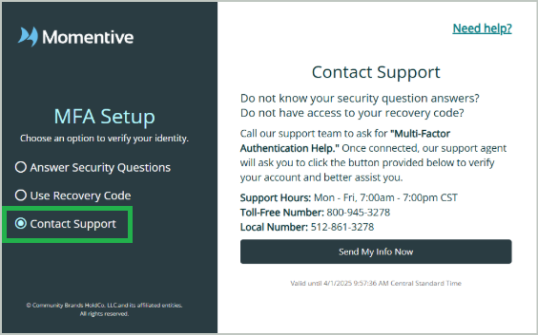
Option C - Contact Support to help you recover your account. The quickest way is through the support chat. You can also call support at the listed number. Once you've contacted a support analyst and a case is created, select Send My Info Now to send a request to the support team. After the request is processed, you'll receive an email once your account is reset.
Yes, you can. Follow these steps:
- Log in to your Momentive product as you normally would by entering your username and password.
- Select send me a passcode. An email will be sent to you with a passcode to enter into the login page.

Yes - the six-digit passcode resets each time you sign in to your Momentive Software product.
The authenticator passcode you enter in the login page must match the six-digit code from your authenticator app. Verify that the code you are entering matches the code from your app.
If you enter an invalid passcode too many times, you'll be temporarily locked out from another login attempt for 3 minutes. If this occurs, wait 3 minutes and try logging in again with the code from your authenticator app.
Follow the steps in this help topic: Change Your Email & Password