Process Allocations
Create new calculations and manage your existing allocation calculations.
Learn how to Add New Calculations.
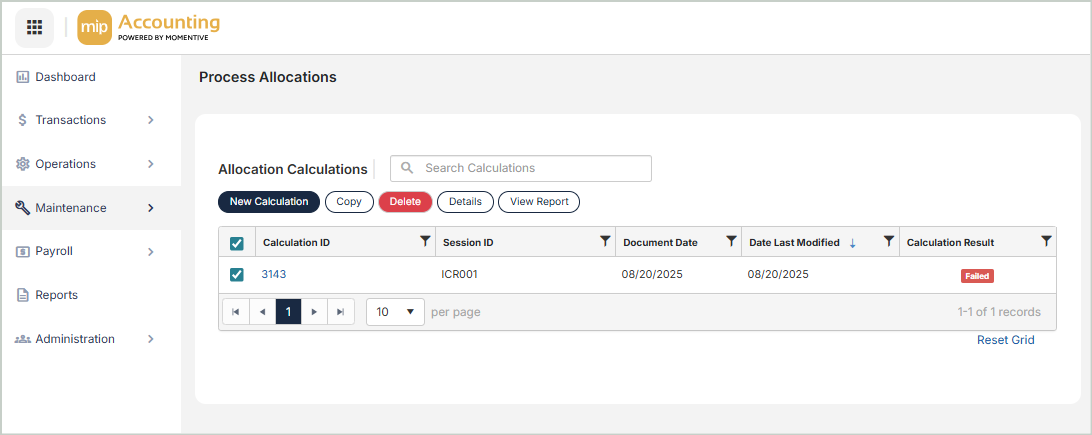
Copy Allocations
You can create an exact duplicate of an existing calculation. Simply select the calculation to copy from and enter a new name to copy to. Once you select Copy, you'll see your new calculation in the grid.

Delete Allocations
Before deleting a record, ensure you’ve selected the correct record you want to remove from the system. Deletion is permanent and cannot be undone.

FAQs
The indirect cost rate cap is applied according to the following rules:
Rule 1:
If the indirect cost limit is calculated to be zero or positive (Debit cap), then the Proposed Allocation is only adjusted if it would cause the recipient accounts to exceed the indirect cost limit in a positive (debit) direction. For example:
| Proposed Allocation | Posted Amounts | Indirect cost limit |
| 500.00 | 1000.00 | 1300.00 |
Using this example, 200.00 remains in the pool.
Rule 2:
If the indirect cost limit is calculated to be less than zero (Credit cap), then the Proposed Allocation is only adjusted if it would cause the recipient accounts to exceed the indirect cost limit in a negative (credit) direction. For example:
| Proposed Allocation | Posted Amounts | Indirect cost limit |
| (500.00) | (1000.00) | (1300.00) |
Using this example, (200.00) remains in the pool.
Rule 3:
If the Proposed Allocation plus the Posted Amounts do not exceed the indirect cost limit (in accordance with Rules 1 and 2), then no adjustment is needed and the Proposed Allocation amount is applied in full. For example:
| Proposed Allocation | Posted Amounts | Indirect cost limit |
| 500.00 | 1000.00 | 1600.00 |
Using this example, the entire Proposed Allocation amount is applied.
Rule 4:
If the Posted Amounts reach or exceed the indirect cost limit before consideration of the Proposed Allocation, then the allocation amounts for the affected recipient lines are set to zero, and an information code of "XCAP" is applied to those lines.
The system continues to allocate for all lines where the indirect cost limit is not reached, or exceeded by the Posted Amounts. For example:
| Proposed Allocation | Posted Amounts | Indirect cost limit |
| 500.00 | 1000.00 | 900.00 |
Using this example, no allocations are made. The entire 500.00 amount remains in the pool.
You can find a calculation report for any past calculations by going to Transactions > Allocations > Process Allocations, selecting a calculation ID, and scrolling down to the Attachments section of the calculation.
Calculation reports are automatically generated and attached to the calculation ID's record - see the "Attachments" drop-down link on this page for an example.
To generate the report at a later date (after you've already run a calculation), go to Transactions > Allocations > Process Allocations, select a calculation ID from the grid, and select View Report.
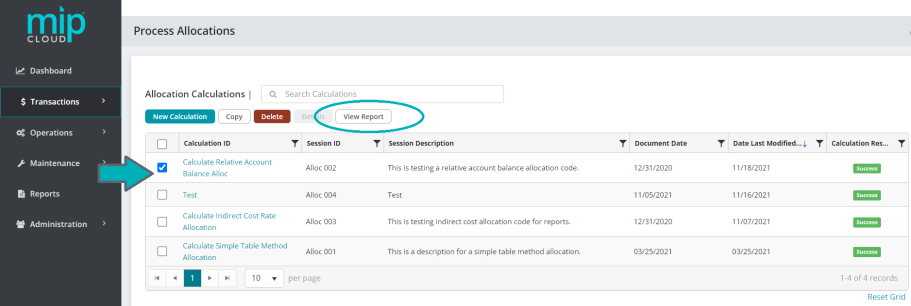
Select a calculation ID, then select View Report.
After selecting View Report, you can choose the format for the report you want to generate. You can select both formats if needed.
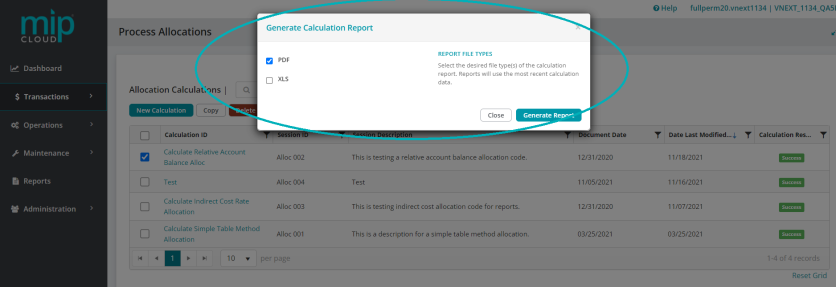
Select PDF, XLS, or both formats for the report generation.
The newly generated report will be automatically attached to the calculation ID as an attachment. Click on the calculation ID and scroll down to "Attachments" to find the report.
The "Amounts" fields refer to the Pool account, and "Balances" refer to the Recipient accounts. For example, if you're working with the Relative Account Balance allocation method, it will use the balance in the Recipient accounts within those dates you indicate, to dictate the percentages to be allocated.
As a result, the "Balances" fields only apply when using certain allocation methods. Employee Headcount, Indirect Cost Rate, Labor Hours, Relative Account Balances, Transaction Count, UDF Unit Measures, and Weighted Average Daily Balance.