New Calculation
MIP will perform the allocation code calculations sequentially in the selected order. If you assign multiple allocation codes to run within the same calculation, MIP will calculate each allocation consecutively, and will treat each prior code as if posted.
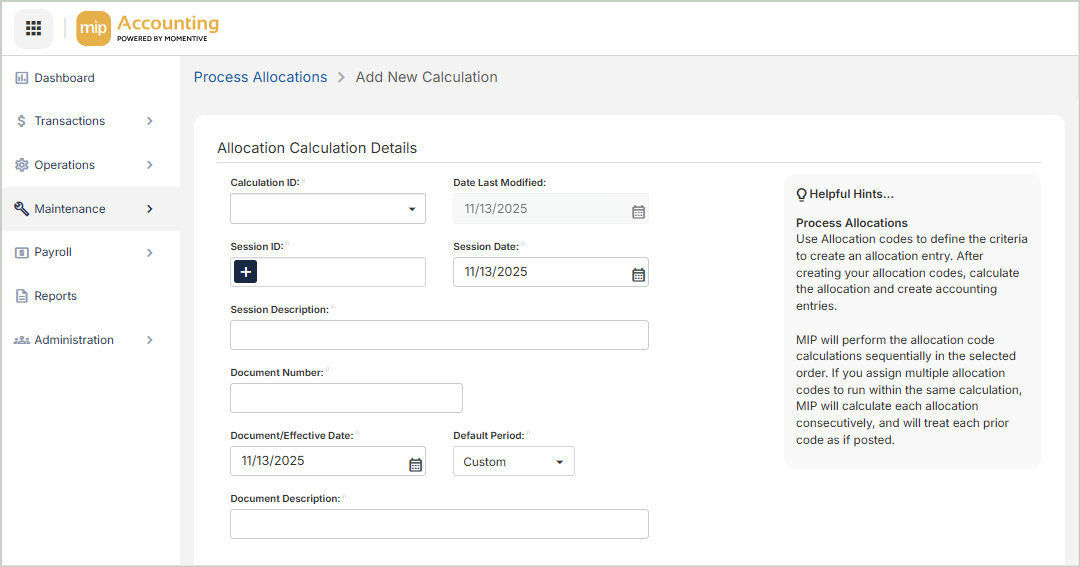
Allocation Calculation Details
Calculation ID: Enter a calculation ID to perform the allocation, or select an existing one from the drop-down list.
Date Last Modified: The date the calculation ID was last saved or calculated. This cannot be changed.
Session ID: Enter an ID for this session, or select an existing one from the drop-down list.
Session Date Enter a session date.
Session Description Enter a description for the session.
Document Number: Enter a beginning document number. This is the first document number used for the allocation entries during calculation.
-
There is one document number for each account code combination to be allocated - therefore, there may be multiple documents within a session.
Document/Effective Date: This is the date that the system posts the JVA to the general ledger. The document date is used as the effective date in the transaction entries.
Default Period: Select a period of Custom, Last Month, Last Quarter, or Last Year.
The periods (other than Custom) are used for recurring calculations. The period is related to the Document/Effective Date.
Document Description: Enter a description for the document - this is a document-level description and will appear on each document's individual line on reports.
Allocation Codes
Use the table to designate the allocation codes and balance dates to use for the calculation.
Order: The order in which the allocation codes will be calculated
-
If you select multiple allocation codes, the system will calculate each allocation consecutively and treats each prior code as if posted to the ledgers.
Selected Codes: Click the drop-down link in this column to select the codes to use for your calculation.
Method: The allocation method of the selected allocation code on the grid
Period (for the Amounts values): Select a period of Custom, Last Month, Last Quarter, or Last Year.
-
The period you select determines the Amounts From and Amounts To dates.
-
The system automatically displays the default period value displayed in the section above.
-
You can change the period used for calculation directly on this grid, without affecting the Default Period. Note that changing the period on this grid will change the period to Custom.
Amounts From: The date from which to start allocating amounts out of the pool accounts of the selected allocation code
-
The pool accounts were determined when the allocation code was first added to the system (see the "Pool" tab section on the Add Allocation Codes help page).
Amounts To: The date from which to stop allocating amounts out of the pool accounts of the selected allocation code
-
The pool accounts were determined when the allocation code was first added to the system (see the "Pool" tab section on the Add Allocation Codes help page).
Basis: Select the basis for the cost pool - Actual or Budget
-
The system uses either the Accounting entries (Actual) or the Budget entries (Budget) to add up the monetary amounts to be allocated, then calculates the allocation percentages.
-
If Budget is chosen as the basis for the calculation, you must have budgeted for all segments that are required to create a complete transaction entry. The budget entries are based on the selected Primary Budget Version by the Administration (see for more information).
Period (for the Balances values): Select a period of Custom, Last Month, Last Quarter, or Last Year.
-
The period you select determines the Balances From and Balances To dates.
-
The system automatically displays the default period value displayed in the section above.
-
You can change the period used for calculation directly on this grid, without affecting the Default Period. Note that changing the period on this grid will change the period to Custom.
Balances From: The date from which to start calculating the allocations
- This column is only available for allocation codes using one of the following allocation methods: Employee Headcount, Indirect Cost Rate, Labor Hours, Relative Account Balances, Transaction Count, UDF Unit Measures, Weighted Average Daily Balance.
Balances To: The date to stop calculating the allocations
- This column is only available for allocation codes using one of the following allocation methods: Employee Headcount, Indirect Cost Rate, Labor Hours, Relative Account Balances, Transaction Count, UDF Unit Measures, Weighted Average Daily Balance.
The "Amounts" fields refer to the Pool account, and "Balances" refer to the Recipient accounts. If you're working with the Relative Account Balance allocation method, it will use the balance in the Recipient accounts within those dates you indicate, to dictate the percentages to be allocated.
As a result, the "Balances" fields only apply when using certain allocation methods. Employee Headcount, Indirect Cost Rate, Labor Hours, Relative Account Balances, Transaction Count, UDF Unit Measures, and Weighted Average Daily Balance.
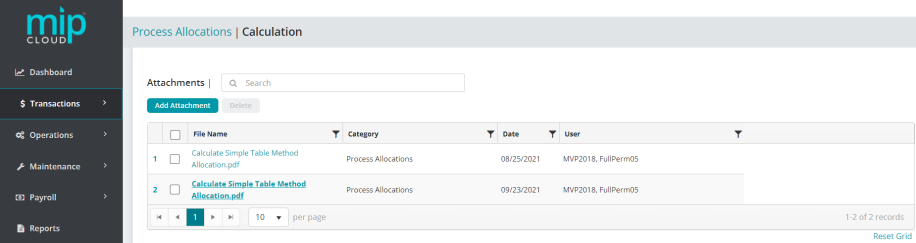
Attachments
You can add attachments to the calculation. These will be saved to the calculation itself.
Save & Calculate
After processing the allocation calculation, a copy of the calculation report will be automatically attached to the calculation ID.
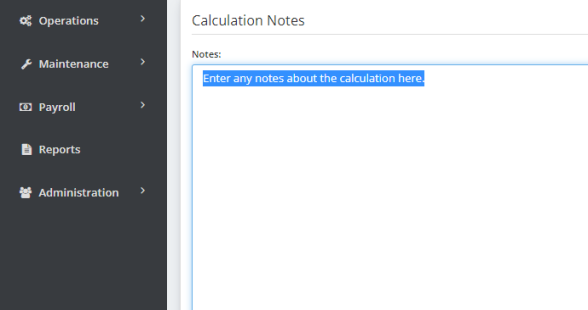
Enter any notes about the calculation here.

You can choose the format to print the report in (.PDF or .XLS). The system generates the report in .PDF format by default.
Choose the format for the calculation report. The system will automatically generate this report and add it as an attachment to this calculation (see the "Attachments" section of this page).
Note: You can also download a different format of this report at a later time if needed.
While this report is generating, you will be free to navigate to other places in MIP and continue to work. The system will work on generating the report in the background and will display a notification when your report is ready to view. You can click the notification to see the report, or come back to it later by going to Transactions > Allocations > Process Allocations and selecting the calculation ID you want to see the report for.
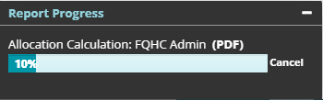
This pop-up notification appears on the bottom left of your screen when an allocation calculation report is being generated. You can continue to work on other pages while this notification is up.
To proceed with the calculation, select Save and Calculate.
To post the calculation session, go to Transactions > Allocations > Edit Allocations, select the session ID from the grid, and select Post.
Note: A calculation report will automatically generate and attach itself to the calculation ID. In the meantime, you are free to navigate to other places in MIP and continue working in the system while the calculation runs.
Consider the following when processing allocations:
-
MIP will perform the allocation code calculations sequentially in the selected order.
-
If you assign multiple allocation codes to run within the same calculation, MIP will calculate each allocation consecutively, and will treat each prior code as if posted.
-
After calculating, the allocation transaction entries are created with a transaction source code of JVA (Journal Vouchers Allocation Management) and a BP (Batch-To Post) status (when there are no validation errors).
FAQs
The indirect cost rate cap is applied according to the following rules:
Rule 1:
If the indirect cost limit is calculated to be zero or positive (Debit cap), then the Proposed Allocation is only adjusted if it would cause the recipient accounts to exceed the indirect cost limit in a positive (debit) direction. For example:
| Proposed Allocation | Posted Amounts | Indirect cost limit |
| 500.00 | 1000.00 | 1300.00 |
Using this example, 200.00 remains in the pool.
Rule 2:
If the indirect cost limit is calculated to be less than zero (Credit cap), then the Proposed Allocation is only adjusted if it would cause the recipient accounts to exceed the indirect cost limit in a negative (credit) direction. For example:
| Proposed Allocation | Posted Amounts | Indirect cost limit |
| (500.00) | (1000.00) | (1300.00) |
Using this example, (200.00) remains in the pool.
Rule 3:
If the Proposed Allocation plus the Posted Amounts do not exceed the indirect cost limit (in accordance with Rules 1 and 2), then no adjustment is needed and the Proposed Allocation amount is applied in full. For example:
| Proposed Allocation | Posted Amounts | Indirect cost limit |
| 500.00 | 1000.00 | 1600.00 |
Using this example, the entire Proposed Allocation amount is applied.
Rule 4:
If the Posted Amounts reach or exceed the indirect cost limit before consideration of the Proposed Allocation, then the allocation amounts for the affected recipient lines are set to zero, and an information code of "XCAP" is applied to those lines.
The system continues to allocate for all lines where the indirect cost limit is not reached, or exceeded by the Posted Amounts. For example:
| Proposed Allocation | Posted Amounts | Indirect cost limit |
| 500.00 | 1000.00 | 900.00 |
Using this example, no allocations are made. The entire 500.00 amount remains in the pool.