Auto Payments
Momentive has partnered with Corpay to power Auto Payments in MIP. This embedded solution allows Corpay to issue vendor payments on your organization’s behalf, helping you automate invoice payments, track payment activity, and offer vendors multiple payment options - including Virtual Mastercard, ACH, and paper check.
If you're interested and would like more information, please contact your Account Manager.
In this topic:
Onboarding & Setup of Auto Payments
Bank Reconciliation for Auto Payments
Onboarding & Setup of Auto Payments
The MIP Services team will guide you through a 10-week implementation to set up Automated Payments for your organization. During this time, your team, MIP, and Corpay will each complete steps to ensure everything is ready before you begin sending payments.
5 Implementation Phases:
-
Client Setup - Meet with the MIP Services team to review the implementation and complete Corpay’s application to set up your organization in their system. You’ll also export your vendor list to begin vendor preparation.
-
Vendor Enrollment Planning - Plan how you’ll transition your vendors to Auto Payments by reviewing Corpay’s outreach process, selecting which vendors to include, and preparing communication to inform them of the upcoming change.
-
Account Configuration - Provide documentation to the MIP Services team to configure the Auto Payments feature in your MIP database, run test transactions with Corpay, and gain access to Corpay’s payment portal. Vendor outreach continues during this phase.
-
Go Live - Process your first live payment using Auto Payments and transition from MIP Services to ongoing support.
-
Vendor Enrollment & Steady Use - Vendors begin enrolling in their preferred payment method with Corpay, and your organization starts regularly processing auto payments.
Make Auto Payments
Once you've completed the onboarding process, you can begin making auto payments in MIP.
1. Create a Pay Invoices Session
2. Select Invoices for Auto Pay
1. Create a Pay Invoices Session
-
Navigate to Transactions > Accounts Payable > Pay Invoices
-
Create a new session.

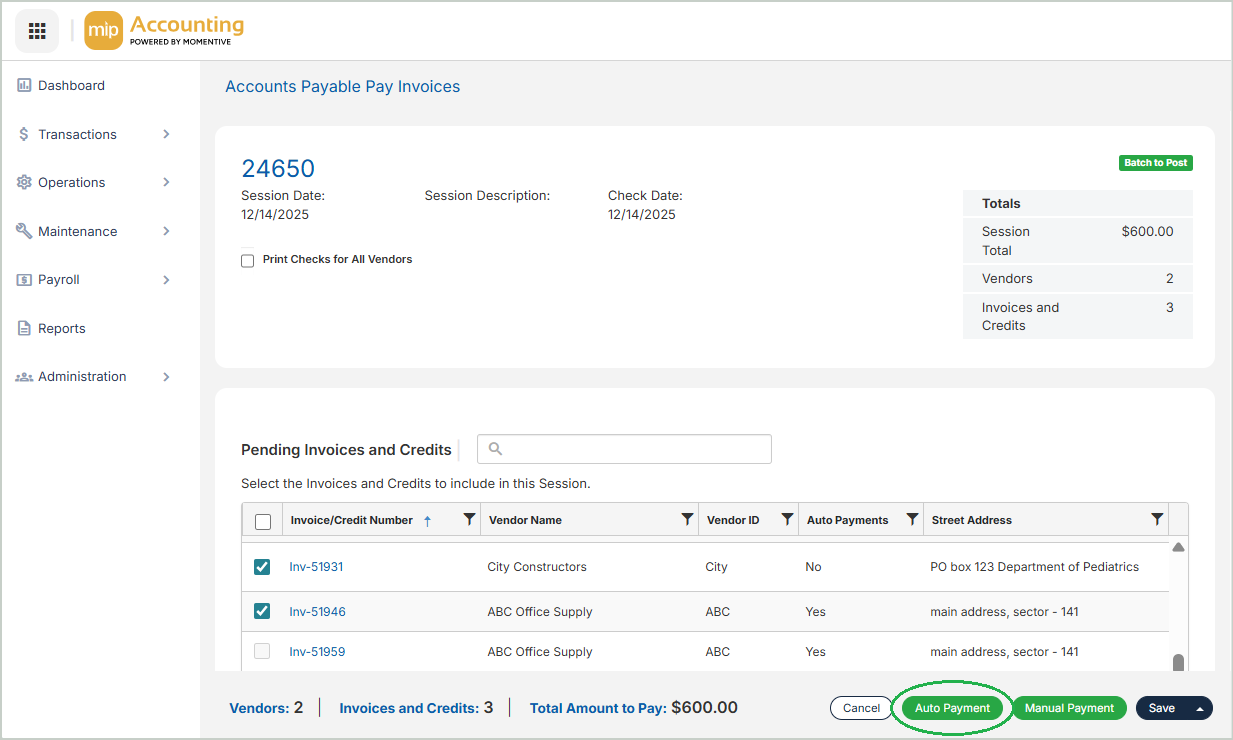
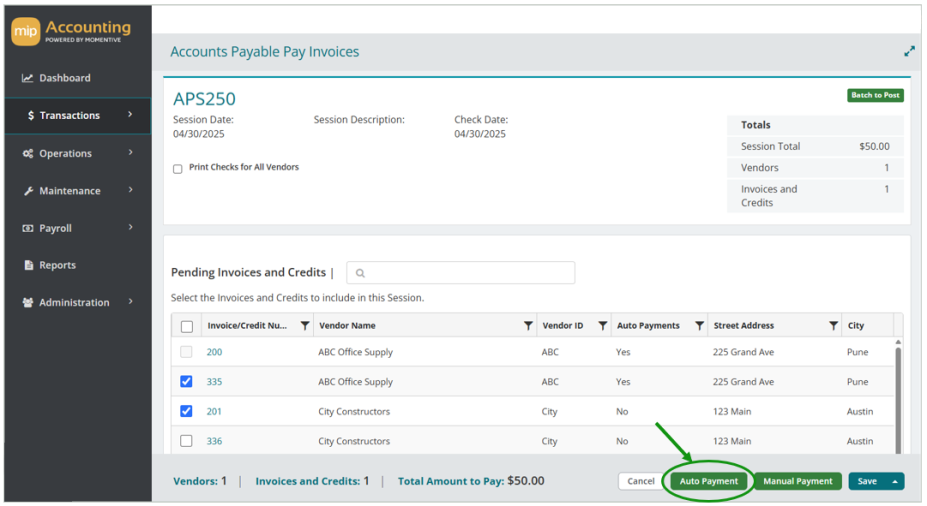
2. Select Invoices for Auto Pay
Choose the invoices you'd like to submit for auto pay, then select Auto Payment.
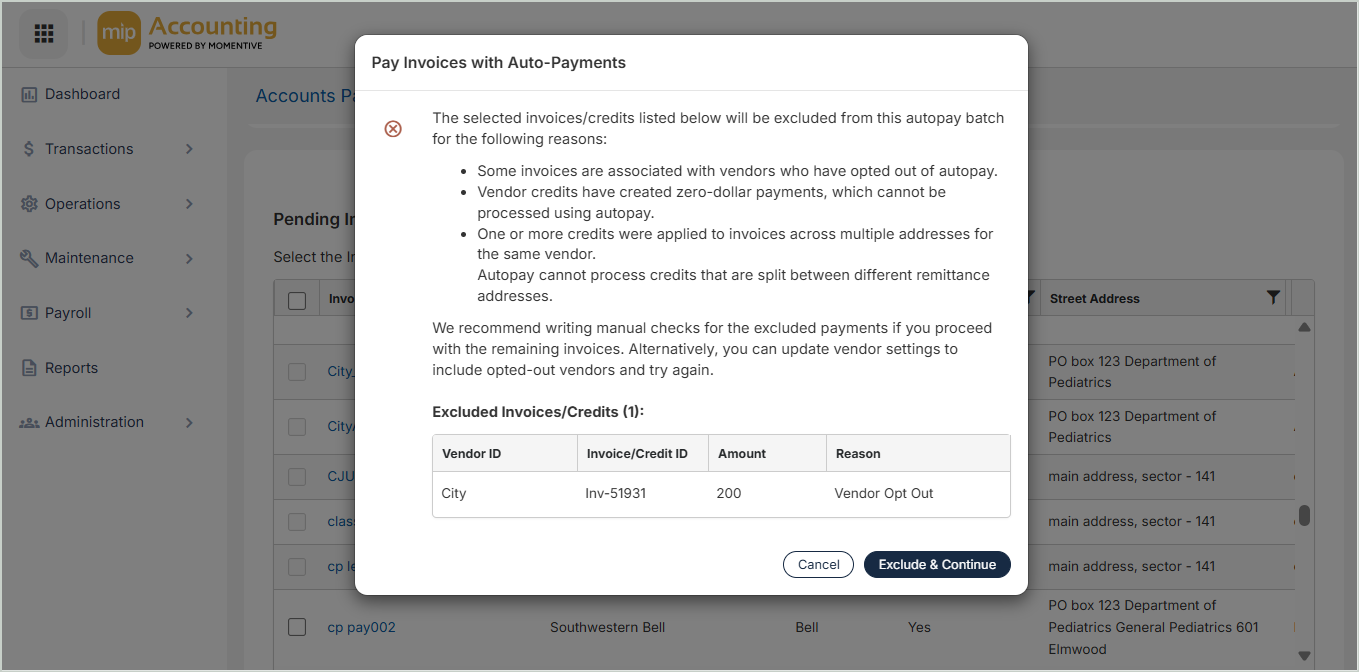
3. Handling Exceptions
You may see validation messages for some of the invoices you selected. These messages explain why certain invoices cannot be processed for auto pay and what actions you can take.
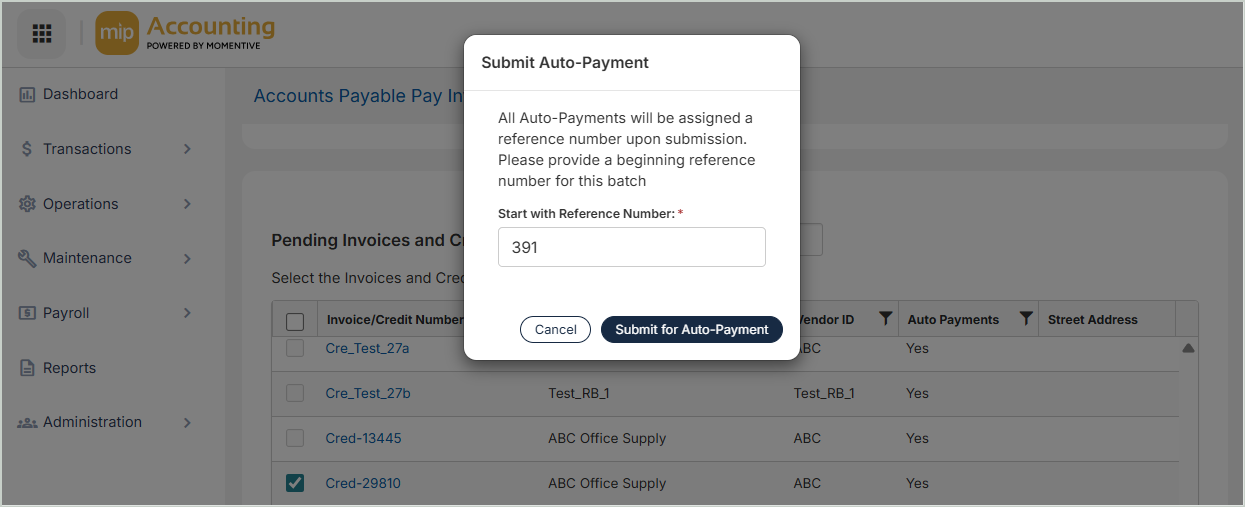
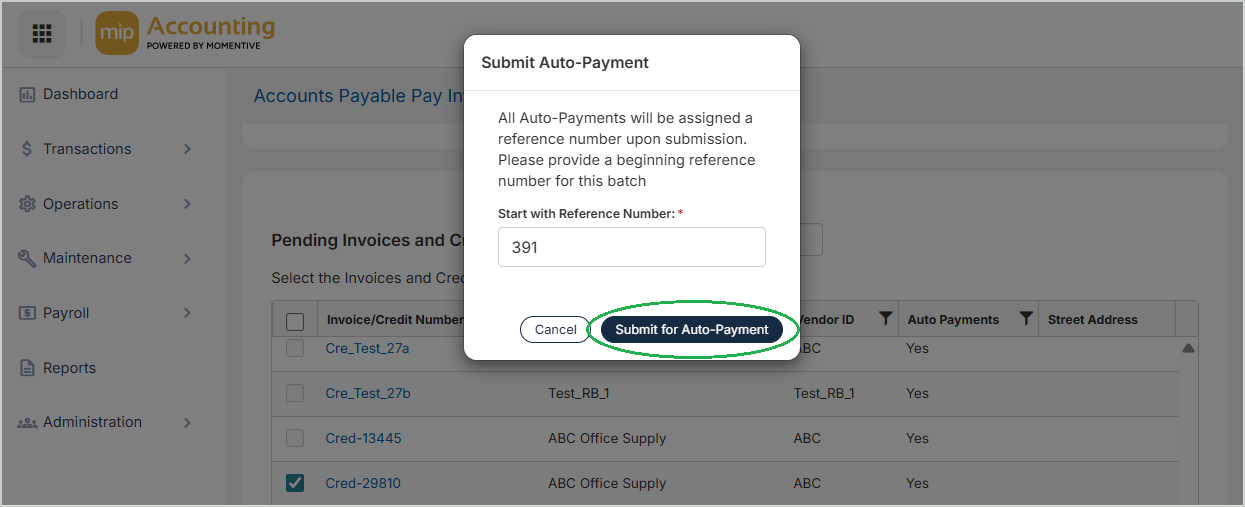
4. Reference Number Assigned
In the final step, your invoices are assigned a Reference Number. This number is used to identify the payment and will appear on the vendor’s remittance or check. If you choose to manually enter or update the reference number, follow these guidelines:
-
Use numeric values only
-
Maximum length: 13 characters
-
No spaces or special characters
Tip: Start the reference number with the current date to make it easier to track payments. (Example: 03042026-100)
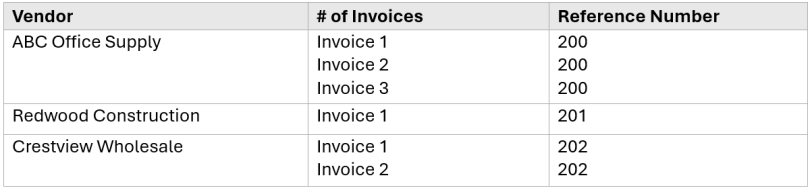
If any vendors have designated to Print Separate Checks for Each Payable on the Vendor Record, each individual invoice for that vendor will receive its own reference number. MIP will auto-increment the reference number for each invoice for that particular vendor.
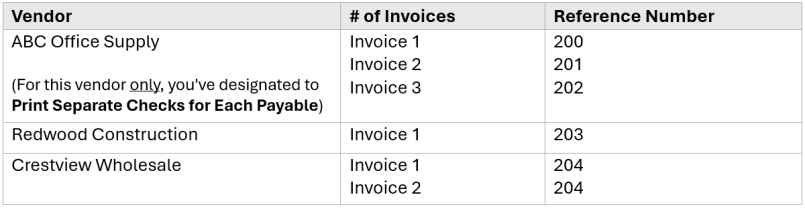
Otherwise, the group of invoices for a vendor will share a single reference number. MIP will auto-increment the reference number for the group of invoices for each vendor.
5. Submit for Auto Payment
Select Submit for Auto-Payment to send the payments to Corpay.
6. Track the Status of Auto Payments
Once you submit your Auto Payments, the data is sent to Corpay who will handle the payment processing. MIP creates an APS (AP System Generated Checks/Voucher) session for each auto payment batch.
Payment Statuses
Submitted - Your payment has been sent to Corpay for review.
In Process - Corpay is reviewing and validating your payment data.
Paid - Auto Payment was successful - Corpay has initiated the payment processing. Payments usually move from Submitted to Paid within minutes if no errors occur. In accordance with Corpay's payment timeline, funds will be drawn from your bank account (typically within 24 hours), and vendors will be paid. As soon as the session has a Paid status, you can post and begin to reconcile.
Error - The payment could not be processed. If a payment has an Error status, contact the MIP Support team and include the payment Session ID in your submission. The support team will work with Corpay to troubleshoot the issue.
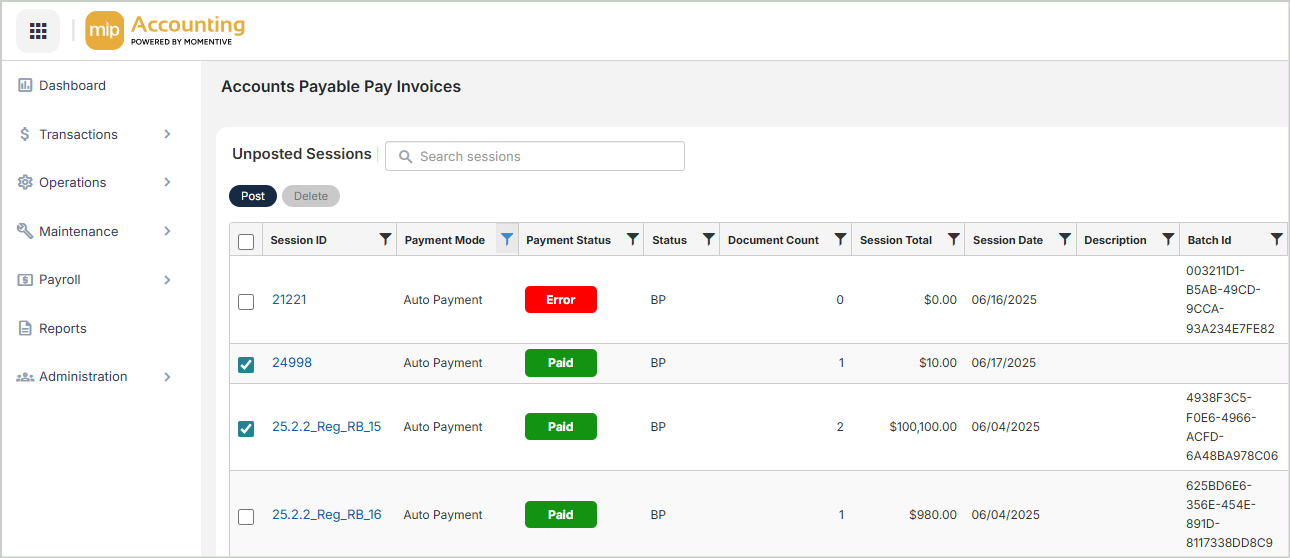
7. Post Auto Payment Sessions
An Automated Payments session can't be posted until the Payment Status = Paid. A Manual Payments session will always have a status of Paid after you've printed the checks, which can be posted at any time.
Once the session is marked as paid, you can post and begin to reconcile.
You have the option to delete unposted Auto Payment sessions under specific conditions. This gives you greater control to remove unused sessions or those with payment issues, helping maintain data accuracy between MIP and Corpay.
Sessions can be deleted if:
-
They are unpaid and have no documents attached.
-
They have an Error status, regardless of how many documents are attached.
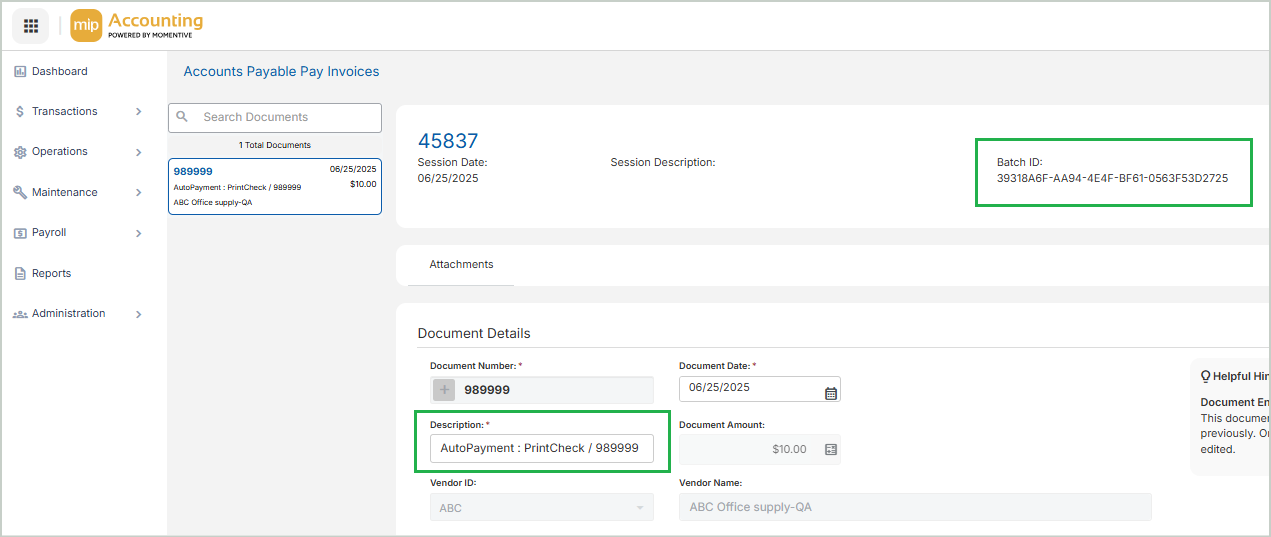
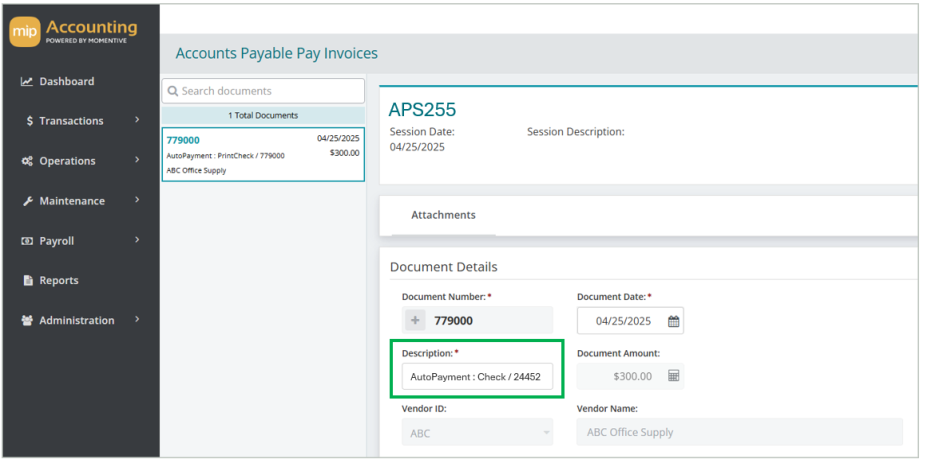
When an Auto Payments session has been paid, you'll find the payment details on the Pay Invoices page.
-
Batch ID
-
Description - "AutoPayment": Payment Method / # Reference Number
-
Example: AutoPayment : Check / 24452
-
Adjusting Payments After Submission
If you need to make adjustments to a payment after submitting it to Corpay, such as voiding a payment and/or processing a refund, please follow the steps below:
1. Identify the payment details of the session
-
Locate the Pay invoices session that contains the payment you want to adjust.
-
If the session is unposted, you can locate the session through Pay Invoice Sessions or Manage Sessions.
-
If the session has been posted, you can locate the session through Manage Sessions.
-
Select the Session ID from the grid.
-
Select the Document Number from the Document List.
-
Take note of the following fields to send to the MIP Support team:
-
Reference Number (in the Description field)
-
Batch ID (in the Unposted Sessions or Manage Sessions grid)
-
Session ID
-
Document Number
-
2. Submit the payment details to the MIP Support team
-
Send the payment details to the MIP Support team that includes the Reference Number, Batch ID, Session ID, and Document Number of the payment you want to adjust.
-
The MIP support team will take steps with Corpay to process the payment adjustment.
-
You'll receive a confirmation email from Corpay once the payment is adjusted (or refunded back to your bank account, if applicable).
3. Receive confirmation email + any refund owed from Corpay
Once you receive the confirmation email from Corpay that the payment has been adjusted and/or refunded, you can void the payment in MIP.
4. Post the Pay Invoices session (if still unposted)
A voided payments session can't be created until the Pay Invoices session has been posted. To post the session:
-
Navigate to Transactions > Accounts Payable > Pay Invoices
-
Select the Session ID from the Unposted Sessions grid.
-
Post the session.

5. Void the payment
Once your Pay Invoices session is posted, you can void the payment.
-
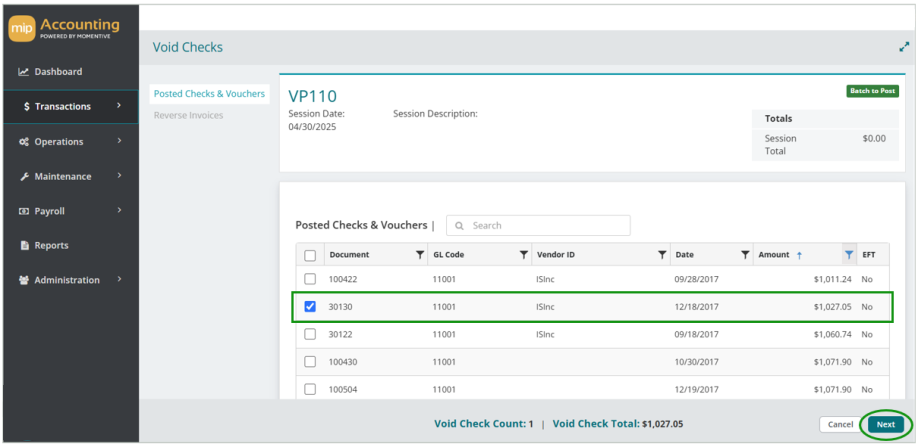
Navigate to Transactions > General Ledger > Void Checks
-
Create a new session.
-
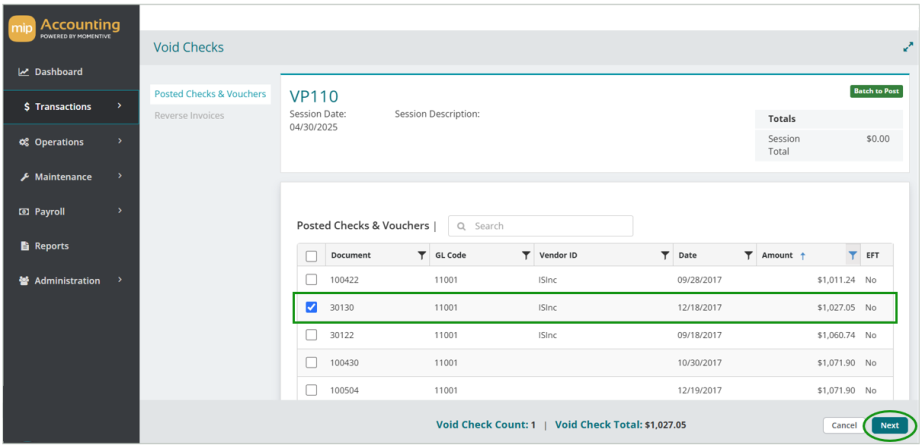
Select the payment to void from the grid. You can filter or search by:
-
Session ID
-
Vendor ID
-
Document Number
-
-
Select Next.
-
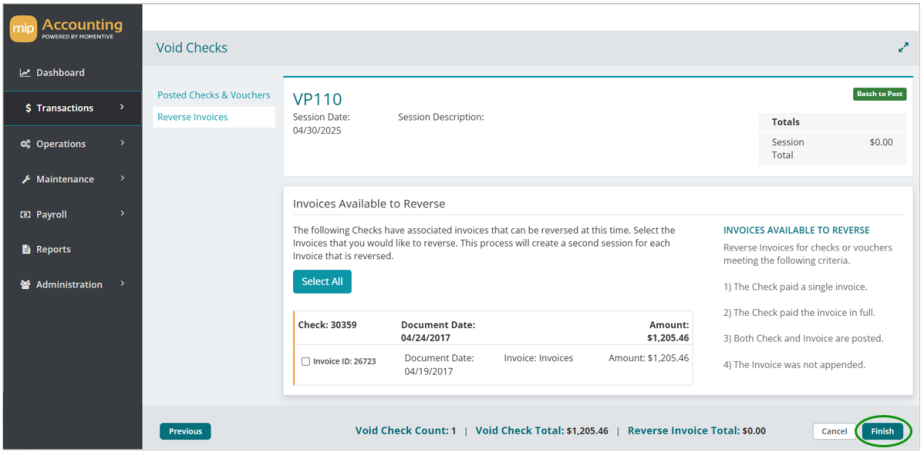
Do not reverse the invoice unless there’s an issue with it. If you need to make a correction, see Auto Payments.
-
Select Finish. This will create a new Void Checks session.
-
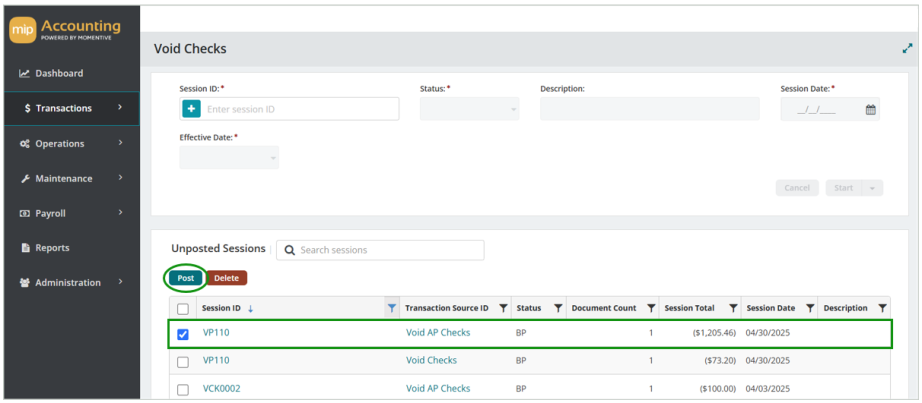
Select the Void Checks session from the Unposted Sessions grid.
-
Post the session.
6. Submit the invoice for Auto Payment
Your invoice is now available to re-process via auto payment. If you need to re-submit the payment, you’ll have to create a new Pay Invoices session.
-
Navigate to Transactions > Accounts Payable > Pay Invoices
-
Create a new session.
-
Select the invoice you'd like to re-submit for auto pay, then select Auto Payment.
If there’s an issue with the invoice (i.e. wrong amount, wrong check address) and you need to make a correction, you have two options:
Option 1: Void the payment & reverse the invoice, then create a new invoice with the corrections.
Option 2: Void the payment, then post appending entries to correct the original invoice. (This is not the recommended option. This method should only be used if you have to process the correction using the original invoice number).
Option 1: Void the payment & reverse the invoice, then create a new invoice with the corrections.
-
Navigate to Transactions > General Ledger > Void Checks
-
Create a new session.
-
Select the payment to void from the grid. You can filter or search by:
-
Session ID
-
Vendor ID
-
Document Number
-
-
Select Next.
-
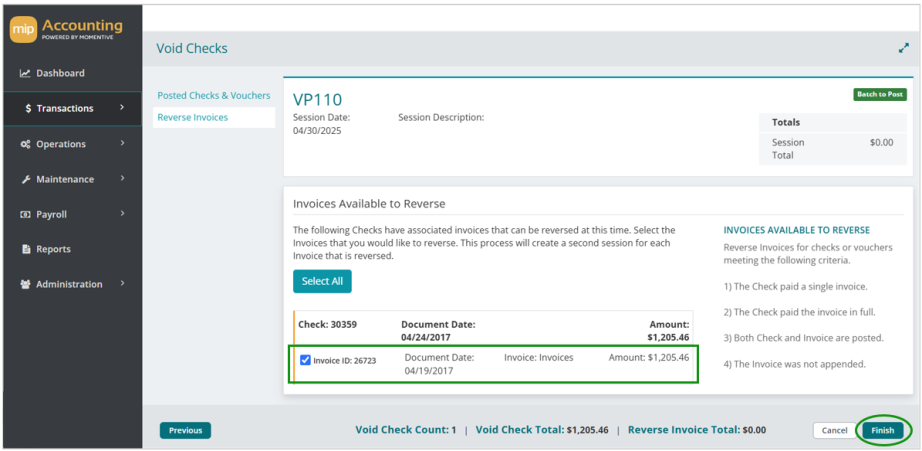
Select the checkbox next to the invoice to create a reversal (If there’s a restriction that doesn’t allow you to reverse the invoice, follow Option 2).
-
Select Finish.
-
The system will create two new sessions: A Void Checks session and a Reversal session. You should post both sessions before creating a new invoice.
-
To post the Void Checks session, navigate to Transactions > General Ledger > Void Checks. Select the session from the Unposted sessions grid, then Post.
-
To post the Reversal session, navigate to Transactions > Accounts Payable > Invoices. Select the session from the Unposted sessions grid, then Post.
-

-
Now that both sessions are posted, you can create your new invoice.
-
Navigate to Transactions > Accounts Payable > Invoices
-
Create a new session.
-
Enter the information for the new invoice, then Save.
-

-
You can now submit the invoice for auto payment.
-
Navigate to Transactions > Accounts Payable > Pay Invoices
-
Create a new session.
-
Select the invoice you'd like to submit for auto pay, then select Auto Payment.
-
Option 2: Void the payment, then post appending entries to correct the original invoice.
(This is not the recommended option. This method should only be used if you have to process the correction using the original invoice number).
-
Navigate to Transactions > General Ledger > Void Checks
-
Create a new session.
-
Select the payment to void from the grid. You can filter or search by:
-
Session ID
-
Vendor ID
-
Document Number
-
-
Select Next.

-
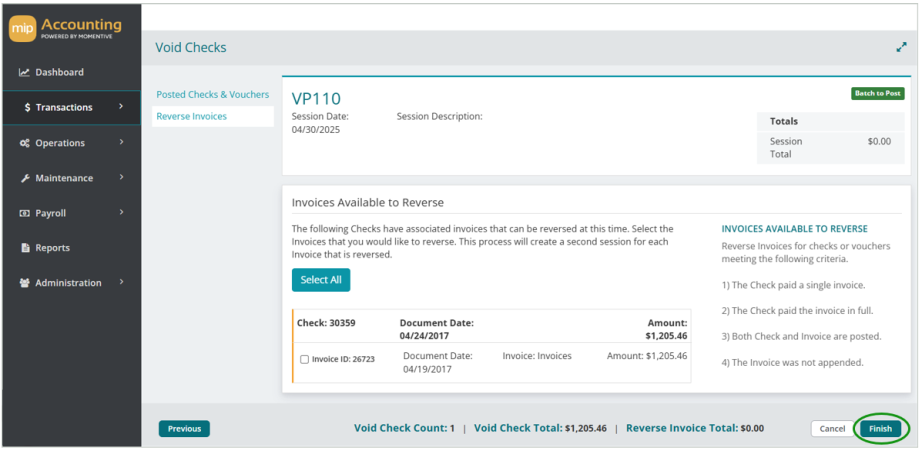
Do not reverse the invoice (leave the box unchecked).
-
Select Finish. This will create a new Void Checks session.
-
Select the Void Checks session from the Unposted Sessions grid.
-
Post the session.
-
Now you can make corrections to the original invoice.
-
Navigate to Transactions > Accounts Payable > Invoices
-
Create a new session.
-
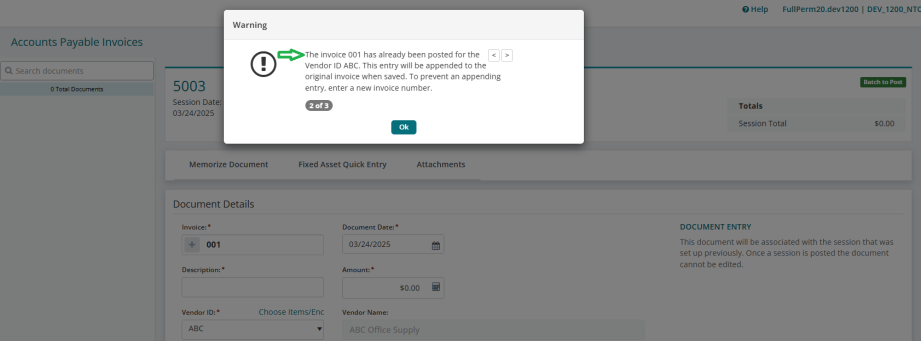
In the Document Details, enter the original Invoice number and select the Vendor ID.
-

-
You’ll receive a message that the invoice you entered has already been posted for the vendor. Review this message to verify that you’ve selected the original invoice number that you want to correct.
-
Make your corrections (i.e. negative or positive amounts, edit check address, etc.)
-
Save the document.
-
Post the session from the Unposted Sessions grid.
-
You can now submit the invoice for auto payment.
-
Navigate to Transactions > Accounts Payable > Pay Invoices
-
Create a new session.
-
Select the invoice you'd like to submit for auto pay, then select Auto Payment.
-
Client & Vendor Support
If you’re a client or vendor who needs assistance or has a question, see below for common issues and the appropriate team to contact. When emailing Corpay, please start a new email thread for each request to ensure your inquiry is resolved in a timely manner.
| Common Issues | Who to Contact | Contact |
|---|---|---|
| Clients needing help with MIP workflows, system navigation, or troubleshooting within MIP | MIP Support | www.mip.com/support |
| Vendors needing help with ACH enrollment | Corpay Vendor Support | vendors@corpay.com |
| Vendors needing help processing payments or updating remittance email information | Corpay Payment Support | paymentsupport@corpay.com |