Vendor Record
View & update details for a vendor, including contact information, payment terms, and accounting codes.
Select a tab below to learn more about the details in each section.
- Vendor Details
- Addresses
- Payments and Discounts
- 1099 Information
- Accounting Codes
- Attachments
- Notes
- User Defined Fields
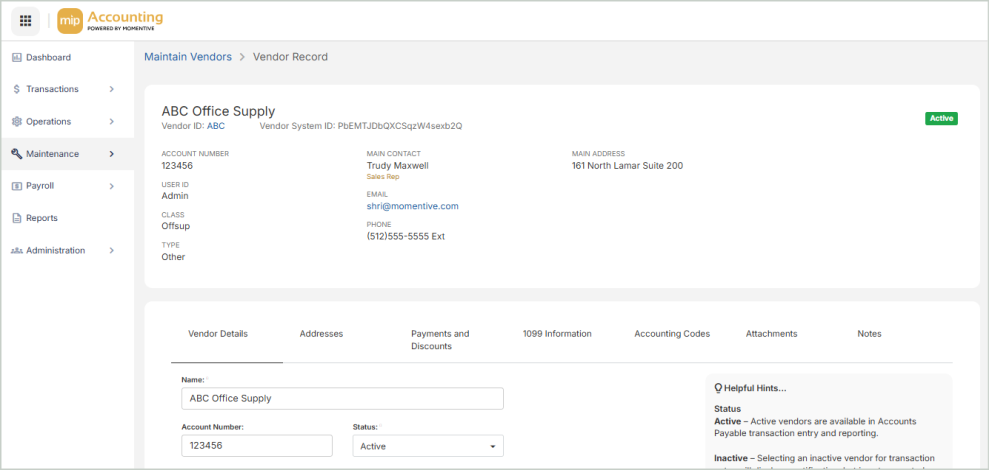
Use the Vendor Details tab to update vendor information.

Name: The full name of the vendor
Account Number: The account number assigned to the organization by the vendor. This number will print on AP system generated checks.
Status: The current status of the vendor (Active, Inactive, or Discontinued)
Type: The type of vendor
Class: The class of the vendor
User ID: The vendor's User ID. User IDs are set up by an administrator through Administration > Users > Manage Users.
Issue 1099: Select this option if the vendor is 1099-eligible, otherwise leave it blank.
Use the Addresses tab to view or update vendor addresses. You can use the grid to select an existing address to load into the form, or select Add Address to add an alternate address for the vendor.
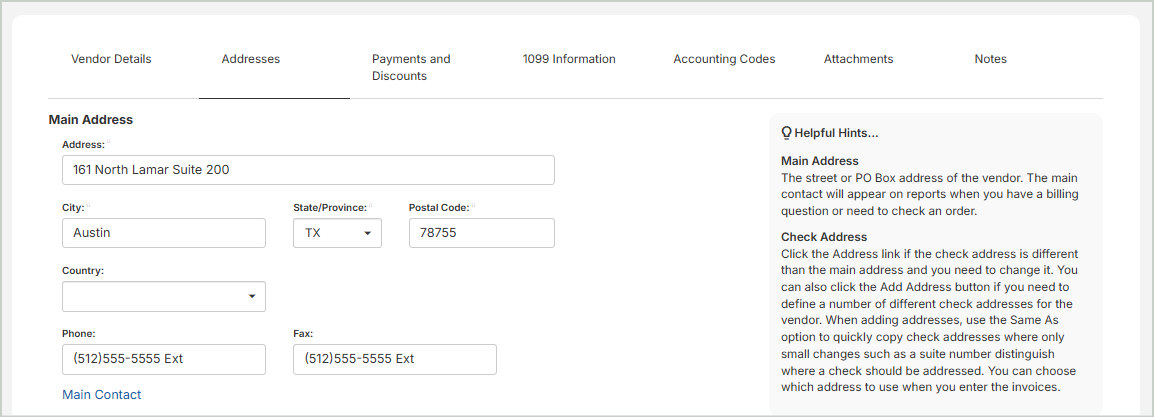
Main Address
View or update the address and contact information for the vendor.
Address: The vendor's street address
City: The vendor's city
State/Province: The vendor's state or province
Postal Code: The vendor's zip or postal code
Country: The vendor's country
Phone: The vendor's phone number
Fax: The vendor's fax number
Designation: The designation of the contact person associated with the vendor address
First Name: The first name of the contact person associated with the vendor
Middle Initial: The middle initial of the contact person associated with the vendor
Last Name: The last name of the contact person associated with the vendor
Position: The position of the contact person associated with the vendor
Email Address: The email address of the contact person associated with the vendor
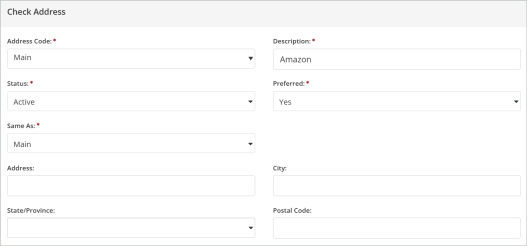
Check Address
Most of the columns in the Check Address grid correspond to fields described above. The exceptions are as follows:
Address Code: A short label that uniquely identifies the particular address for the vendor. Select a code to edit an existing address.
Description: A string describing the role of the address for the vendor
Contact: The title, first name, middle initial, and last name of the contact associated with the address
Status: The current status of the address (Active, Inactive, or Discontinued)
Add Check Address
Select Add Address to add a new check address. Once you Save, your new address will be available in the Check Address grid.
Once you're finished with your edits, Save your changes.
Use the Payments and Discounts tab to specify information about the payment and terms for the vendor. You can specify a Hold Payments status for this vendor, have the system Print Separate Checks for Each Payable, indicate a Check Stub Comment for checks written to this vendor, and record the appropriate Discount Rates.
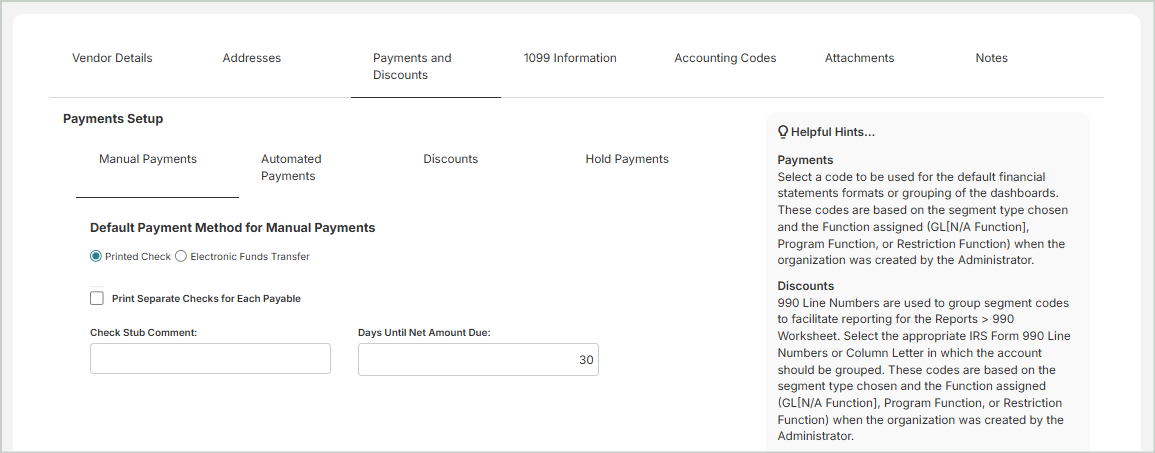
Payments Details
Hold Payments: Select this option to hold payments to this vendor. When a vendor is on hold, the system will not generate checks for them. You can still create and link invoices, but checks - including system-generated ones - will not be printed. If you attempt to enter a manual AP check for a vendor on hold, a warning message will appear, but you can choose to proceed. Note that invoices can still be created and linked to the vendor but checks will not be printed.
Print Separate Checks for Each Payable: Select this option to create separate checks for each invoice in a payment batch.
Note: If this option is not selected and invoices are tied to multiple addresses, the system batches payments by check address and prints one invoice per check address.
Note: For EFT payments - If you clear this option, no Addenda record will be created (as it supports only one invoice), but the system will still validate for multiple check addresses at the time of invoice payment. An Addenda record is always created when paying a single invoice unless the "Disable Addenda" option is selected by the Administrator (Organization Settings > Module Setup > Bank Information)
Check Stub Comment: Enter any information you want to appear on the check stub comment portion of the check. For example, you may want to enter the customer number this vendor has assigned to your organization. If you want the account number (from the Vendor Details tab) to display when printing checks, enter %ACCT% in this box. The system will then print the appropriate account number for you.
Days Until Net Amount Due: After specifying the discount percents and the days available, enter the number of days until invoices are due to this vendor. For example, if the vendor's payment terms are Net 30, enter 30 in this box. When entering an invoice, the system uses this number and the invoice date to calculate the due date for the invoice. This calculated date appears as the default due date for the invoice. If you do not enter a response, the system assumes the number of days is 30. If you leave this field blank, the system assumes that invoices are due immediately.
Electronic Payments
Enable Electronic Payments: Select this option to enable electronic payments.
Routing Number: The bank routing number
Bank Account Number: The vendor's bank account number
Account Type: The account type for the vendor
Prenote: Enable to create a pre-note check for the account
Email Address: The vendor's email address
Disable Payment Notification Email: Select this option to disable payment notification emails sent to the vendor.
Personal Account: Select this option to indicate that this is a personal bank account to be used for the vendor's electronic payments.
Electronic Payments Details: Select to display the Electronic Funds Transfer Details.
Discounts
First Discount, Days Available, Second Discount, Days Available: Enter the vendor's discount percentage followed by the number of days that the discount is available. Two discount intervals can be set up, such as a 2 percent discount if paid within 10 days, and a 1 percent discount if paid within 20 days. The system determines if discounts apply when checks are selected for payment.
When entering percentages in the system, use a whole number. For fractional percentages, you must enter a decimal point. For example, for 2 1/2 percent, enter 2.5 to indicate the percentage 02.5000 %. The discount can include up to four decimal places.
Once you're finished with your edits, Save your changes.
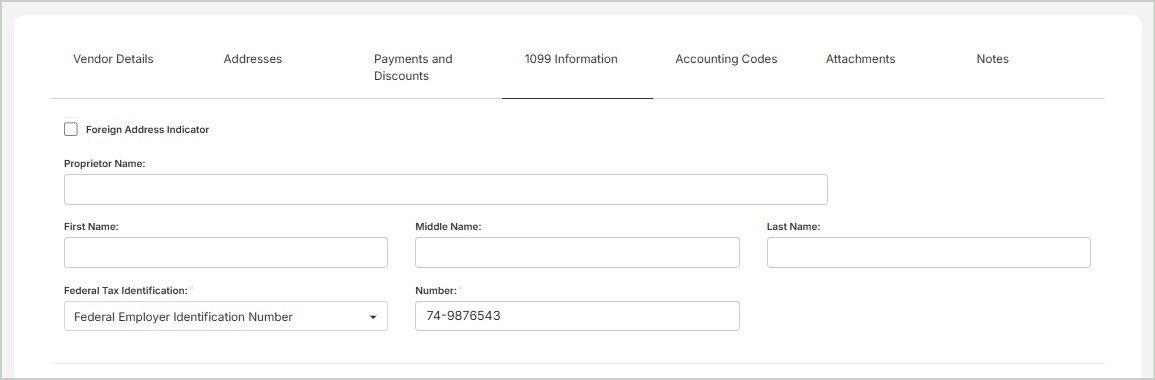
The 1099 Information tab is only visible if you checked the Issue 1099 box in the Vendor Details section because you plan to issue a 1099 for this vendor. Use this tab to enter vendor 1099 information, including Federal Tax Identification numbers, 1099 Form Setup, and 1099 Adjustments. If you enter a 1099 Default Form Type and Default Box Number for this vendor, they display on each line you enter during transaction entry.
Record manual adjustments to a vendor's 1099 amounts using the 1099 Adjustments table. Any amounts you enter here will be added to amounts accumulated from transactions you enter and post. For example, this would be helpful if you implement your system at a date other then the beginning of the calendar year. In this case, some vendors probably already have 1099 amounts accumulated prior to implementation. Use the 1099 Adjustments table to enter those initial amounts from your other system. In order to delete a 1099 adjustment, select the row by clicking in the left-most column, and then press the Delete key on your keyboard.
Note: 1099 Adjustments are not available for W2G, however, 1099 W2G transactions are tracked on a per-document basis. Adjustments to W2G are facilitated through the transaction entry process.
1099 Information
Foreign Address Indicator: Select this option if you're using a foreign address. This option is used for electronic filing.
Proprietor Name: Enter the individual's name that prints on the first line of the Recipients Name box on the 1099 form. This field is only needed when it's different than the Vendor Name. For businesses that are operated by individual taxpayers, enter the name of the sole proprietor.
First Name: Enter the vendor's first name.
Middle Name: Enter the vendor's middle initial.
Last Name: Enter the vendor's last name.
Federal Tax Identification: Select a federal tax ID:
-
F: Vendor's Federal Employer's Identification Number
-
S: Individual Social Security Number
-
A: Vendors who have applied for a Tax ID Applied For number but have not yet received it
-
X: Vendors outside of the United States Foreign Tax ID Number
Note: In order to view the entire SSN field, you must have been granted Display Sensitive Data rights for vendors in the active organization. Otherwise, only the last four digits of the Social Security Number display.
Number: Indicate the type of tax ID number this vendor uses. Then, enter the tax identification number (usually either a social security number or a federal employer identification number).
Organization State Withholding
Override State Withholding: Select this option if the 1099 withholding State and State Tax ID information is different and needs to be changed for every vendor in this organization. This will replace the default information for every vendor in your organization. This is your organization's state and tax id number, which is needed if you intend to withhold state and local taxes on 1099 distributions for this vendor.
State: Select the state. This will replace the default state for every vendor in your organization.
State Tax ID: Enter the state tax identification number. This will replace the default state tax ID for every vendor in your organization.
1099 Form Setup
The form type and box number you enter here appears as the default form type and box number during transaction entry; however, you can change the default form type and box number for individual transaction line items.
Default Form Type: Select a default 1099 form type, such as MISC, NEC, DIV, INT, R, or W2G.
Default Box Number: Enter or select the box number for the selected Default Form Type where you want the vendor's 1099 amount to print.
Name Control
- Enter the first four characters of the selected vendor name as it should appear in positions 7-10 of the B record in the electronic file. We recommend that you print the Vendor Information List Report <1099-MISC - Validate Name Control Entries > to verify specific name control entries against Rev. Proc. 2006-33.
- For surnames less than four characters, enter only those characters. Surname prefixes are considered, such as VANE for Van Elm.
For businesses (excluding sole proprietorships), enter the first four significant characters of the business name. If the name starts with "The," disregard it, unless there are only two words in the name.
Note: Do not enter special characters or spaces. A dash (-) and an ampersand (&) are the only acceptable special characters.
1099 Adjustments
Enter any manual adjustments to be added to 1099 transaction line items. This can be used for entering 1099 startup amounts if the system is implemented at any time other than the first of the calendar year.
Note: 1099 Adjustments are not available for W2G, however, 1099 W2G transactions are tracked on a per-document basis. Adjustments to W2G are facilitated through the transaction entry process.
Year: Enter a valid year.
Type: Select a 1099 form type. This populates the Box list with the matching form type box numbers.
Box: Select a 1099 form type box number.
Amount: Enter the amount.
Once you're finished with your edits, Save your changes.
Use the Accounting Codes tab to set the default accounting codes for transactions. The system applies these codes to entries involving this vendor.
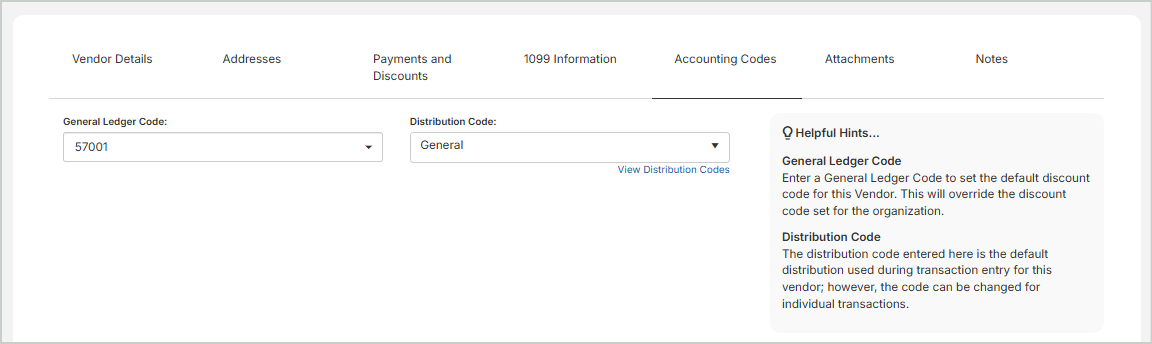
General Ledger Code: Enter or select an existing GL account code. This becomes the default for transactions involving this vendor, overriding the organization’s discount code.
Distribution Code: Enter or select an existing distribution code. This serves as the default during transaction entry but can be changed for individual transactions.
-
You can View Distribution Codes to review and select your organization's available codes.
Once you're finished with your edits, Save your changes.
Use the Attachments tab to quickly attach related documentation to a vendor record.
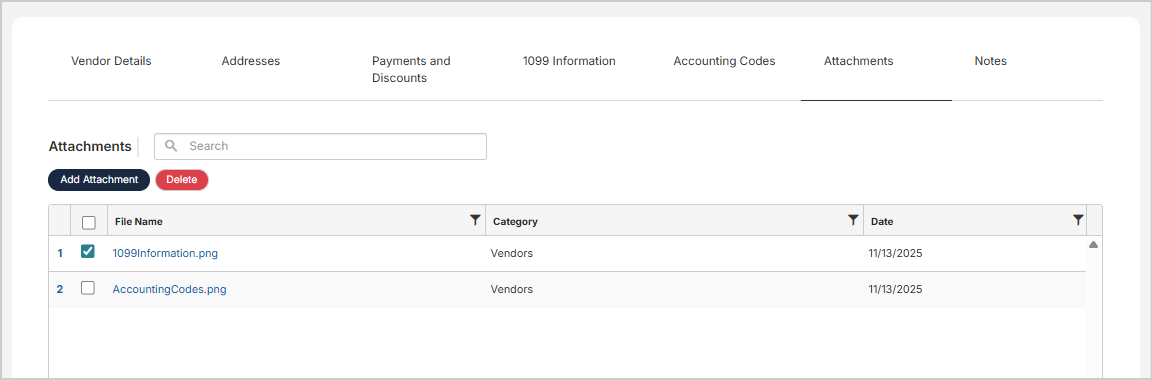
Steps:
-
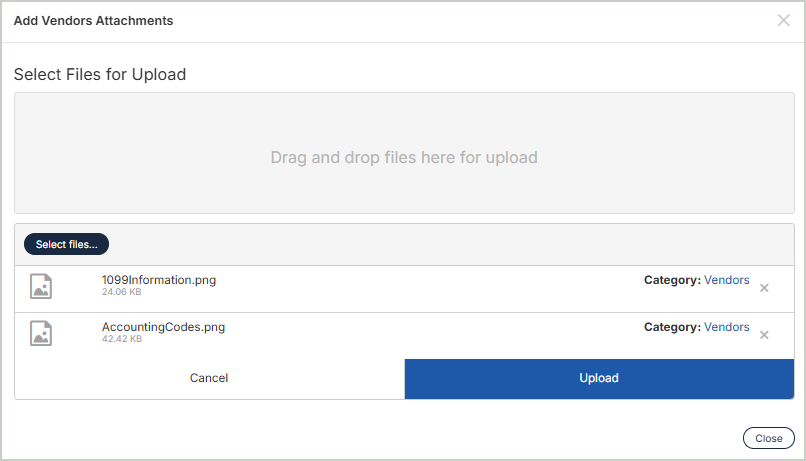
Select Add Attachment.
-
You can either drag and drop files to upload or Select files... from your file explorer.
-
Select Upload after you add the attachment.
-
You'll receive a message that the File(s) upload successfully.
-
Close the window. The document that you attached will display in your list of attachments.
Once you're finished with your edits, Save your changes.
Use the Notes tab to add any specific notes or reminders about the vendor. This is a free-form area where you can type longer entries. Press Enter to start a new line.
Once you're finished with your edits, Save your changes.
The User Defined Fields tab is only visible if your organization has defined custom fields for vendors in MIP Cloud. Created by an administrator, user defined fields (UDF) have specific characteristics such as field type, character length, and default values specific to the field. All fields that display in this section are specific to your organization.