Pay Invoice Sessions
After creating and posting invoices against existing vendor accounts, you'll need to issue payment to clear the balance from your accounts payable ledger. You can start a session to make Manual Payments (printing checks) or Auto Payments.
In this topic:
Create a New Session - Start a session to select the invoices for payment
Unposted Sessions - Use the grid to view, edit, or post sessions with paid invoices

Create a New Session
To create a new session, complete the fields at the top of the page.
Session ID: Enter a value for the Session ID that represents the invoices you want to pay, or select the + button to generate one automatically. The Session ID links each transaction to its session, allowing you to track the origin of any entry.
Status: Select the session status:
-
BP (Batch to Post) - Runs accounting validations against the session transactions.
-
BS (Batch to Suspend) - Suspends validations and keeps the session as a work-in-progress. Sessions with this status can't be posted until the status is changed to BP.
Description: Enter a description for this batch of payments.
Session Date: Enter a valid session date. The system defaults to today's date.
Check Date: Enter a date to appear on the checks.
Start: Select to proceed to the invoice selection.
Unposted Sessions
The Unposted Sessions grid displays all sessions that haven't been posted. After you've submitted your invoices for payment or printed your checks, you'll find the sessions in this grid.
-
Post - To post a session, select it from the grid, then select Post. You can only post sessions that have a status of BP.
-
Delete - You can only delete Manual Payment sessions. If you submitted the invoices through Auto Payments, you cannot delete the session. To delete a session, select it from the grid, then select Delete. This action cannot be undone.
Once a session is posted, you can find it on the Manage Sessions page.
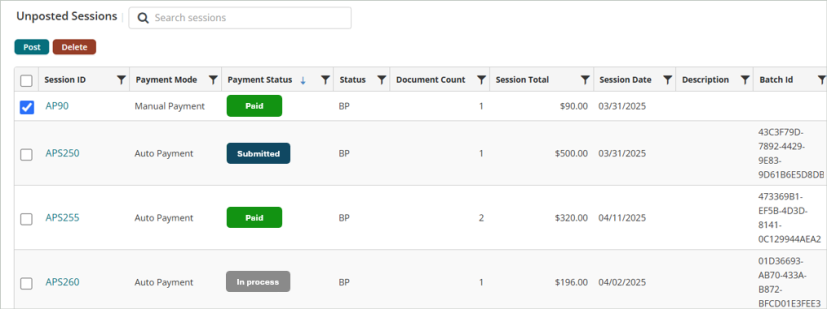
The Unposted Sessions grid includes the following columns:
Session ID: The ID of the session. Select a session ID to view the document details.
Payment Mode: Either Manual Payment or Auto Payment
Payment Status:
-
For Manual Payments = Paid. Manual Payment sessions will always have a status of Paid after you've printed the checks.
-
For Auto Payments = Submitted > In Process > Paid (or Error)
-
Paid status – the payment will be paid within minutes after submission (as long as the file does not error out).
-
Error status – there are a few scenarios that could cause a payment to error out. If the payment has an error status, contact the MIP Support team and include the payment Session ID. The support team will take steps with Corpay to troubleshoot the error.
-
Status: The status of the session (BP or BS)
Document Count: The number of documents in the session
Session Total: The total dollar amount of invoices in the session
Session Date: The date of the session
Description: The description of the session
Batch Id: A value received from Corpay to identify the batch of invoices (only applies to the Auto Payments feature)
Payment issued on: The date the checks were printed or the invoices were paid