Email Set Up on IIS
Simple Mail Transfer Protocol (SMTP) is the network protocol used to send email across the internet. Millennium will use SMTP to send Advisory email notifications to users who set up Assignments and choose to be notified by email once the conditions of an assignment have been met.
SMTP is a Windows Feature. The process to install SMTP varies slightly depending on the version of Windows Server. You can install the SMTP server as part of the web server installation. If you do not install SMTP as part of the web server installation, you must return to the Server Manager and add SMTP as an IIS feature before you can send email from Millennium.
Consult with your IT department and make sure they are aware of the following SMTP requirements for Millennium:
- To work with Millennium, SMTP must be installed to the default location: \inetpub\mailroot.
There are several sudirectories also installed at this location.
Important! Millennium users must have write access to this directory and its subdirectories for emails to be sent from the application.
- SMTP must be running, and the frequency for delivery must be set to Immediate.
Note: You must be an administrator on the server to complete the tasks described in the following sections.
SMTP for Windows Server
Use the tasks in this section to install and configure the SMTP Server on Windows Server.
Set Up the SMTP Server
To Install SMTP on the Windows Server where Millennium is installed, use the following steps:
- Log in to the Windows server where Millennium is installed. You must be an administrator on this server to perform this task.
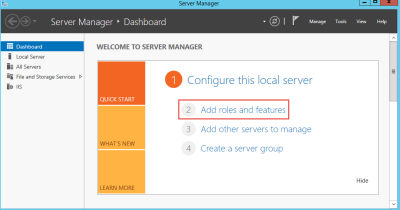
- In the task bar, click the Server Manager icon
 . The Server Manager dashboard opens.
 - Click Add roles and features. The Add roles and features wizard opens.
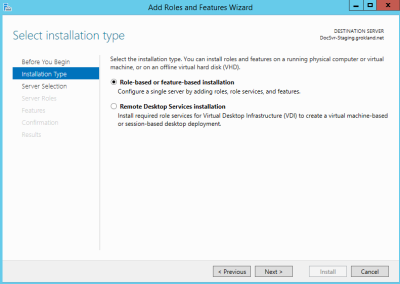
- If the Before you begin panel appears, click Next to proceed to the Select installation type panel.
- Select Role-based or feature-based installation and click Next. The Select destination server panel opens.
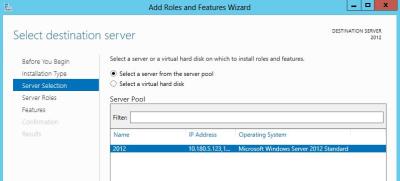
- In the Select destination server panel, select the server on which SMTP will be installed and click Next. The Select server roles panel opens.
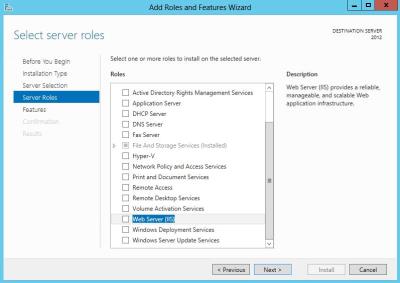
- If you have already installed IIS on this server, proceed to Step 8. Otherwise, use the following steps to install the web server:
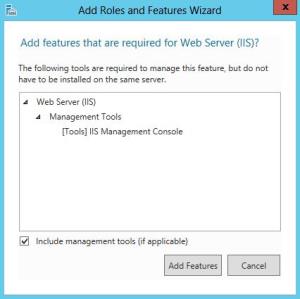
- Select the Web Server (IIS) role. The system prompts you to add the features required for the web server.
- Make sure the Include management tools check box is selected and click Add Features to return to the wizard.
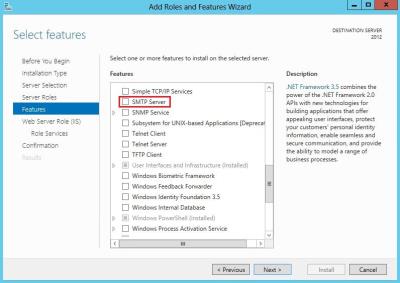
- Click Next to open the Select features panel. Use the following steps to add the SMTP Server
- Scroll the list to find and select SMTP Server.
- The system prompts you to add the features required for the SMTP server.
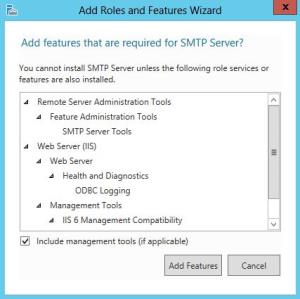
- Make sure the Include management tools check box is selected and click Add Features to return to the wizard.
- Click Next to proceed to the Select role service panel.
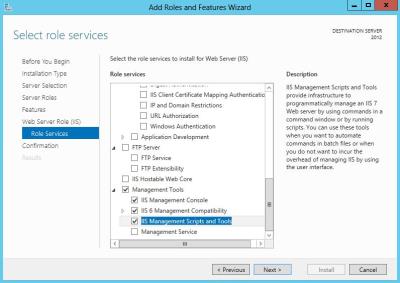
- Scroll to Management Tools and select the following items:
- IIS Management Console
- IIS 6 Management Compatibility
- IIS Management Scripts and Tools
- Click Next to open the Confirmation panel. The panel allows you to verify your choices.
- Click Install to begin installing the selected roles and features.
Note: This installation might require you to restart the Windows server.
Configure the SMTP Server
After you install SMTP, use the following steps to configure the SMTP Server for use with Millennium:
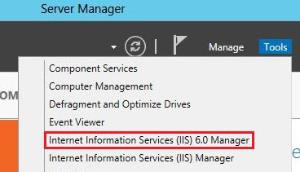
- From the Server Manager, click Tools>Internet Information Services (IIS) 6.0 Manager to open the IIS 6 Manager.
- In the IIS Manager, expand the server name, right-click on SMTP Server, and select Properties.
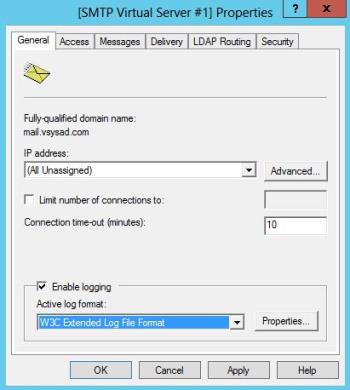
- In the General tab, accept the default settings, unless you want the SMTP Server to use a specific IP address. Accepting the default sets the IP address to All Unassigned.
- Select the Access tab.
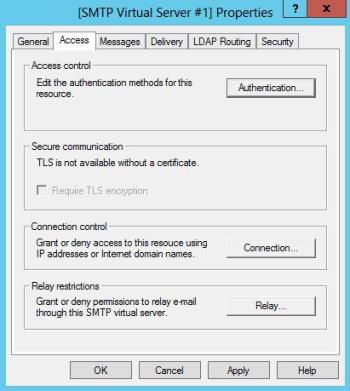
- Configure access settings as follows:
- Click Authentication to verify that Anonymous access is enabled and click OK.
- Click Connection, select the Only the list below option and click Add.
- Enter 127.0.0.1 as the IP address, and click OK.
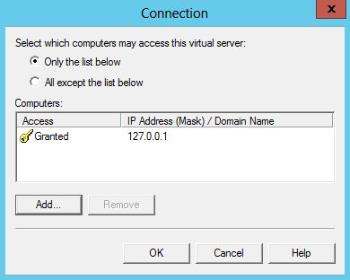
- Click OK again to return to the Access tab.
- Click Relay, select the Only the list below option and click Add.
- Enter 127.0.0.1 as the IP address and click OK.
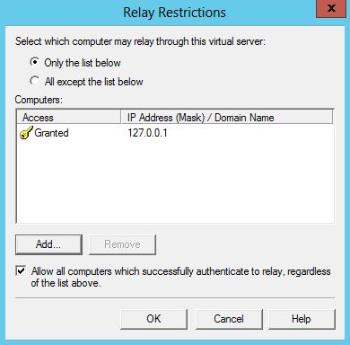
- Click OK again to return to the Properties window.
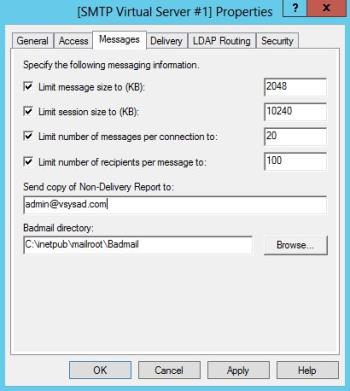
- Select the Messages tab and enter a valid email address at your organization for the Non-Delivery Report. Optionally, you can also set the Badmail directory on this tab.
- Select the Delivery tab.
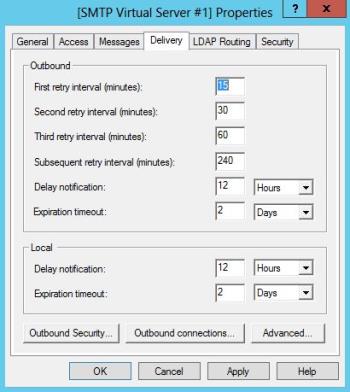
- Configure delivery settings as follows:
- Click Outbound Security to verify that Anonymous access is selected. Because the Connection and Relay settings limit access to localhost, no other Outbound Security configuration is required.

- Click OK to return to the Delivery tab.
- Click Advanced.
- Enter the fully-qualified domain name of the SMTP server. This is the host name or a record that has been created in your DNS zone file.
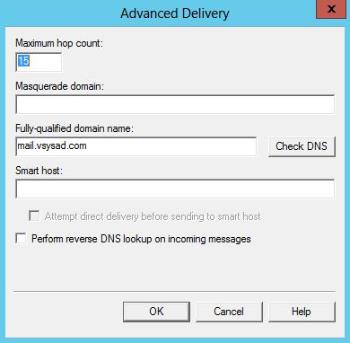
Important! Confirm this entry with the party that manages DNS for your domain. The correct DNS resolution is crucial to successful email delivery. If your SMTP server cannot resolve the domains where it is trying to send messages, the email process fails.
- Click on the Check DNS button to confirm that the domain name resolves successfully. If the domain name resolves, the system displays the following confirmation message.
- Set the SMTP Service to Automatic so that the service starts when the server starts. Use the following steps:
- Open the Powershell console.
- Run the following command:
PS C:\Users\Admin> set-service smtpsvc -StartupType Automatic
- Run the following command to confirm that the SMTP service is running:
PS C:\Users\Admin> get-service smtpsvc
- If the SMTP Service is not running, the command returns a status of Stopped. If the service is stopped, use the following command to start it:
PS C:\Users\Admin> start-service smtpsvc
PTR Records for Reverse DNS Lookups
In addition to the correct host name, make sure that you configure a PTR record for reverse DNS lookups. The PTR record allows your SMTP Server’s public IP address to resolve to your hostname.
If you do not have a PTR record, email delivery can be delayed, or messages from your host might be blocked, and your host blacklisted.
For more information on testing DNS configuration, see Testing SMTP Server using SMTPDIAG tool.
Testing the SMTP Server
After Millennium is installed and the SMTP Server is enabled, use the following steps to test that the email process is working properly:
- At the Web Server (IIS), verify that the SMTP Service is started.
- .
- Double-click Services.
- In the Services list, locate Simple Main Transfer Protocol (SMTP).The status should be set to Started.
- Verify that the service is working.
- Create a text file with the following information (first change From and To in this sample to reflect your organization and test recipient email addresses)

- Drop the text file in the \inetpub\mailroot\pickup directory.
- If the text is not delivered to the test recipient, then SMTP is not working. Contact the IT Department at your organization for further assistance.
- Create a text file with the following information (first change From and To in this sample to reflect your organization and test recipient email addresses)
Online Constituent Directory
On the IIS machine, the inetpub\mailroot\pickup directory will hold the text file that is generated when a constituent requests his or her log on information. This text file is used as the body of the email that will be sent to all constituents who request that their log on information be sent. Millennium users must have write access to the and its subdirectories for this feature to work.