How Do I Export Reports to XLS and Save Them to my Local Machine?
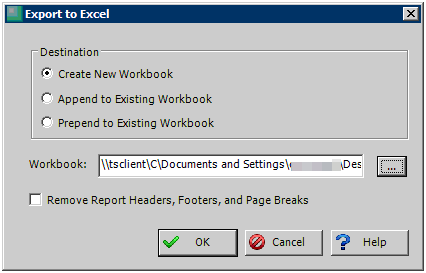
- Click the Export to XLS button and you will be prompted with the following option
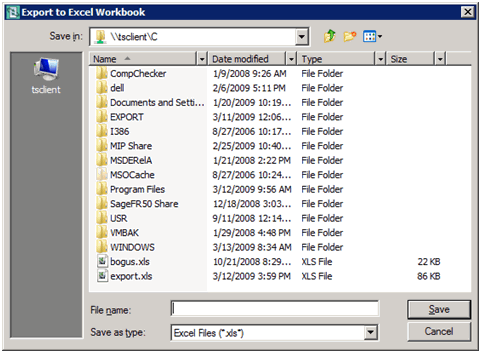
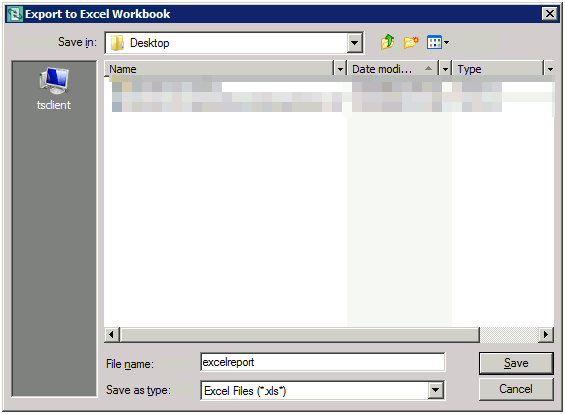
- Click the browse button to the right of the Workbook box to be prompted with a save location window. Note the path listed in the ‘Save in’ field. It is listed as \\tsclient\c. This is the C:\ drive on your local computer. The default path to save XLS reports from within MIP Accounting can differ depending on how the organization was originally implemented. If no preference was chosen, the default value is \\tsclient\c.
- In our example, the exported report will be saved to the local desktop. Using the Export to XLS Workbook window, browse to the desktop folder on your local machine.
- When the desired location has been reached, type the name you would like the file to be and click the ‘Open’ button.
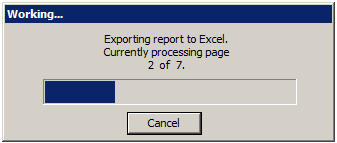
- Click the ‘OK’ button and you will be presented with a progress bar:
-
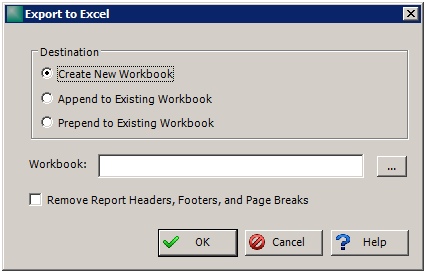
Select the appropriate option.
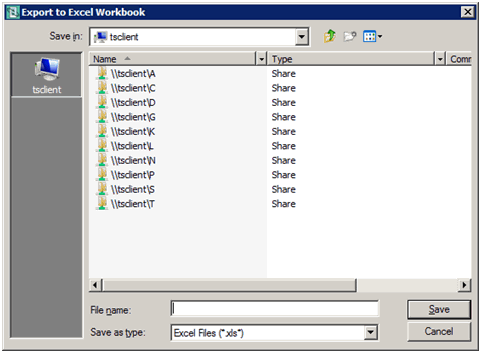
Clicking the ‘tsclient’ button in the upper left hand corner of the window will list all the drives on your local computer.
This process may take several minutes depending on the speed of your internet connection combined with the overall size of the report.
When completed, the XLS file will be saved to the location originally selected. In this example, it would be the local desktop.
Once you save to your desktop, it should default here every time you save this type of file.