Add / Edit Customer Statements
Print or email a summary of customer activity for a specific time period. Customers can use this statement to verify account activity or remind them of outstanding balances.
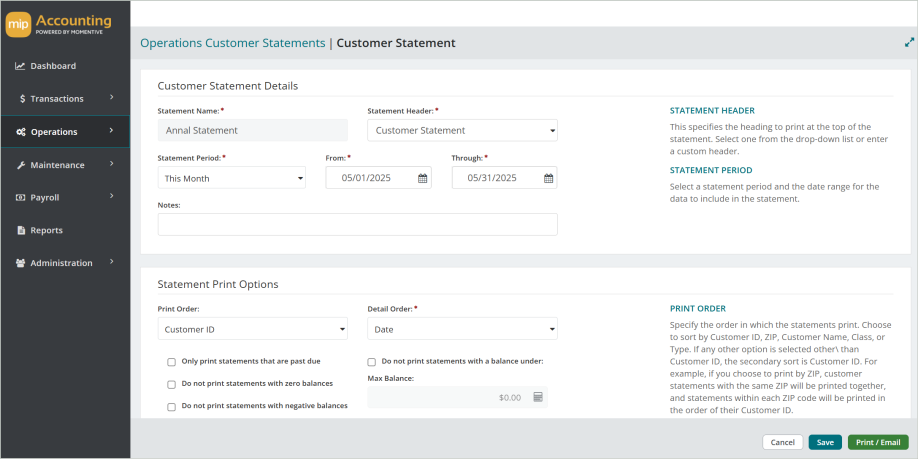
Customer Statement Details
Enter the following information for the statement.
Statement Name: Enter a name for the statement.
Statement Header: Enter or select a header for the statement. This will be printed at the top of the statement.
Statement Period: Choose a default statement period, or enter a custom date range.
From and Through dates: Enter a custom date range, or choose a default statement period from the prior field.
Notes: Enter any notes about the statement.
Statement Print Options
Print Order: Specify the order in which the statements print. If any option other than Customer ID is selected, the secondary sort will be by Customer ID.
Detail Order: Specify the order in which the detail items print on the statement.
Choose from the following options to customize the statement:
-
Only print statements that are past due
-
Do not print statements with zero balance
-
Do not print statements with negative balances
-
Do not print invoices with zero balances
-
Do not print statements with a balance under (enter amount)
Statement Filter
You can use filters to narrow down the range of statements you want to print. You can double click or drag-and-drop individual items to move them to the Selected Filters area.
Save & Print / Email
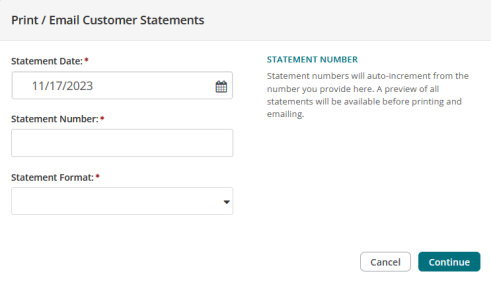
When you're ready to generate your statement, Save your new statement. Then select Print/Email.
The next screen allows you to edit the statement date, number, and choose a format.
Note: You can edit your customer statement formats in MIP Classic through Reports > Forms Designer.
Lastly, choose the customers to print statements for. When you're finished selecting, you can preview the statement by selecting Preview, or print/email the statement by selecting Process.

Note: Make sure the customer is set up to receive statements by going to their Customer Record. Check the Email tab and ensure that the "Email Statements" checkbox is selected.
Note: For help setting up email capabilities in MIP Modern, see Email Setup.