Advanced Data Examiner Import Tool - Events
If your site subscribes to the optional Events component of the Advanced Data Examiner (ADE), the Advanced Data Examiner (ADE) Import Tool will include a feature that will enable you to insert data from an external input file into Millennium's event-related pending tables for any active Event that already exists in Millennium. The Advanced Data Examiner is then used to review, accept, or reject any data that has been imported into this set of event-related pending tables.
Before using the ADE Import Tool to import Event data from your input file, thoroughly review the Advanced Data Examiner Import Tool topic. The Events component of the ADE Import Tool utilizes the same Main and Mapping windows, and you follow the same step-by-step instructions as you follow for running the ADE Import Tool. However, there are additional components on the Main Mapping window, and the techniques for creating a Millennium to Input File mapping for Event Guest, Attendance, Event Income and Guest Items rows will differ slightly from those techniques used for Millennium to Input file mappings for the other pending tables.
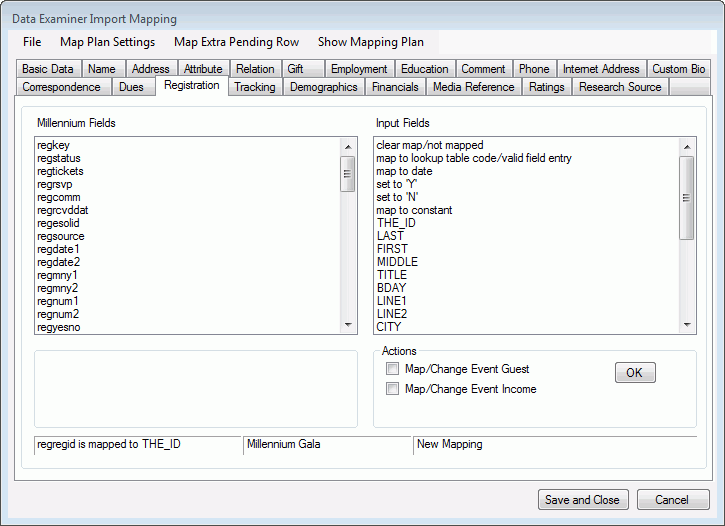
If your site is licensed to use the Events component of the Advanced Data Examiner, the Registration table tab will be available on the Main Mapping window. Only Registration rows are mapped on the Main Mapping window. Event Guest, Event Income, Attendance and Guest Items (for an Activity and for the Event) will have their own mapping windows.
When mapping event-related data, the status bar on each of the mapping windows will help you to keep track of where you are in the mapping process.
The following mapping instructions, information, and examples assume that you are logged on to the ADE Import Tool and that you have accessed the Main Mapping window.
Registration
- On the Map Plan Settings menu, click Events.
- Select the Event of your choosing from the list of active Millennium event names and click OK. Or, click Cancel to halt the process without selecting an Event.
-
The registration ID number (regregid) is automatically mapped to the Millennium Identifier. Map the other Millennium fields as desired.
- Registration rows can only be created for those constituents who have a Basic Data row already in Millennium. If you are creating an Event mapping plan for new constituents, the mapping plan must include Basic Data fields, and it should also include Name and Address fields. When the Advanced Data Examiner processes the pending table data, it will first create the Basic Data, Name and Address rows for a new constituent before it can process the Registration and other event-related pending data rows for that constituent.
- Only one registration row can be created for each one row in the input file.
- On the Registration table tab, the middle segment of the status bar displays the name of the selected Event.
Event Income
- Access the Registration tab on the Main Mapping window.
- Under Actions, select the Map/Change Event Income check box.
-
Click OK. The Event Income Mapping window displays. The first segment of the window's status bar displays the name of the event.
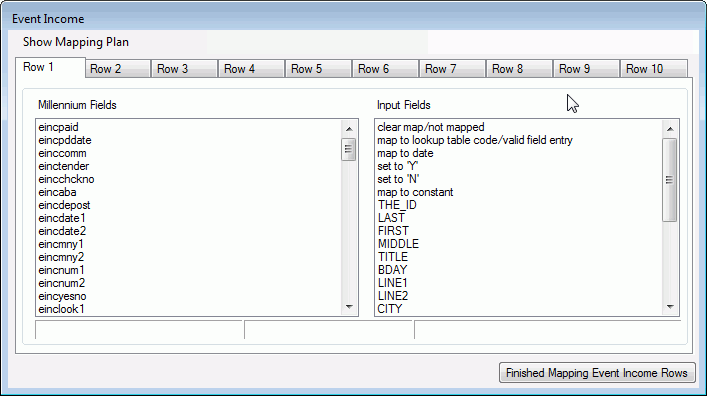
- Map the Millennium fields as desired. The Millennium Field list includes available fields from the Event Income and several Ecommerce pending table fields. If you map the tender field to either credit card or bank draft, then it is important that you then map the related Ecommerce pending fields appropriately. Up to ten Event Income rows per registrant can be mapped. At least one field must be mapped in order to create an Event Income pending row.
- To review the entire mapping plan while it is in progress, click on Show Mapping Plan. The Millennium Fields Mapping window displays and lists all Millennium fields that have been mapped so far, and the input file field names, lookup table values, dates and/or constants to which they are mapped. Click OK to return to the Event Income mapping window.
- When finished, click Finished Mapping Event Income Rows.
- Additional validation rules will apply for the Input file fields that have been mapped to Event Income fields. Refer to the topic, Advanced Data Examiner Import Tool, Additional Validation Rules for Giving and Dues for details.
- If, on the Registration table tab, you have selected both Map/Change Event Guest Row and Map/Change Event Income Row, then the Event Guest mapping window will display before the Event Income mapping window.
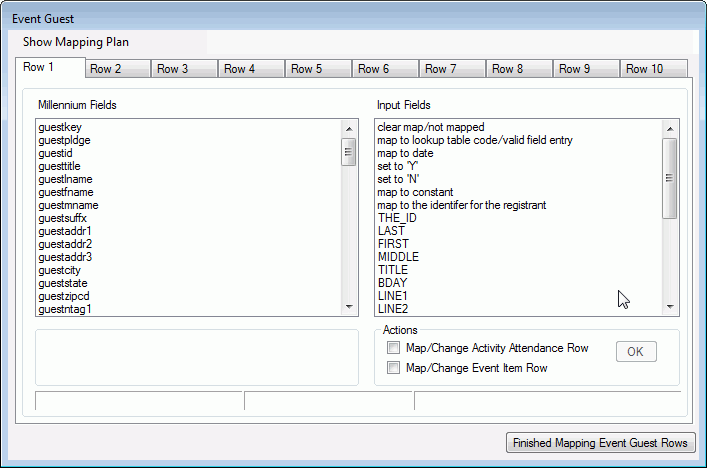
Event Guest
- Access the Registration tab on the Main Mapping window.
- Under Actions, select the Map/Change Event Guest check box.
-
Click OK. The Event Guest Mapping window displays. The first segment of the window's status bar displays the name of the event.
-
Map the Millennium fields as desired. Up to ten Event Guest rows per registrant can be mapped. You must map either the Guest ID (guestid) or the Guest Last Name (guestlname) fields in order to create an Event Guest pending row.
Note: If you have mapped the Millennium Identifier to a field in the input file, and you want to create an Event Guest row for the registrant, then map the guest ID field to the map to the identifier for the registrant item shown in the Input Fields list.
- To review the entire mapping plan while it is in progress, click on Show Mapping Plan. The Millennium Fields Mapping window displays and lists all Millennium fields that have been mapped so far, and the input file field names, lookup table values, dates and/or constants to which they are mapped. Click OK to return to the Event Guest mapping window.
- When finished, click Finished Mapping Event Guest Rows. If the Map/Change Event Income Row check box on the Registration table tab is not checked, you will return to the Main Mapping window. If it is checked, then the Event Income mapping window will display.
- If you map the Guest ID field to a field in the input file, that field must be a valid Millennium Identifier that belongs to an existing constituent.
- If you map the Guest Last Name field instead, you will create a non-constituent guest row. Neither the ADE Import Tool nor the Advanced Data Examiner will attempt to match guest name information to an existing Millennium constituent.
- If you map both the Guest ID and Guest Last Name fields, the utility will assume that you are creating a guest row for an existing Millennium constituent. Therefore, the input value for the ID number must be a valid, existing Millennium ID number.
-
If you have mapped only the Guest ID field to a valid Millennium Identifier, the utility will auto-populate the Event Guest name fields with the preferred Millennium name. The utility will also auto-populate the Name Tag 1 field with the formatted name field (nameformn) of the Event Name type name, if it exists, or the formatted preferred name if it does not. Mapping the name fields to fields in the input file will override this automatic behavior.
Important! If you map just one of the Event Guest name fields, then the automatic behavior is overridden for all of the Event Guest name fields.
-
If you have mapped only the Guest ID field to a valid Millennium identifier, the utility will auto-populate the Event Guest address fields with the preferred Millennium address. If no preferred address is on file for the constituent, the addresses are sorted in ascending order by address type and the first one will be used. Mapping the address fields to fields in the input file will override this automatic behavior.
Important! If you map just one of the Event Guest address fields, then the automatic behavior is overridden for all of the Event Guest address fields.
- The Event Guest primary key field (guestkey) can be mapped to a field in the input file. If the key value in the Input file field does not match an existing Millennium Event Guest row primary key, then the entire Input file row will be rejected. If it does match, then any Attendance or Event Item rows that you are inserting will be linked to this Event Guest row. However, the existing Event Guest row will not be updated with any new information.
Event Items
Event Items are guest items that are assigned to each registrant's guest, regardless of what activities the guests will be attending as part of the event. A typical Event Item might include a T-shirt, hat, or book bag.
- Access the Event Guest mapping window. Map the guest fields for the first guest as desired.
- Under Actions, select the Map/Change Event Item Row check box.
-
Click OK. The Event Items mapping window displays. The first segment of the status bar displays the name of the selected event. The middle segment of the status bar displays Guest N, where N is the guest number for whom you are mapping this set of Event Items.
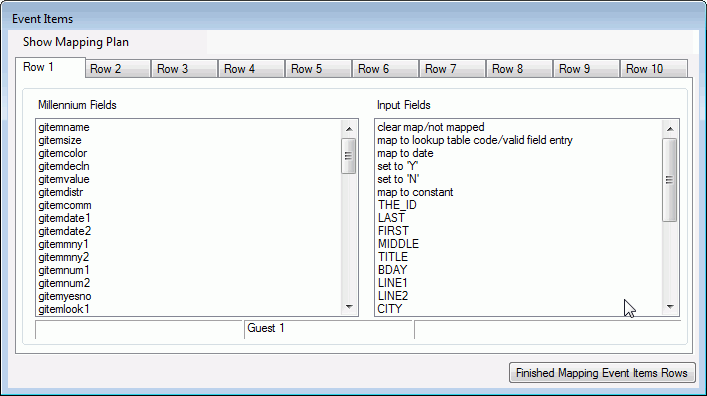
- Map the Event Items fields as desired. You may map up to ten Event Items rows for this guest. You must map the Guest Item Name (gitemname) field in order to create a row in the Guest Items pending table.
- To review the entire mapping plan while it is in progress, click on Show Mapping Plan. The Millennium Fields Mapping window displays and lists all Millennium fields that have been mapped so far, and the input file field names, lookup table values, dates and/or constants to which they are mapped. Click OK to return to the Event Items mapping window.
- When finished, click Finished Mapping Event Items Rows.
- If more than one guest will be created from one input file row, map the Event Guest fields for the next Guest on the second tab. Then, access the Event Items mapping window from this second tab. Notice that the middle segment of the status bar displays Guest 2. Map the Event Items fields as desired, up to ten. Close the Event Items form to return to Event Guest form. Continue this process until you have mapped all desired Event Items for each of your guests.
- If you have selected both Map/Change Activity Attendance Row and Map/Change Event Item Row, on the Event Guest mapping window, the Activity Attendance mapping window will display before the Event Items mapping window.
- The Guest Item Name (gitemname) field can be mapped to a value from the items table to 'assign' the same item for each guest N for each registration. Do so by mapping it to the map to lookup table code item in the Input Fields list box. A list of items that are linked to the selected event displays. Each item on the list is a concatenation of the item name, item size and item color fields. Chose the desired item from the list.
- The Guest Item Name field can also be mapped to a field in the input file that is a time key that belongs to a row in the items table.
- The Guest Item Name, Item Size and Item Color fields can be mapped to three separate fields in the input file. But, the concatenation of the values of the three fields must exactly match an item in the items table that is linked to the selected event by in the items table by name, size, and color in order for an Guest Item row to be created. Within the items table, the item name and item color fields are table-driven, so the Input file fields must be table codes from the item_name and item_color lookup tables. The item size field is a free text field; the value in the Input file must match the text exactly.
You are giving each guest a T-shirt. The item_name code for T-shirt is 'tshirt'. The shirt comes in three sizes: small, medium and large, and in two colors: black and white. The code for each color in the item_color table is 'b' for black and 'wh' for white. You have an entry in the items table for a small, black T-shirt: itemkey = 5020, itemname = tshirt, itemcolor = b, and itemsize = small. You have another entry in the items table for a small white T-shirt: itemkey = 5021, itemname = tshirt, itemcolor = wh, and itemsize = small. If you want some guests to get a small white t-shirt and others to get a small black tshirt, you can map this in one of two ways:
- Map the Guest Item Name to a field in the Input file. The value of this field for the guests who are receiving the black t-shirts must equal 5020. The value of this field for the guests who are receiving the white t-shirts must equal 5021.
-
Map the Guest Item Name field to an input file field which holds the value tshirt, map the Guest Item Color field to a field which holds the value b or wh, and map the Guest Item Size field which holds the value small. The value of the Guest Item Color field must be b for the guests who are receiving the black t-shirts. The value of this field must be wh for the guests who are receiving the white t-shirts.
Important! If you map the Guest Item Size field to a field in the Input file which holds a value other than small ( Small, SMALL, sm are examples), then the input file row will be rejected because it is not an exact match to small.
Each guest attending the event will receive a tote bag. All of the tote bags are exactly the same. The item_name code for the tote bag is 'tote'. You have an entry in the items table for this tote bag: itemkey = 5022, itemname = tote. You may assign a tote bag to each guest in one of two ways:
- Map the Guest Item Name field to value from the items lookup table by selecting map to lookup table code from the Input Fields list, and then select tote// from the list of available items.
- Map the Guest Item Name a field in the input file. The value of the field can be equal to 5022, the primary key associated with the item in the items table. Or, the value of the field can be equal to the code, tote.
Attendance
- Access the Event Guest mapping window. Map the guest fields for the first guest as desired.
- Under Actions, select the Map/Change Activity Attendance Row check box.
-
Click OK. The Attendance mapping window displays. The first segment of the status bar displays the name of the selected event. The middle segment of the status bar displays Guest N, where N is the guest number for whom you are mapping these Attendance rows.
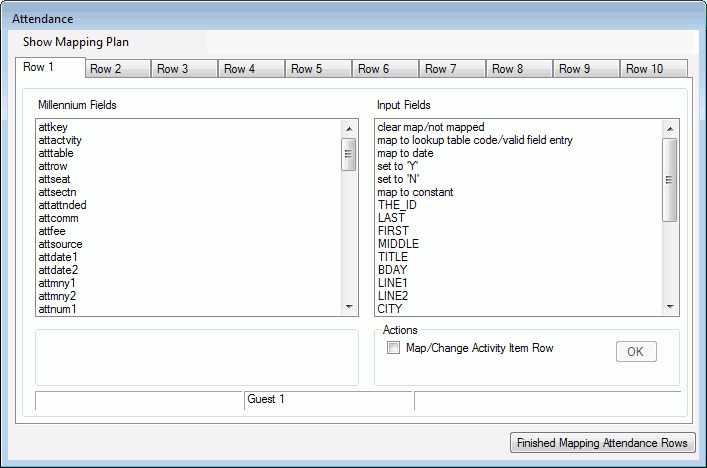
- Map the Activity Attendance fields as desired. You may map up to ten Attendance rows for this guest. You must map the Activity (attactvity) field in order to create a row in the Attendance pending table.
- To review the entire mapping plan while it is in progress, click on Show Mapping Plan. The Millennium Fields Mapping window displays and lists all Millennium fields that have been mapped so far, and the input file field names, lookup table values, dates and/or constants to which they are mapped. Click OK to return to the Attendance mapping window.
- When finished, click Finished Mapping Attendance Rows. If the Map/Change Activity Item Row check box is not checked, you will return to the Event Guest mapping window. If it is checked, then the Activity Items mapping window will display instead.
- If more than one guest will be created from one input file row, map the Event Guest fields for the next Guest on the second tab on the Event Guest mapping window. Then, access the Activity Attendance mapping window from this second tab. Notice that the middle segment of the status bar displays Guest 2. Map the Attendance fields as desired, up to ten. Close the Activity Attendance mapping window and either return to Event Guest mapping window, or if Map/Change Event Item Row is checked, the Event Items mapping window will display for this second Guest (and so on for all guests that will be created from the one input file row). Continue this process until you have mapped all Activity Attendance rows for each of your guests.
- The Activity (attactvity) field can be mapped to an activity name from the Millennium activity table to create the same activity for each guest. Do so by mapping it to the map to lookup table code item in the Input Fields list box. A list of activity names that are linked to the selected event displays. choose the desired activity from this list.
- The Activity field can also be mapped to a field in the input file. The value of this field can either be a timekey for a row in the activity table. Or, the value of this input file field can be an Activity Name. In either case the value must match an entry in the activity table that is an activity linked to the selected event.
- The Activity Attendance primary key field (attkey) can be mapped to a field in the input file. If the key value in the input file field does not match an existing Millennium Attendance row primary key, then the entire input file row will be rejected. If it does match, then any Activity Item rows that you insert will be linked to this existing Attendance row. However, the existing Attendance row itself will not be updated with any new information.
Activity Items
Activity Items are those items that are assigned to each guest based on what activities they will be attending. A typical Activity Item might include a breakfast, lunch or dinner item, or a ticket to attend a special concert. To map one or more Activity Item rows for each Attendance mapping, select Map/Change Activity Item Row for Guest X for Activity Attendance Row Y from the File menu on the Attendance Map Application Window. X represents the Guest Number, Y represents the Attendance number. The Activity Guest Items Mapping Application Window displays. The first segment of the Status Bar displays the name of the chosen event. The middle segment of the Status Bar displays the guest number and specific activity attendance number for whom and what you are mapping these Activity Items. The third segment of the Status Bar displays the specific Activity's name (if mapped to a value in the activity table).
- Access the Event Guest mapping window. Map the guest fields for the first guest as desired.
- Access the Activity Attendance mapping window for the first guest. Map the fields for the first Activity Attendance row for the first guest, as desired.
- Under Actions on the Activity Attendance mapping window, select the Map/Change Activity Item Row check box.
-
Click OK. The Activity Items mapping window displays. The first segment of the status bar displays the name of the selected event. The middle segment of the status bar displays Guest N Activity M, where N is the guest number and M is that guest's activity attendance row for which you are mapping this set of Activity Items. If the Attendance row was mapped to a value in the Millennium activity table, then the third segment will display that activity's name.
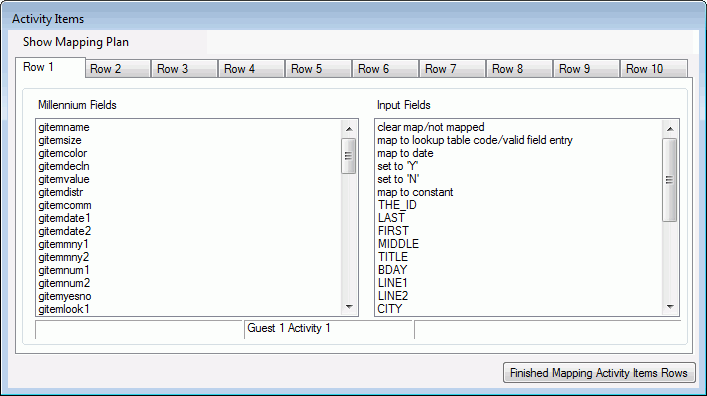
- Map the Activity Items fields as desired. You may map up to ten Activity Item rows for this Attendance row. You must map the Guest Item Name (gitemname) field in order to create a row in the Guest Items pending table.
- To review the entire mapping plan while it is in progress, click on Show Mapping Plan. The Millennium Fields Mapping window displays and lists all Millennium fields that have been mapped so far, and the input file field names, lookup table values, dates and/or constants to which they are mapped. Click OK to return to the Activity Items mapping window.
- When finished, click Finished Mapping Activity Items Rows to return to the Activity Attendance mapping window.
- If the first guest is attending another activity, map the fields for the next activity on the second Attendance tab. Then, access the Activity Items mapping window from that tab. Notice that the middle segment of the status bar will displays Guest N Activity 2. Map the Activity Items fields as desired, up to ten. Close the Activity Items mapping window to return to Activity Attendance mapping window. Continue this process until you have mapped all desired Activity Items for each activity that the Guest will attend.
Only if you have mapped the Activity Attendance row's attactvity field to an value in the Millennium activity table will you be able to map a Guest Item Name to a value in the Millennium items table. If the Activity Attendance row's attractive field is mapped to a field in the input file instead, then the Guest Item Name must also be mapped to a field in the input file.
If you did map that Activity Attendance row's attractive field to a value in the activity table, you can then map the Guest Item Name (gitemname) field to a value from the items table in order to assign the same item to each guest who will attend that activity. Do so by mapping it to the map to lookup table code item in the Input Fields list box. A list of items that are linked to the activity displays. Each item on the list is a concatenation of the item name, item size and item color fields. Chose the desired item from the list.
The Guest Item Name field can also be mapped to a field in the input file that is a time key that belongs to a row in the items table.
The Guest Item Name, Item Size and Item Color fields can also be mapped to three separate fields in the input file. But, the concatenation of the values of the three fields must exactly match an item in the items table that is linked to the activity by in the items table by name, size, and color in order for an Guest Item row to be created. Within the items table, the item name and item color fields are table-driven, so the Input file fields must be table codes from the item_name and item_color lookup tables. The item size field is a free text field; the value in the Input file must match the text exactly.
All guests who attend Activity 1 will receive a ticket for either an adult sized or child sized roast beef dinner. You have an entry in the items table for a child sized roast beef dinner: itemkey = 5030, itemname = rbeef, and itemsize = child. You have another entry in the items table for the adult sized roast beef dinner: itemkey = 5031, itemname = rbeef, and itemsize = adult. You can map this in one of two ways:
- Map the Guest Item Name to a field in the input file. The value of this field must be 5030 for those guests who are receiving the adult sized dinner ticket. The value of this field must be 5031 for those guests who are receiving the child sized dinner ticket.
- Map the Guest Item Name to a field in the input file which holds the value rbeef. Map the Gust Item Size to a field which holds the value adult or child. The value of the Guest Item Size field must be adult for the guests who are receiving the adult sized ticket and the value of this field must be child for the guests who are receiving the child sized dinner ticket. If the field holds a value other than adult or child (Adult, ADULT, Child, CHILD, or blank are examples) then the input file row will be rejected.
All guests who attend Activity 2 will receive a ticket to the lunch buffet. You have an entry in the items table for this: itemkey = 5032, itemname = buffet. You may assign a lunch buffet ticket to each guest in one of two ways:
- Assuming that Activity 2 was mapped to a value in the Millennium activity table and not to a field in the input file, map the Guest Item Name field to value from the items lookup table by selecting map to lookup table code from the Input Fields list, and then select buffet// from the list of available items.
- Map the Guest Item Name to a field in the input file. The value of that field must be 5032, the primary key associated with the item in the items table. Or, the value of the field can be equal to the code, buffet.
Matching Existing Event Data Records
The ADE Import Tool will automatically attempt to match input file rows to existing Millennium Registration rows, Event Guest rows, Attendance rows, Guest Items rows that link to the selected event, and Guest Items rows that link to activity rows. The import tool will look for matching registration rows by id and event code, matching constituent event_guest rows by id and registration key, matching attendance rows for constituent guests by registration key, guest key and activity, and matching guest_items rows for constituent guests by registration key, guest key, activity key if the item is linked to an activity rather than the event, and the item name/color/size.
The ADE Import Tool will not attempt to match non-constituent guest rows, attendance rows for non-constituent guests, or guest items for non-constituent guests. And, it looks for matching event rows only to insure that duplicate rows will not be created. However, event rows that match will not be updated with any new information.
The following chart gives the name of the data row, the matching criteria, and the action that the utility will take if a match is found.
| Data row name | Matching criteria | Actions |
|---|---|---|
| Registration | ID and event code | Event Guest and Event Income information in the input file row will be linked to the matching Registration row. |
| Event Guest | ID and primary key from the registration row | Activity Attendance and Event Item information in the input file row will be linked to the matching Event Guest row |
| Activity Attendance | primary key from the registration row, primary key from the guest row, and activity | Activity Item information in the input file row will be linked to the matching Activity Attendance row. |
| Event Item | primary key from the registration row, primary key from the guest row, item name/color/size | The Event Item information in the input file will be ignored |
| Activity Item | primary key from the registration row, primary key from the guest row, primary key from the activity, item name/color/size | The Activity Item information in the input file will be ignored. |