Vendors
Set up vendor records to store contact information, payment terms, discounts, default accounts, and 1099 tax reporting information. Vendor records help manage purchases, payments, and tax reporting efficiently.
Learn how to Add Vendors or View & Update Current Vendors.
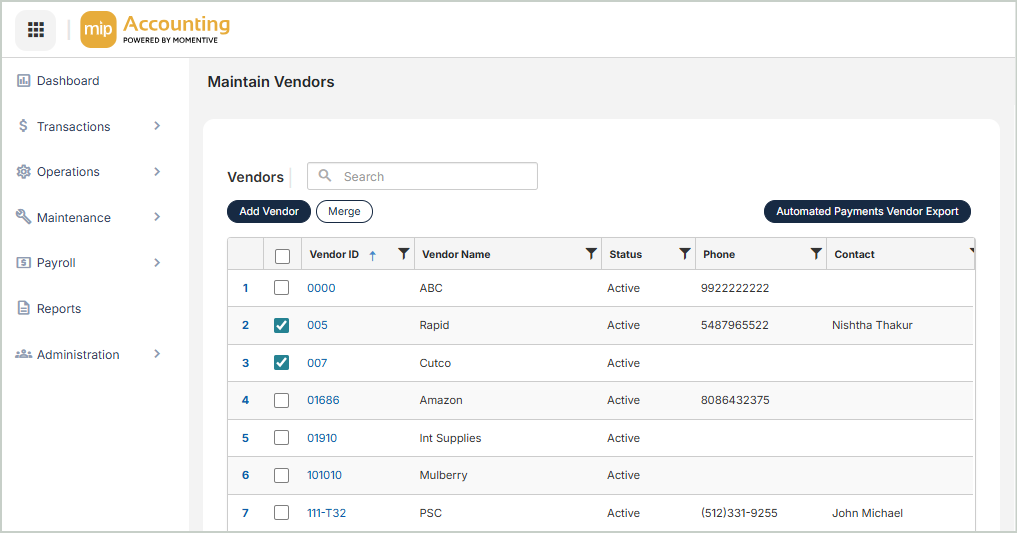
Vendors Grid
The Vendors grid includes the following columns:
Vendor ID: The unique ID for the vendor. Select a vendor to open the Vendor Record.
Vendor Name: The full name of the vendor
Status: The current status of the vendor (Active, Inactive, or Discontinued)
Phone: The phone number associated with the vendor's main address
Contact: The full name of the contact associated with the vendor's main address
Main Address: The street address associated with the vendor's main address
City: The city associated with the vendor's main address
State/Province: The state (or province, in applicable countries) associated with the vendor's main address
Postal Code: The zip code (or postal code, in non-US countries) associated with the vendor's main address
Class: The class of the vendor
Type: The type of vendor
Issue 1099: 'True' if the vendor is 1099-eligible; otherwise 'False'
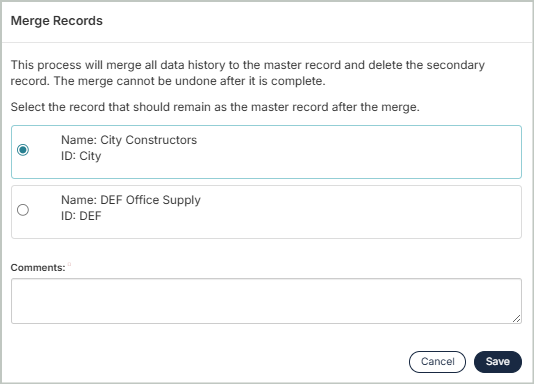
Merge Vendors
You can merge two vendor records to combine all data history into a master record and delete the secondary record. To merge, select two vendors from the grid, then select Merge. Choose which record you want to keep as the master, then Save. Note that this action is permanent and cannot be undone.
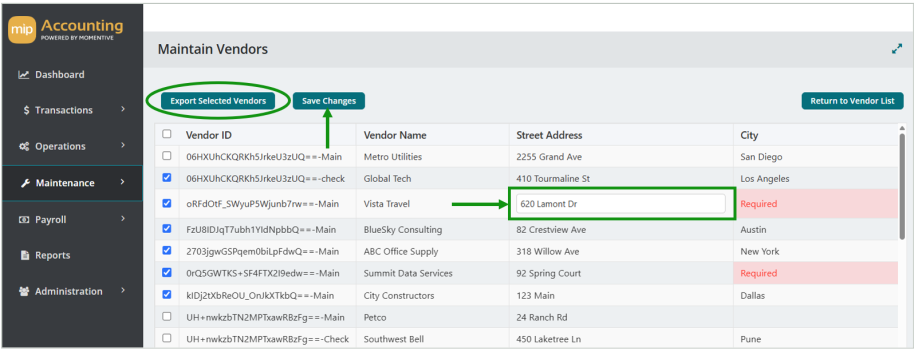
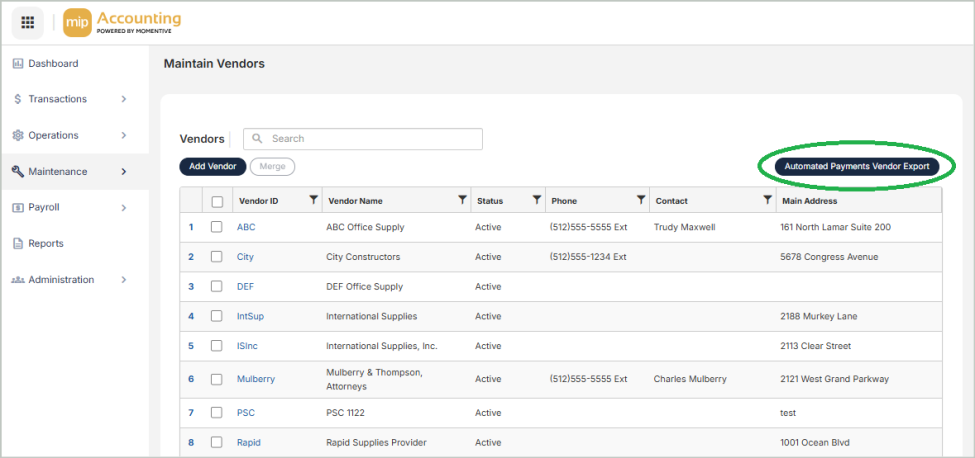
Automated Payments Vendor Export
You can generate an .XLSX file of your vendor records from MIP. This export tool is part of the Auto Payments feature but is available to all MIP users for vendor data updates or reporting.
-
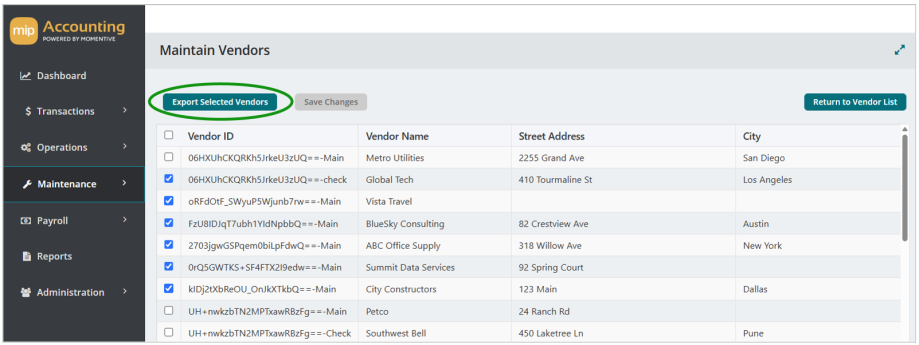
Select Automated Payments Vendor Export at the top of the grid.
-
The grid will display all of your vendors that have an "Active" status.
-
Select the vendor records you’d like to export from the grid, then select Export Selected Vendors.
-
If any of the vendor records you selected are missing information (such as email or phone number), a message will display with the option to either:
-
Cancel & Update Data - Cancel the export and update the missing information for the vendors in the grid.
-
Continue Export - Continue with the export as-is without updating any information.
-

If you selected Cancel & Update Data, you can edit the missing information for your vendors directly from the grid. The grid will highlight the fields that require your input.
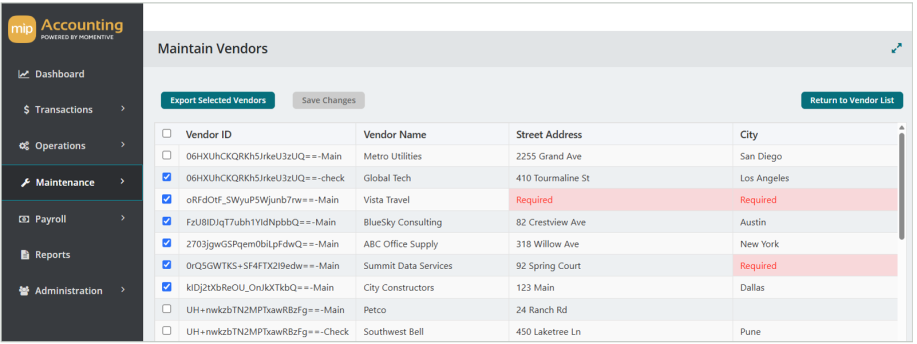
Select a field to manually type in the information. Any updates made here will also update the Vendor Record.
-
Once you've completed your edits, select Save Changes.
-
To initiate the export again, choose your vendors from the grid and select Export Selected Vendors.
-
An .XSLX file will be automatically generated and available for download.