Add Vendors
Enter the details for the new vendor you'd like to add to the system.
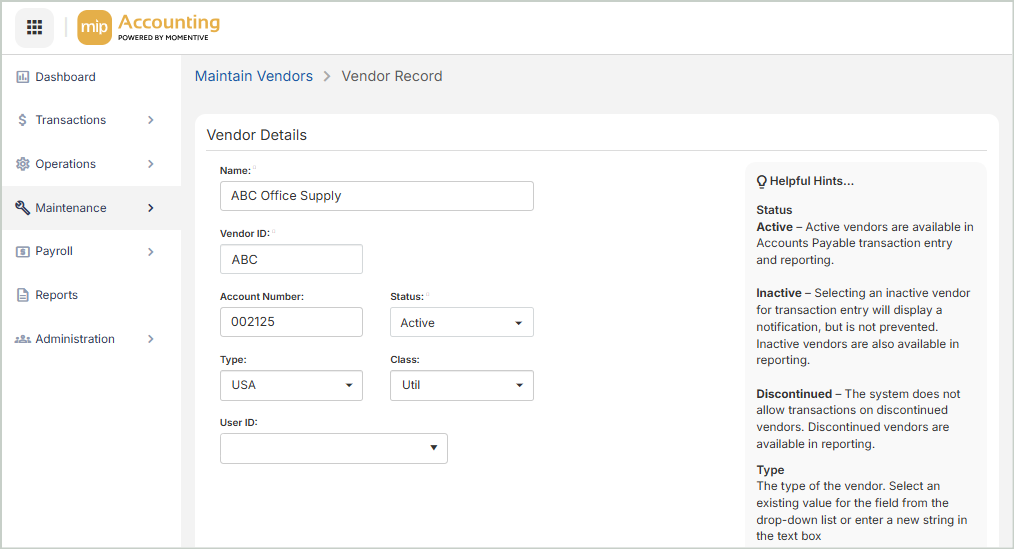
Vendor Details
Enter the following information for the vendor.
Name: Enter the full name of the vendor.
Vendor ID: Enter a unique ID for the vendor.
Account Number: Optionally, enter the account number that the vendor issues to you.This number will print on AP system generated checks. For example,
Status: Select the current status of the vendor (Active, Inactive, or Discontinued).
Type: Optionally, select a type from the drop-down list or enter a type in the text box. The meaning and usage of the Type field is determined by your organization.
Class: Optionally, select a class from the drop-down list or enter a class in the text box. The meaning and usage of the Class field is determined by your organization.
User ID: Optionally, select a User ID from the drop-down list or enter a User ID in the text box. User IDs are set up by an administrator through Administration > Users > Manage Users.
Main Address & Contact
Enter the address and contact information for the vendor.
Address: Enter the vendor's street address.
City: Enter the vendor's city.
State/Province: Enter the vendor's state or province.
Postal Code: Enter the vendor's zip or postal code.
Country: Enter the vendor's country.
Phone: Enter the vendor's phone number.
Fax: Enter the vendor's fax number.
Designation: Enter the designation of the contact person associated with the vendor address.
First Name: Enter the first name of the contact person associated with the vendor.
Middle Initial: Enter the middle initial of the contact person associated with the vendor.
Last Name: Enter the last name of the contact person associated with the vendor.
Position: Enter the position of the contact person associated with the vendor.
Email Address: Enter the email address of the contact person associated with the vendor.
Once you Save, you'll be taken to the Vendor Record where you can review and update information as needed.