Module Setup
The Module Setup section in Organization Settings allows you to Add a Module, and apply settings for current modules.
- Accounts Payable
- Accounts Receivable
- Bank Information
- Budget
- Connect to Financial Institution
- Encumbrances
- Fixed Assets
- Payroll
The Accounts Payable tab contains the following settings to apply for your organization.
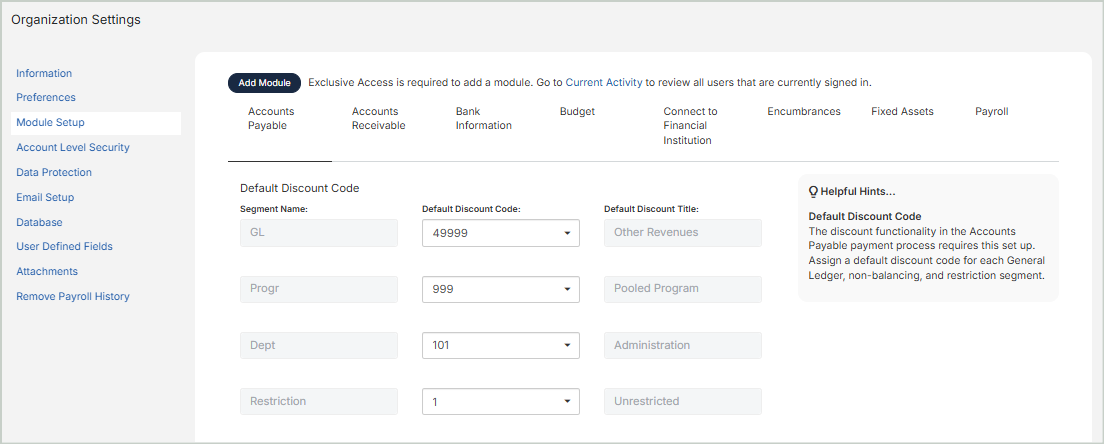
Default Discount Code
-
Assign default discount codes for each general ledger, non-balancing, and restriction segment. The discount functionality in the Accounts Payable payment process requires this set up.
-
The General Ledger segment as well as non-balancing and restriction segments appear in the table. Balancing and Fund type segments are not available for selection.
-
Complete this section before you pay an invoice with discounts. The discount account and defaults are required before you can continue the payment process.
Transaction Entry Options
Allow Appending Entries to Invoices and Credits: Select this option to append new transactions to an existing invoice using the same invoice number and vendor. The original invoice will either sum the originating and appended transactions or reverse the original transactions for a zero net amount.
Allow Appending Entries to Auto-Reversed Invoices through Void Checks: Select this option to append entries to invoices that are auto-reversed via the void checks workflow. This is useful if you discover coding errors on invoices after a check has been printed.
Automated Invoice Payment Options
Allow Automated Invoice Payment: This options enables the Auto Payments feature for your organization. Only MIP Admins can view & edit the full Corpay credentials that are entered into each field.
-
Client ID
-
Client Secret Phrase
-
Company ID
Once you're finished with your edits, Save your changes.
The Accounts Receivable tab contains the following settings to apply for your organization.
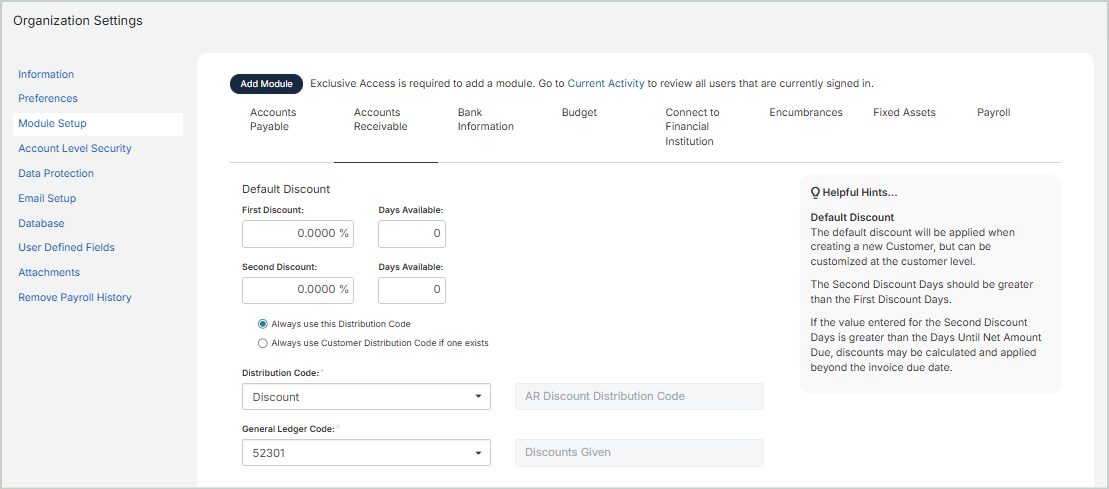
Default Discount
First Discount Rate, Days Available: Enter the percentage of discount for the first discount and the number of days to apply.
Second Discount Rate, Days Available: Enter the percentage of discount for the second discount and the number of days to apply.
Always use this Distribution Code: Select this option to use the distribution code entered on this page.
Always use Customer Distribution Code if one exists: Select this option to use the distribution code entered through Maintenance > Accounts Receivable > Customers.
Distribution Code: Enter the default distribution code for the discounts.
General Ledger Code: Enter the default general ledger account code for the discounts. MIP displays cash accounts related to the functional currency.
Default Prepayments
General Ledger Code: Select the general ledger account code to populate when using the Distribution Code link during transaction entry of prepayments. You can change the values populated at the time of entry if needed.
Transaction Entry Options
Allow Appending Entries to Invoices: Select this option to append new transactions to an existing invoice using the same invoice number and customer. The original invoice will either sum the originating and appended transactions, or reverse the original transactions to result in a zero net amount.
Warn when Appending an Invoice: Select this option to display a warning when posting an invoice with the same customer and invoice number as an already posted invoice.
Once you're finished with your edits, Save your changes.
Use the Bank Information tab to set up bank accounts and associated details.

Routing Numbers
The Routing Numbers grid includes the following columns:
Routing Number: The routing number associated with the bank. Select a routing number to display the Bank Information, Bank Accounts, and Bank Holidays page.
Bank Name: The name of the bank associated with the routing number
Add a Bank
Select Add Bank to add a new bank to the system.
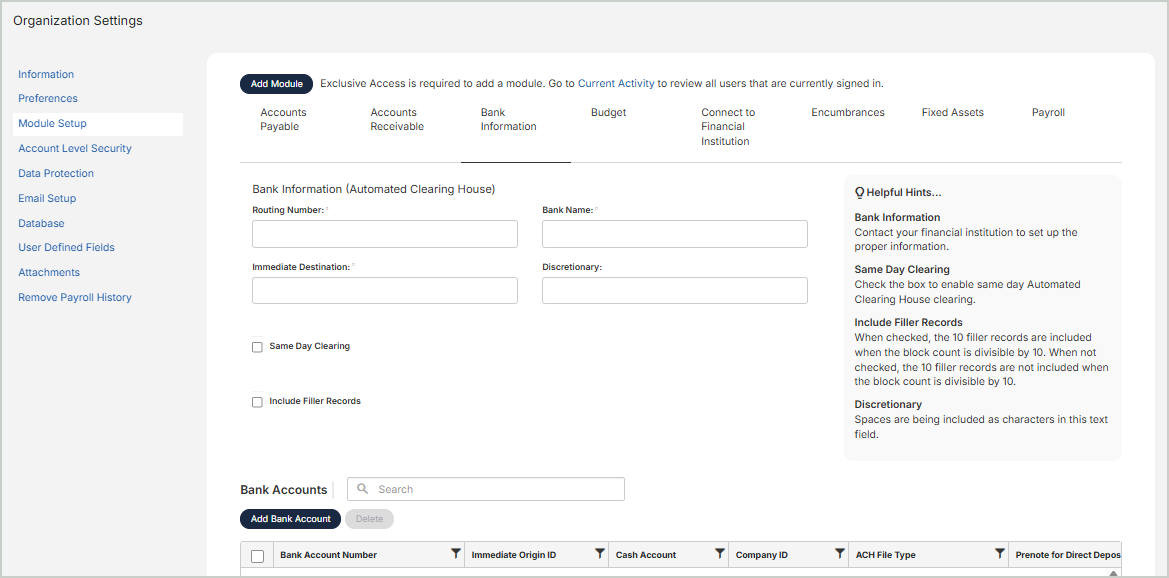
Bank Information (Automated Clearing House)
Routing Number: Enter the routing number for the bank.
Bank Name: Enter the bank name associated with the routing number.
Immediate Destination: Enter the immediate destination number associated with the routing number.
Discretionary: Spaces are being included as characters in this text field.
Same Day Clearing: Select this option to enable same day Automated Clearing House clearing.
Include Filler Records: Select this option to include 10 filler records when the block count is divisible by 10.
Bank Accounts
Select Add Bank Account to add a new account to the system.

Bank Account Number: Enter the bank account number used to transfer funds to your vendor’s account.
Immediate Origin ID: Enter the ID assigned by the Automated Clearing House (ACH) Operator (bank) for this account. Note that the ACH Operator supplies this information when signing up for electronic funds transfer. This field defaults to the Federal Tax ID Number entered through Administration > Organization Settings > Information.
Cash Account: Enter the general ledger account number for this bank account, or select one using the drop-down list. The drop-down list displays the code, title, status, and type. For example, Code 11001, Title Payroll Cash, Status A, Type CSH.
Company ID: Enter your organization's ID number. The bank assigned this number when signing up for electronic funds transfer. This field defaults to 1 + Federal Tax ID Number entered through Administration > Organization Settings > Information.
ACH File Type: Select the ACH file type from the drop-down list.
Prenote for Direct Deposit: Select this option to enable or disable prenotes from being sent to employees.
Prenote for AP Payments: Select this option to enable or disable prenotes from being sent to vendors.
Addenda: Verify with your bank which file to use, either CCD or CCD+. The CCD+ will include one addenda record.
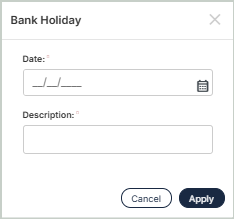
Bank Holidays
Select Add Holiday to add a new bank holiday to the system. The system will supply all Federal Holidays. Add, edit or delete the holidays to match those at your financial institution.
EFT Email Notifications
These settings control the messaging and recipients of automated EFT email notifications. Emails will only be sent if all required settings are configured. See Send Automated Email Notifications to Vendors for the complete setup.
Once you're finished with your edits, Save your changes.
Use the Budget tab to set up multiple budget versions for your organization. A budget version allows budget transaction entries and budget worksheets to be grouped together. This grouping allows for streamlined reporting and creating Adjust Posted Budget worksheets.

Budget Versions
You can select one budget to be the primary budget. The primary budget will be used for budget checking during posting.
Version ID: The unique version ID of the budget
Display Name: The display name for the budget version. The display name appears in reports.
Description: A short description of the budget version
Status: The status of the budget version - A (Active), I (Inactive), D (Discontinued), or L (Locked)
Primary: Indicates which budget version is set as the primary budget version. The primary budget will be used for budget checking during posting.
Primary Budget Details
Use this section to add additional information to the budget version set as primary.
Primary Budget Version ID: The Version ID of the budget version set as primary. This field is not editable.
Substitute Report Group for GL Code: Select a report group for the GL code. By selecting a report group, the GL codes in the group set are the only codes the system verifies.
Check Available Budget During Posting: When selected, the system checks the current fiscal year budget when posting budget transactions.
Chart of Account Segments: The system will check to ensure that you do not exceed your budget for each segment selected. The GL segment is always selected by default; all other segments are optional. Additionally, you can set one specific segment as the critical segment.
Critical Segment
Setting up critical segment dates is not required. This is useful when specific grants or programs use a different budget period.
Critical Segment: Select the segment you want to set as critical from the drop-down menu. The Set Up Critical Segment Dates grid below will display the codes for the selected segment.
Set Up Critical Segment Dates
Select Modify Dates to edit your critical segment dates. The grid includes the following columns:
Code: The account code assigned to the segment
Title: The title of the account code
Status: The status of the account code
Beginning Date, Ending Date: The beginning and ending dates for each account code within the segment to apply system checks. By default, the system displays the current fiscal year dates.
Once you're finished with your edits, Save your changes.
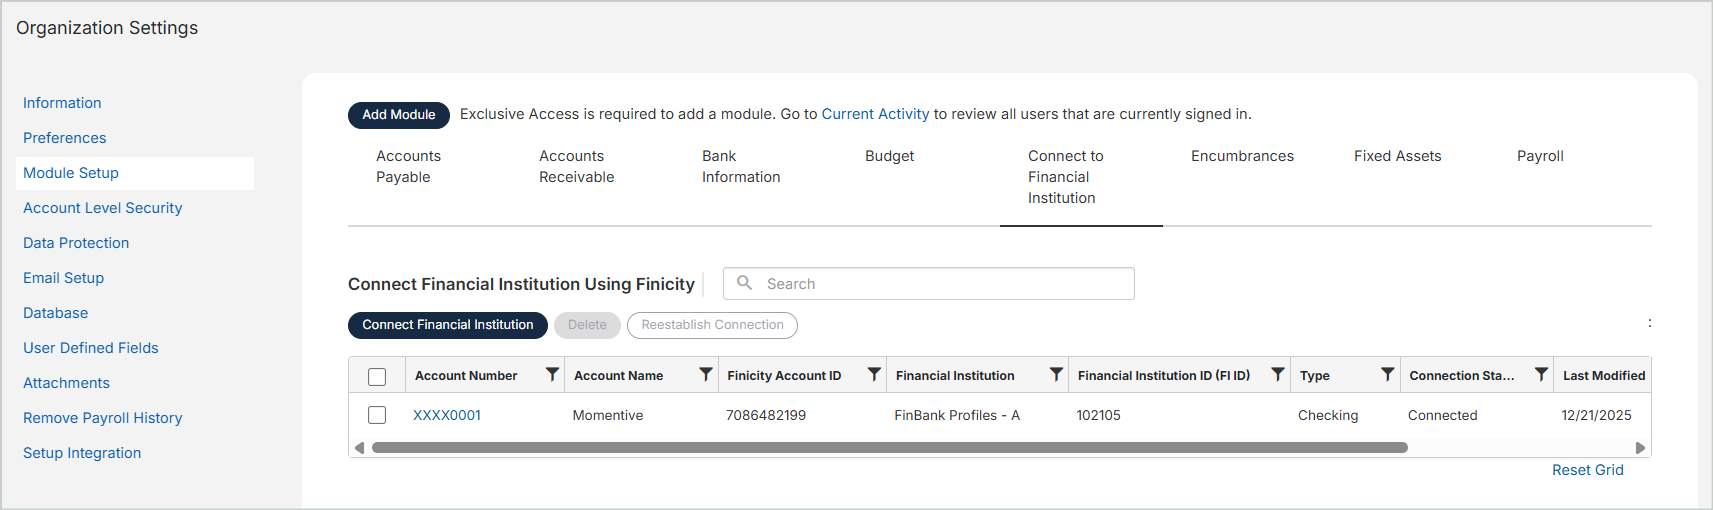
Use the Connect to Financial Institution tab to set up your bank connection to use for Automatic Bank Reconciliation. Once you complete this setup, you can get started by adding your new reconciliation.
Note: MIP connects your bank through Mastercard’s open banking platform, which supports thousands of financial institutions. Both personal and business accounts are supported, but availability depends on your specific bank and the account types it allows.
FAQs about Connecting Your Bank
Mastercard’s open banking platform supports thousands of financial institutions. Both personal and business accounts are supported, but availability depends on your specific bank and the account types it allows.
You can check Mastercard’s list of supported institutions, but the easiest way to confirm is to try connecting your account directly in MIP.
If you don’t see your bank when trying to connect, it may not currently be supported. Our support team can contact Mastercard on your behalf to request that the institution be added. While we’re happy to facilitate this, we can’t guarantee it will be approved.
-
Contact our support team and include the name of your bank along with the account type (Personal, Business, Commercial, or Investment).
-
We'll submit your request to Mastercard for consideration.
-
In the meantime, continue using the Manual Reconciliation process.
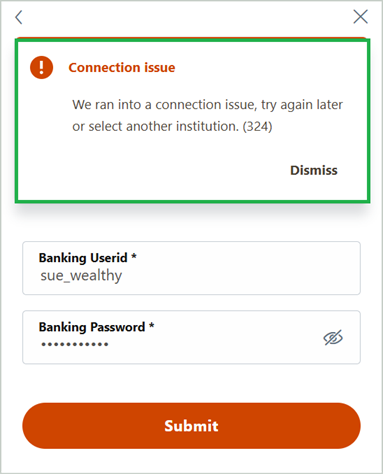
If you're running into a connection issue when trying to sign in to your bank account:
-
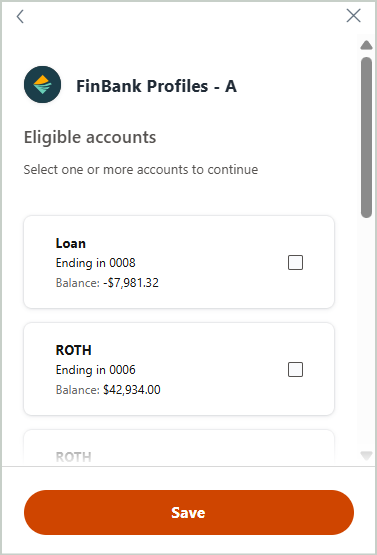
Contact our support team and include a screenshot or description of the error code (example below).
-
We'll investigate the issue and work with Mastercard to troubleshoot the connection.
If your bank was working before and now isn't connecting properly:
-
Select the bank, then choose Reestablish Connection.
-
If it's still not connected, contact our support team and include a screenshot of your bank information on this page (example below).
-
We'll investigate the issue and work with Mastercard to troubleshoot the connection.

Get Started
In this tab, you will:
-
Connect your financial institution
-
Select your bank account
-
Link the account to the appropriate general ledger code
1. Select Connect Financial Institution to set up a new bank connection.
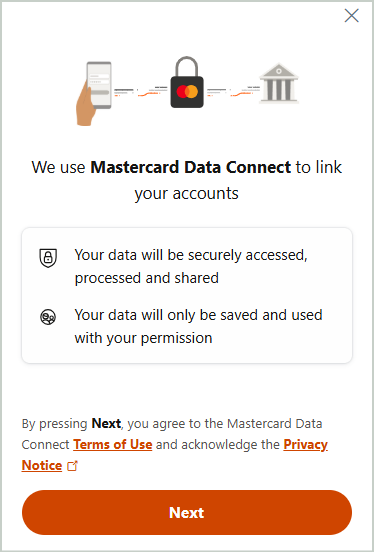
2. Search for and select the bank you'd like to add.

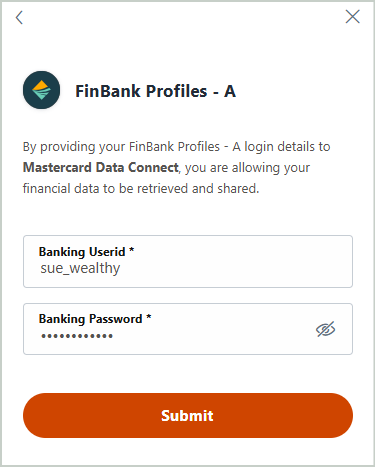
3. Enter your banking User ID and Password.
4. Select the appropriate bank account for your connection and save your settings.
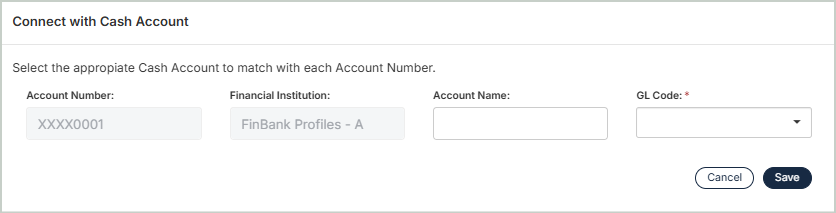
5. You can then connect your selected bank account with the appropriate general ledger code.
6. Once you're finished, you'll see your new bank connection in the grid. Now you can add your new bank reconciliation.
Once you're finished with your edits, Save your changes.
The Encumbrances tab contains the following settings to apply for your organization during transaction entry.
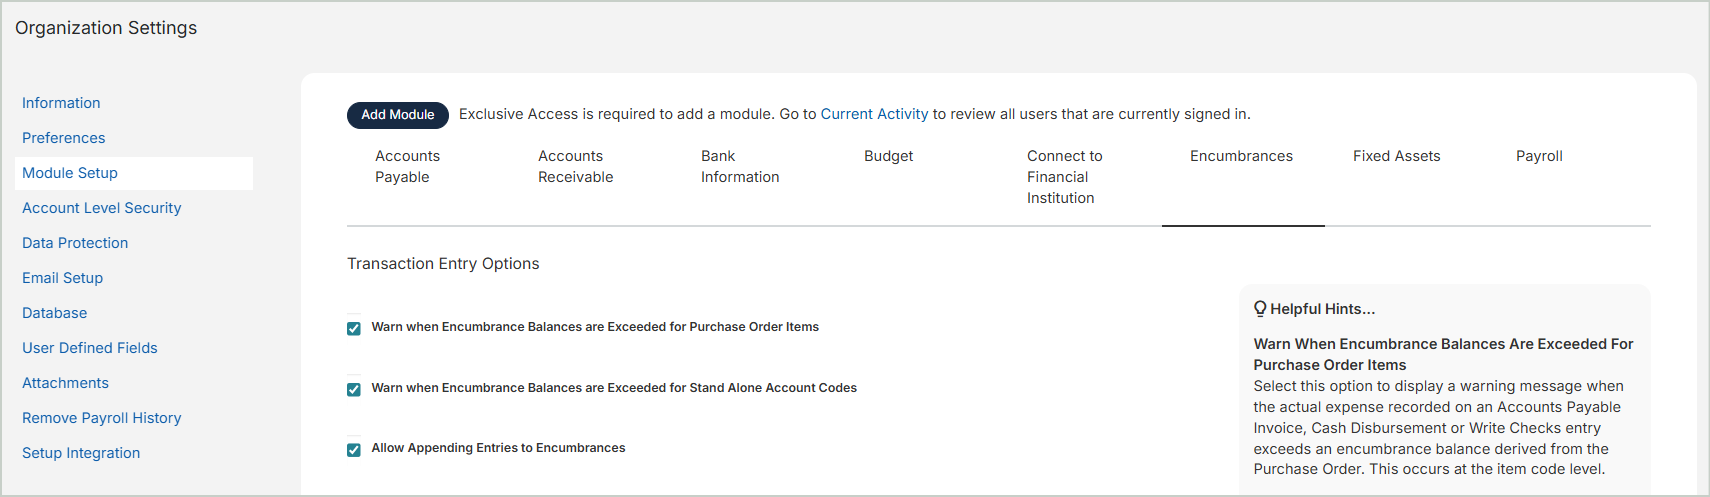
Transaction Entry Options
Warn when encumbrance balances are exceeded for purchase order items: Select this option to display a warning message when the actual expense recorded on an Accounts Payable Invoice, Cash Disbursement or Write Checks entry exceeds an encumbrance balance derived from the Purchase Order. This occurs at the item code level.
Warn when encumbrance balances are exceeded for stand alone account codes: Select this option to display a warning message upon Save, when entering an AP Invoice, Cash Disbursement, Encumbrance Liquidation or the Write Checks transaction entry sessions, when the actual expense exceeds an encumbrance balance at the transaction coding level. This warning applies to stand alone encumbrances only.
Allow appending entries to encumbrances: Select this option to allow appending entries for an existing encumbrance. If this option is selected, you will be able to adjust a balance and reclassify a GL code for any existing encumbrance by posting an appending entry to the Vendor and Document Number of the original encumbrance.
Once you're finished with your edits, Save your changes.
The Fixed Assets tab contains the following settings to apply for your organization, including Fixed Asset default fields and Quick Entry options to speed up your asset entry.

Fixed Assets Defaults
Establish default values for your assets.
Frequency: Select a depreciation frequency of M (Monthly), Q (Quarterly), or Y (Yearly) from the drop-down list. This is an organization-wide option, so whichever frequency you choose will be applied to all of the assets in your organization.
-
You can't change the depreciation frequency after a depreciation or disposal has been calculated, or after a deprecation has been transferred and posted.
-
If Monthly or Quarterly depreciation is selected, the system does not calculate partial months or quarters. For annual depreciation, the system follows a partial year convention. For example, if an asset is purchased during the last month of the year, the system only depreciates the month in which it was owned for that year.
-
See Calculate Depreciation for more information on how MIP Cloud uses depreciation frequency in its calculations.
Gain/Loss General Ledger Account: Select a general ledger revenue or expense account from the drop-down list. You must have previously added at least one account in your Chart of Accounts to make a selection.
Default Asset Type: Select a default asset type. This asset type will auto-populate anytime you create a new asset, either through the Fixed Assets module or using Asset Quick Entry within other modules.
-
Asset Types determine where in the general ledger an asset's depreciation is posted, along with other important information such as depreciation methods (see Asset Types).
Default Category: Select a default category. This category will auto-populate anytime you create a new asset, either through the Fixed Assets module or using Asset Quick Entry within other modules.
Asset Quick Entry Options
You can choose to include additional fields when creating an asset through Quick Entry.
Include Life on Quick Entry: Select this option if you want to include the Life column when creating an asset through Quick Entry. This is helpful if you know the useful life of an asset and want to enter it right away.
Turn On Validations: Select this option if you want to turn on the validations that check if an asset’s cost matches the transaction entry document and if the transaction is linked to a fixed asset (FAO) account.
Note: When creating an asset using through Quick Entry, a zero book value asset is saved when the Cost is entered as zero and the "Turn On Validations" option is selected.
Once you're finished with your edits, Save your changes.
The Payroll tab contains the following settings to apply for your organization, including payroll disbursing accounts and interfund accounts and additional customization options.
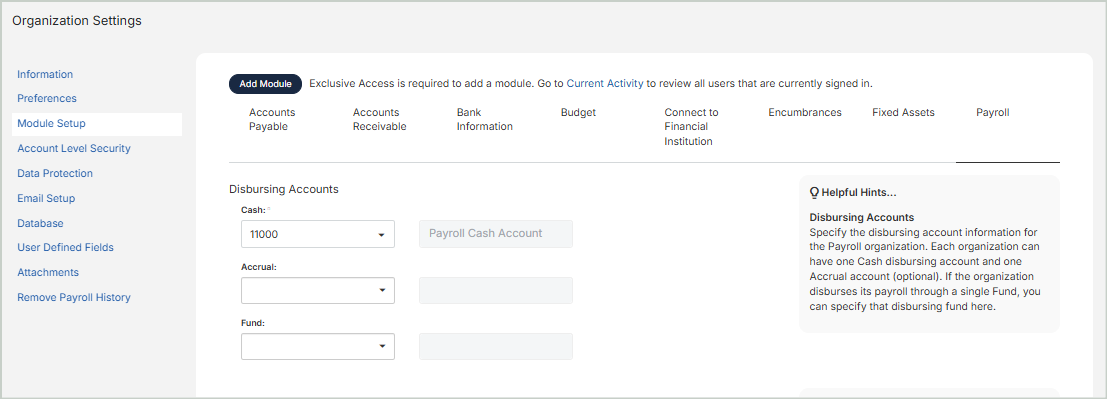
Disbursing Accounts
Cash: Enter an existing General Ledger "Cash" type account. You must select a cash account with a USD currency type.
-
If your organization uses more than one fund code to disburse payroll, this is the only field you need to fill in this section.
-
Each Payroll organization can have one Cash disbursing account, and one (optional) Accrual account.
-
You must have previously added at least one account in your Chart of Accounts to make a selection.
Accrual: Enter an existing APO (Accounts Payable), OA (Other Assets), or OL (Other Liabilities) GL account for the current organization.
Fund: Enter an existing fund disbursing account.
-
If your organization disburses its payroll through a single Fund, you can specify that disbursing fund here. In this case, credits in your payroll entries (to various liability accounts and cash for net pay) are recorded to this fund, even though payroll expenses may be allocated to multiple funds.
-
If you enter a disbursing Fund, then you must also enter the Interfund Accounts, "Due To" and "Due From", in the next section. If payroll expense is allocated to funds other than the disbursing fund, the system can balance the payroll entries between funds using these interfund accounts.
-
If you use more than one disbursing fund for your payroll, you can skip the Fund field, as well as the Interfund Accounts fields in the next section. In this case, credits in your payroll entries (to various liability accounts and cash for net pay) are recorded in each fund to which payroll expense is recorded.
Interfund Accounts
Enter the interfund account numbers. The accounts must be existing general ledger accounts with an account type of Interfund Receivable (IFR), Interfund Payable (IFP), or Interfund Transfers (IFT).
Fraud Prevention Options
Lock Employee ID and User ID Association: Select this option to display the User ID field in Payroll > System Setup > Employee Information only after a User ID is selected and the form is saved.
Enable Deactivation of User ID Upon Employee Termination: Select this option to automatically set the associated User ID status to "Inactive" when an employee is terminated.
Note: The association between the Employee ID and User ID is set up through Payroll > System Setup > Employee Information. The User ID is set up by the Administrator through Administration > Users > Manage Users. It's recommended to use unique User IDs. If a User ID is shared and one of the associated Employee IDs is terminated, the User ID will be set to "Inactive," locking out any remaining users.
Warn Upon Employee Termination Linked User ID Deactivation: Select this option to display a warning message about the Employee ID and User ID association when the Employee ID status is changed to "Terminated."
Hide Earning Code Rates and Amounts During Timesheet Processing: Select this option to hide rates and amounts when entering timesheet information when Adding Timesheets (visible on the "Summary" tab of the timesheet).
Note: The Rates and Amounts will display when Reviewing Calculated Payroll. Otherwise, to view earning code rates and amounts during timesheet entry, clear this checkbox.
Include Historical Pay Code Information on Stubs: Select this option to include pay codes without current activity on a stub when Printing Checks and Vouchers, or reprinting pay stubs.
Once you're finished with your edits, Save your changes.