Automated Workflow Approvals
Automated workflow approvals let your organization require sign-off on purchase requests, AP invoices, and AP payments before they move forward. You decide which records need approval, the conditions that trigger it, and who approves at each level. Approvers can be MIP users or people outside MIP who approve by email.
Note: Invoices created in Classic are not subject to approvals. To make sure invoices go through the approval process, enter them in MIP Modern.
1. About approval workflows
An approval workflow is a set of rules made up of four parts:
| Part | What it controls |
|---|---|
|
Record types |
Which records the workflow applies to: Purchase Request, Invoice, AP Payment, or any combination. |
|
Conditions |
When the workflow applies, for example when the amount is greater than $100. |
|
Approval levels |
Who must approve, and in what order. Up to five levels. |
|
Priority and status |
Which workflow wins when more than one could apply, and whether the workflow is in use. |
How a record moves through a workflow
-
A user submits a purchase request, saves an invoice session, or selects invoices for payment.
-
If the record matches an active workflow, MIP tells the user that approval is required and asks whether to continue.
-
The record routes to the level 1 approver. When level 1 approves, it moves to level 2, and so on.
-
The record stays Pending Approval until every level has approved it. If any approver denies it, the record is Denied.
The submitter receives an email when the record is fully approved or denied.
Approval statuses
| Status | Meaning |
|---|---|
|
Pending Approval |
Submitted and waiting on one or more approval levels. |
|
Approved |
All approval levels have approved. |
|
Denied |
An approver denied the record and entered a reason. |
|
No Approval Required |
The record didn't match any active workflow. |
2. Create and manage an approval workflow
View your workflows
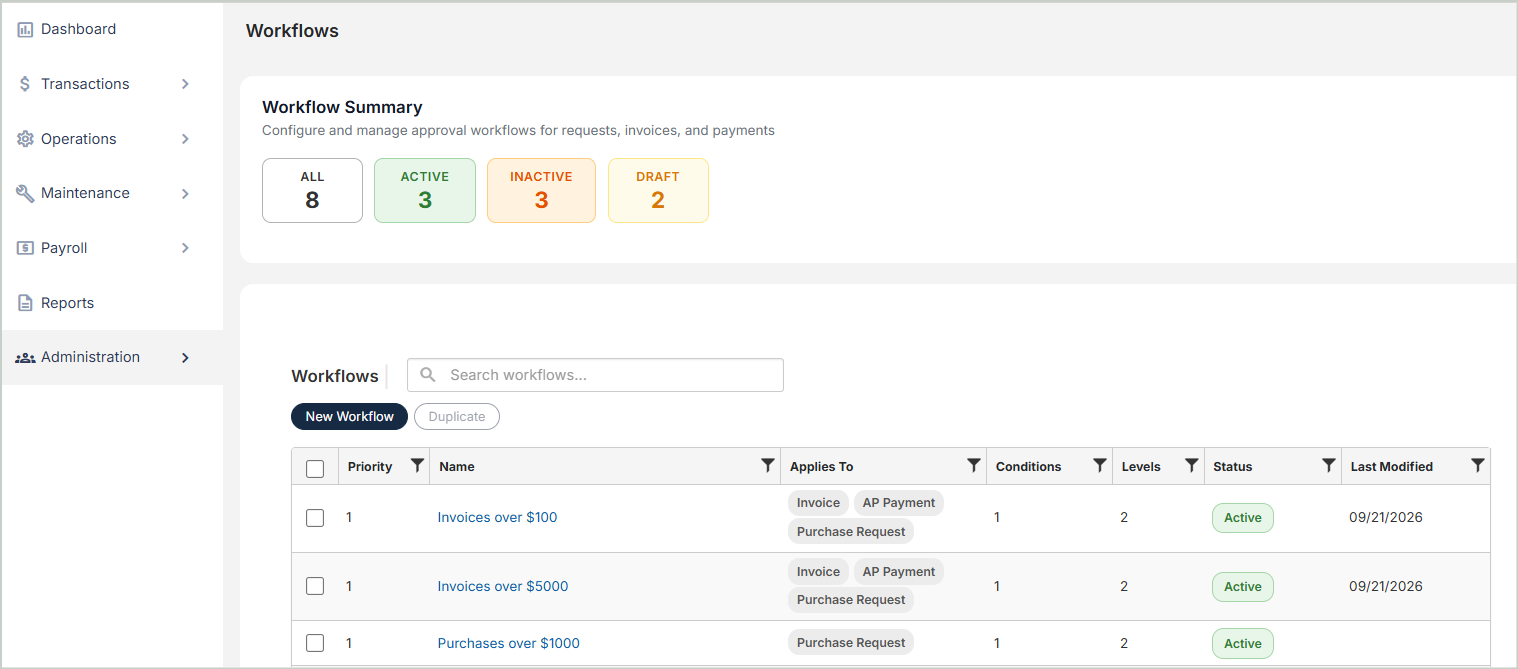
Go to Administration > Workflows. The Workflow Summary shows how many workflows you have in each state: All, Active, Inactive, and Draft. The Workflows list shows each workflow's priority, name, record types, number of conditions, number of approval levels, status, and last modified date. Use the search box to find a workflow by name, or select a workflow and choose Duplicate to copy it as a starting point for a new one.
Create a workflow
-
Go to Administration > Workflows and select New Workflow.
-
Complete the Basics, Conditions, and Approval Levels tabs as described below.
-
Review the Preview tab.
-
Select Create Workflow.
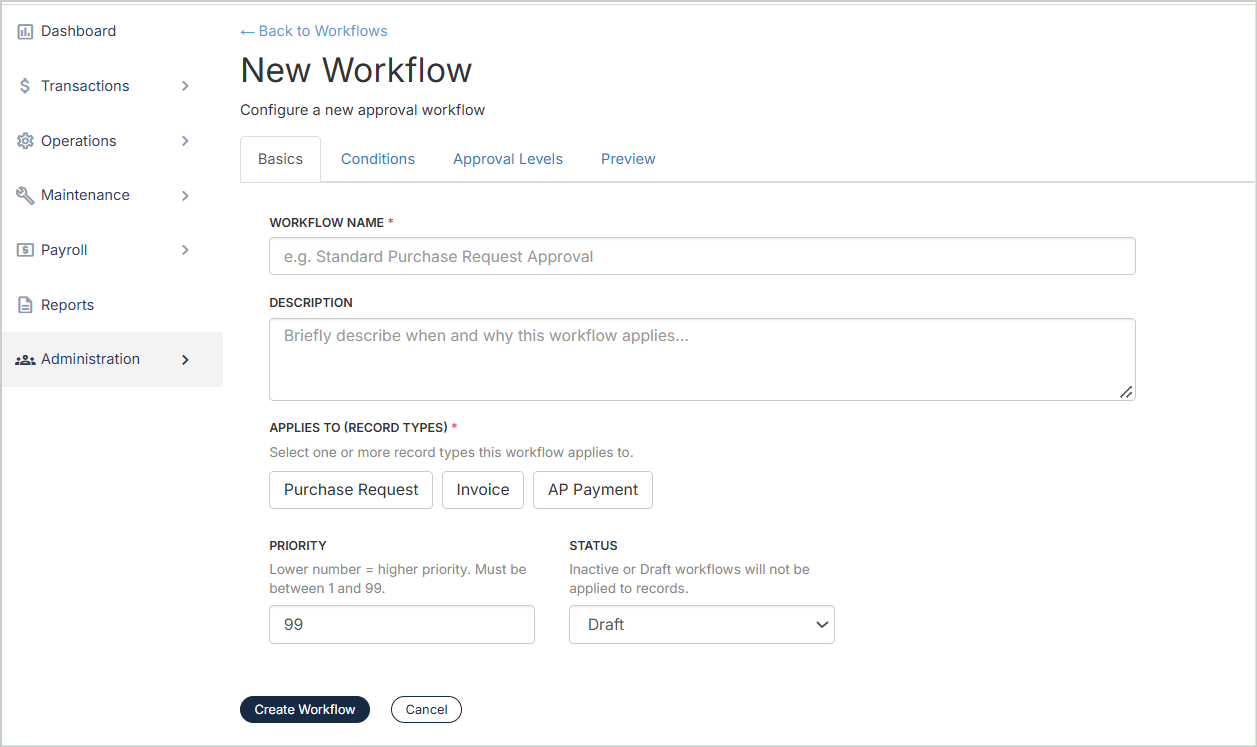
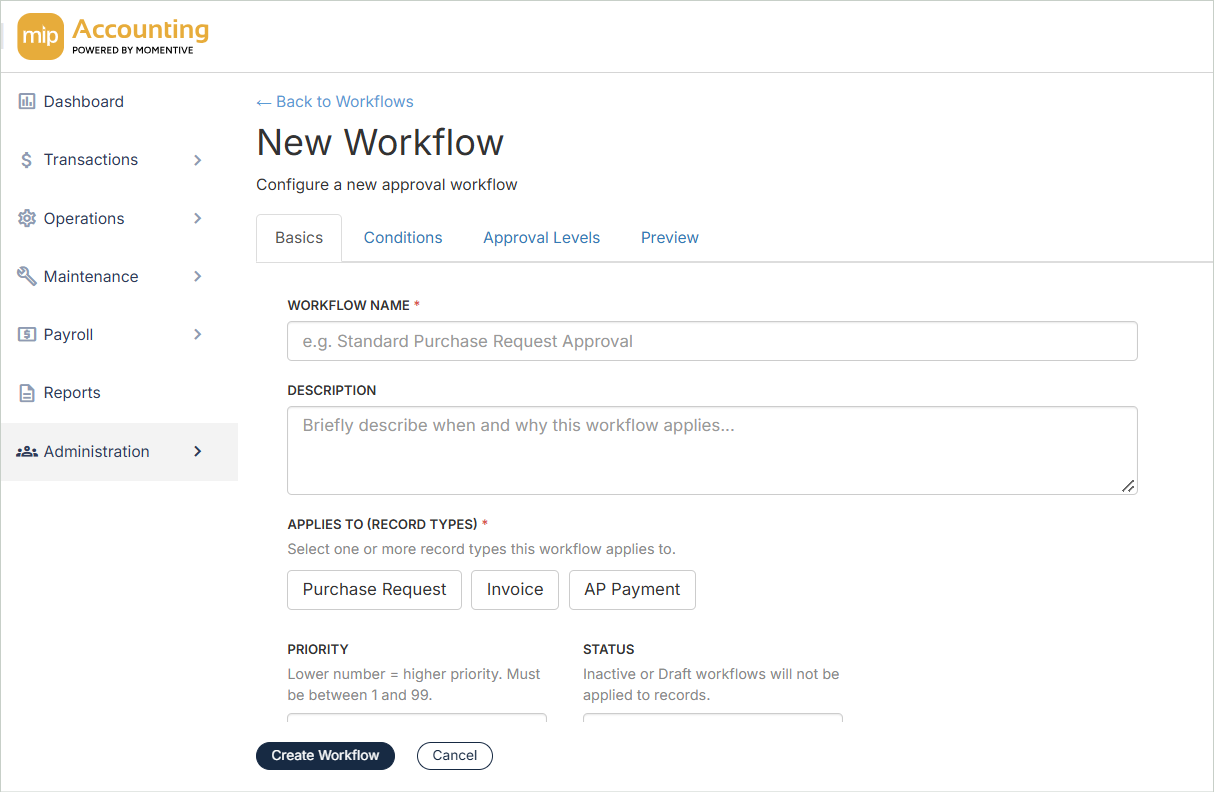
Basics tab
| Field | Description |
|---|---|
|
Workflow Name |
A name that describes the rule, such as Invoices over $100. |
|
Description |
Optional details, such as Invoices over $100 require approval chain. |
|
Applies To |
Select one or more: Purchase Request, Invoice, AP Payment. |
|
Priority |
A number from 1 to 99. A lower number means a higher priority. |
|
Status |
Active, Inactive, or Draft. Only Active workflows are applied to records. |
Conditions tab
Conditions define when the workflow applies. At least one condition is required.
-
In the IF row, choose a field (such as Amount), an operator (such as is greater than), and a value.
-
To add another condition, select + Add Condition.
-
To remove a condition, select the × next to it.
When you use more than one condition, all conditions must be true for the workflow to apply. For example, Amount is greater than 100 AND Amount is less than 10000 applies only to records between $100 and $10,000.
Approval Levels tab
Records route through each level in order. You can add up to five levels.
-
Enter a name for the level, such as Department Manager.
-
Under Approver, choose either an MIP User or Non-MIP User.
-
Under Allowed Actions at This Level, confirm the actions the approver can take.
-
To add the next level, select + Add Approval Level. To remove a level, select Remove.
Preview tab
The Preview tab summarizes the workflow, including its record types, conditions, and approval levels. Review it before you save.
3. Submit records for approval
Purchase requests
-
Go to Operations > Purchase Requests and select New Purchase Request.
-
Enter a Title, select a Vendor ID, and set Urgency to Normal or Urgent.
-
Add line items, a Business Justification, and any attachments.
-
Select Submit for Approval. To finish later, select Save Draft.
-
If the request matches a workflow, MIP asks whether you want to continue. Select Yes.
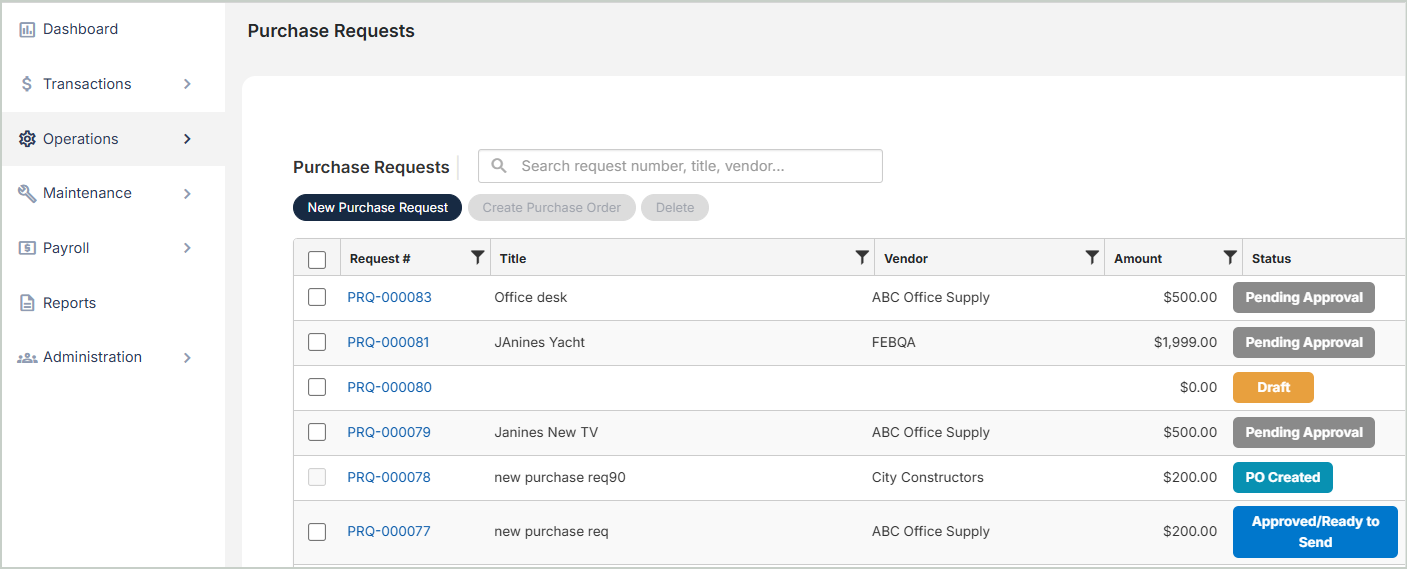
The Purchase Requests list shows the status of each request. Open a request to see its details, line items, business justification, attachments, and approval status. Requests marked Urgent display an urgent tag for approvers in MIP.
AP invoices
-
Go to Transactions > Accounts Payable > Invoices and create or open a session.
-
Enter your invoices and save.
-
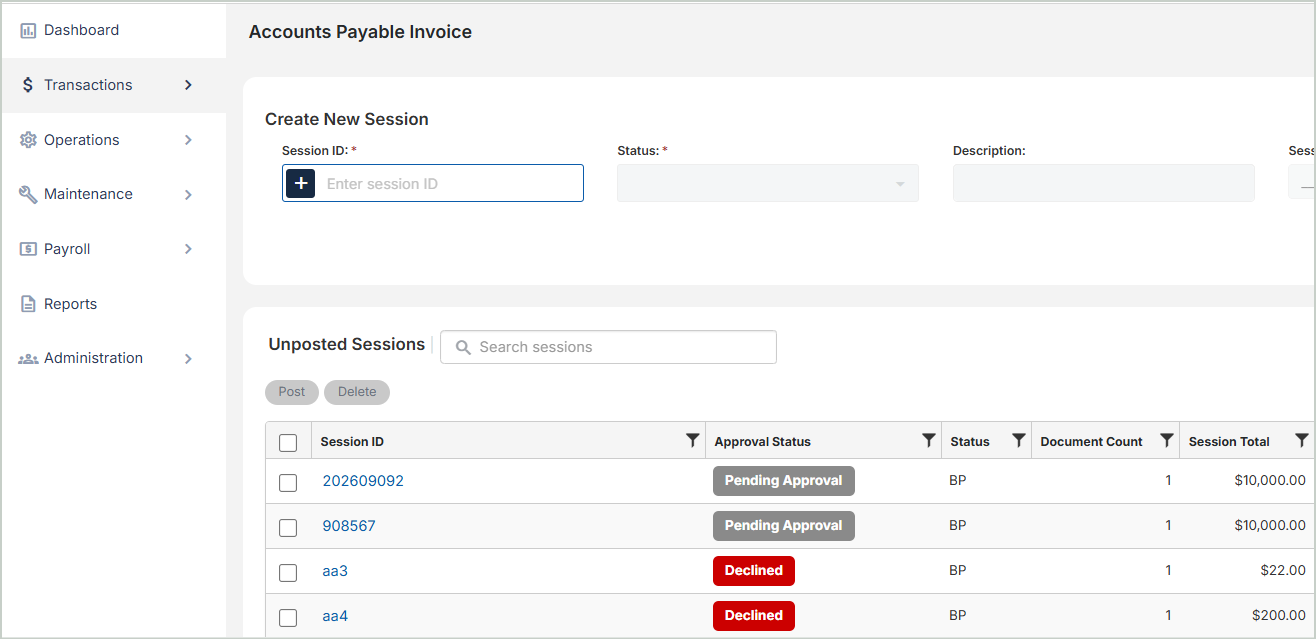
If an invoice matches a workflow, MIP tells you the invoice requires approval and asks whether to continue. Select Yes.
The Unposted Sessions list includes an Approval Status column so you can see which sessions are pending approval or declined. A session can't be posted until its invoices are approved.
AP payments
-
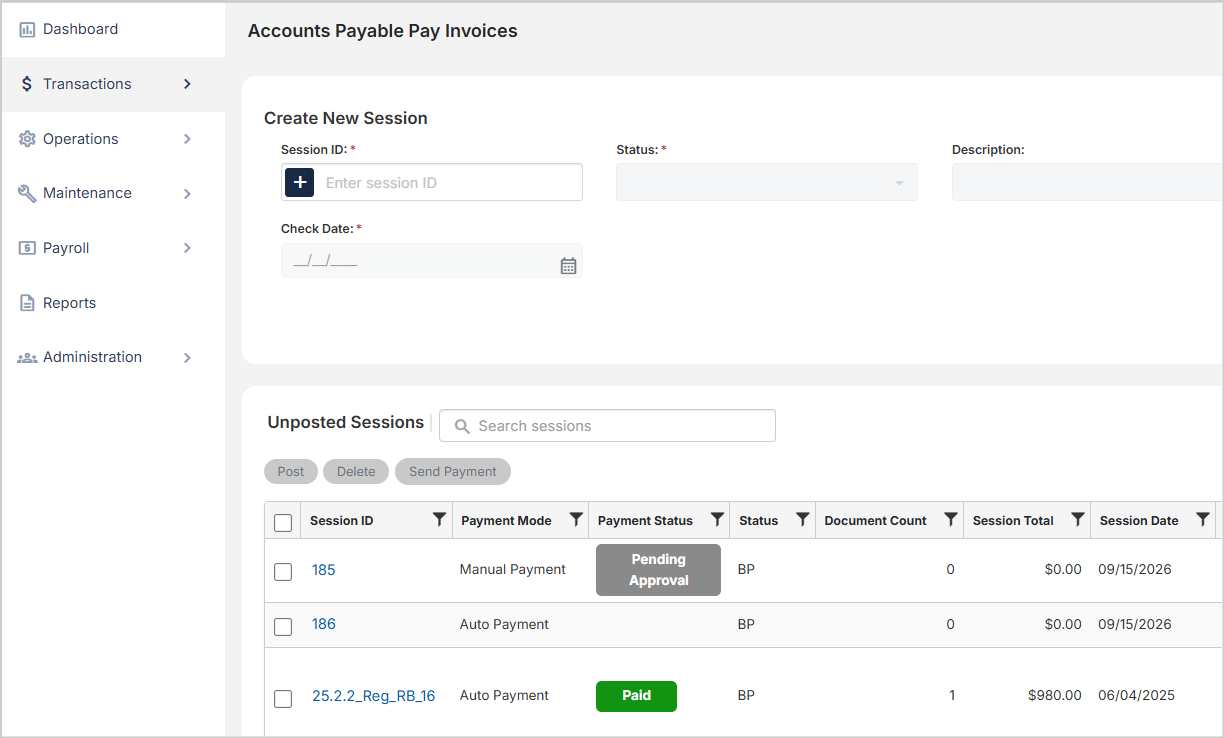
Go to Transactions > Accounts Payable > Pay Invoices and select the invoices to include in the payment session.
-
If the selection matches a workflow, MIP displays: The selected invoices require approval before they can be processed for payment. Do you want to continue? Select Yes.
Make changes after submitting
To correct a record that's pending approval, open it and select Edit. When you save your changes, the original approval request is canceled and a new approval request is sent. The approval process starts over from level 1.
4. Approve or deny records
Approve or deny in MIP
-
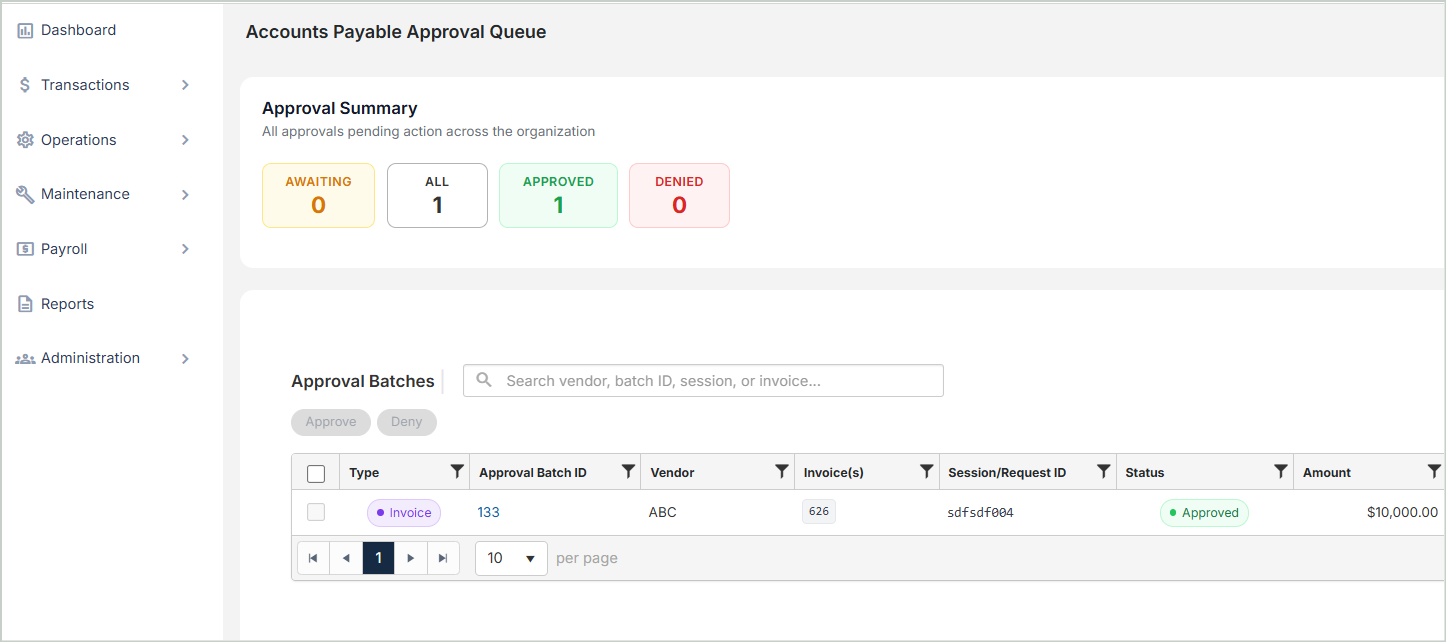
Go to Transactions > Accounts Payable > Approval Queue.
-
Use the Approval Summary tiles (Awaiting, All, Approved, Denied) to filter the list, or search by vendor, batch ID, session, or invoice.
-
To review a record, select its Approval Batch ID. The detail page shows the amount, vendor, session, items, and the Approval Chain, which lists each level and whether it's approved or awaiting action.
-
Select the check box for one or more records, then select Approve or Deny.
-
If you deny a record, enter a Reason for Denial and select Confirm Denial. A reason is required for every record you deny.
The queue shows records that were routed to you. A record doesn't show as Approved until every level in its workflow has approved it.
Approve or deny by email (non-MIP approvers)
Approvers who were added by email address receive a message with the subject Action Required: [record] with Approval Batch ID #[number] ([amount] – [vendor]) needs your approval. The email lists the vendor, amount, session ID, invoices, who initiated the request, and the approver's level.
To respond, the approver selects Approve or Deny in the email. A reason is required to deny.
See why a record was denied
Open the denied record and view its Approval Timeline. The timeline shows who denied the record, when, and the reason they entered. Records denied by email are marked as such.
5. Split a session with mixed approval results
If a session contains more than one invoice and some are approved while others are denied, the session can't be posted as is. MIP displays a message on the session: This session contains a mix of approved and denied invoices. You can use Split to move invoices into a new session, or Edit to remove specific invoices.
To split a session:
-
Open the session and select Split.
-
In the Split Session window, enter a New Session ID, or select + to generate one automatically.
-
For each invoice, choose whether it stays in the current session or moves to the new session. At least one invoice must move to the new session.
-
Select Split.
Both sessions keep each invoice's current approval status. You can then post the session with the approved invoices and correct or resubmit the denied ones.
FAQs
Which records can require approval?
Purchase requests, AP invoices, and AP payments. A single workflow can apply to any combination of the three.
How many approval levels can a workflow have?
Up to five.
Can a condition use OR logic?
Not currently. All conditions in a workflow use AND logic, so every condition must be true for the workflow to apply.
Does an approver need an MIP license?
No. You can add an approver by email address as a Non-MIP User. They approve or deny from the email they receive.
How does the submitter know the outcome?
The submitter receives an email when the record is fully approved or when it's denied.
If one level approves and a later level denies, what's the status?
Denied. A record is only Approved when every level approves it.
Can I change a record after submitting it for approval?
Yes. Edit the record and save. The approval restarts and new notifications are sent.
Is there a report of approval activity?
Approval actions are recorded in the audit trail.