ACH File
Create the file to upload to your financial institution for electronic payments. You can also choose to send automated payment notification emails to vendors when an ACH file is created.
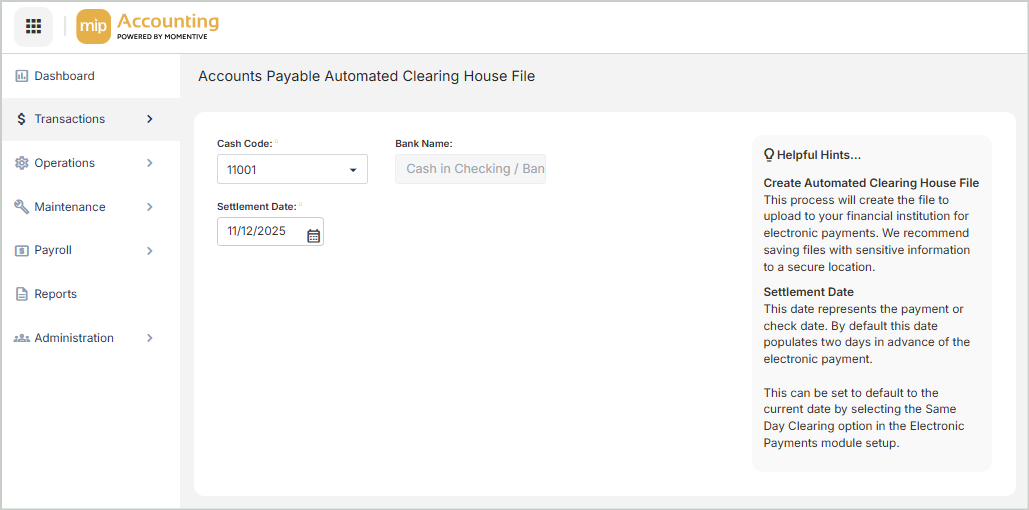
Create an ACH File
Complete the fields at the top of the page to create or update the file you'll upload to your financial institution for electronic payments.
Cash Code: Select a valid general ledger cash code. The Available Vouchers grid will list all available records for the selected cash code.
Bank Name: Displays the bank name associated with the selected cash code.
Settlement Date: Defaults to two days in advance of the current date. You can enter a different date if needed, such as the date of the initial electronic payment transaction.
Available Vouchers
The Available Vouchers grid lists the existing electronic payments files in the system for the selected cash code.
ID: The electronic payment file ID
Name: The electronic payment file name
Date: The date of the electronic payment file
Voucher: The voucher number linked to the file
Amount: The dollar amount for the electronic payment file
Type: The type of electronic payment file
Select the voucher(s) from the grid to generate a file, then Save.
A .txt file will download automatically.
Note: How and where the electronic payment file is saved depends on your browser and its version.
Send Automated Email Notifications to Vendors
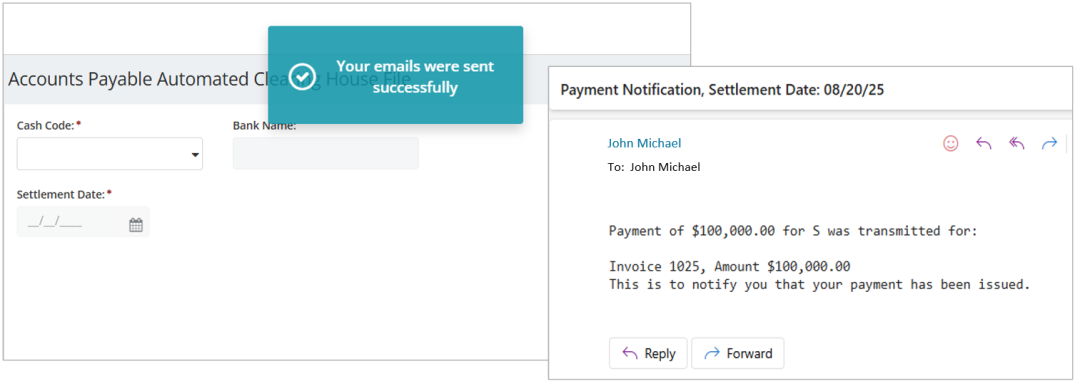
You can send automated emails to vendors to notify them of ACH payments. This functionality is compatible with both SMTP and Office 365 email configurations. Once set up, emails will be sent automatically when an ACH file is created for vendors with valid email addresses and payment notifications enabled. You’ll receive a confirmation message when the email is successfully sent.
How to Set Up Automated Email Notifications
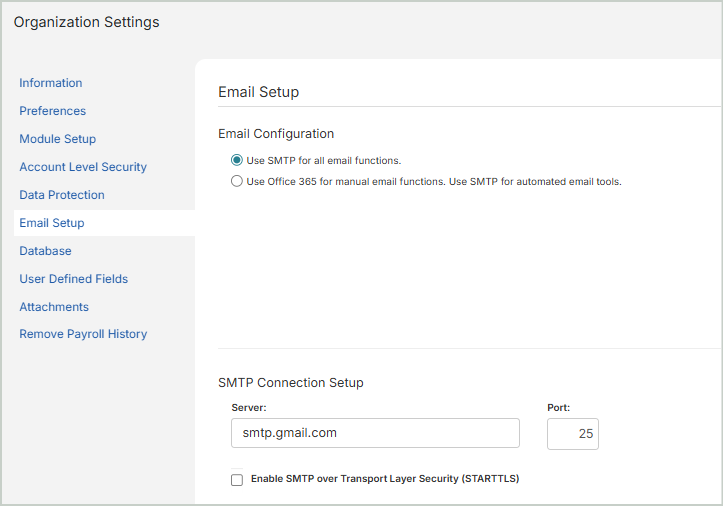
1. Ensure your organization’s email setup is properly configured and working.
-
Navigate to Administration > Organization Settings > Email Setup
-
Test your email connection by sending a test email at the bottom of the page. For more information on setting up email capabilities, see Email Setup.
2. Enable EFT Email Notifications for your vendors.
-
Navigate to Organization Settings > Module Setup > Bank Information
-
Select the bank Routing Number.
-
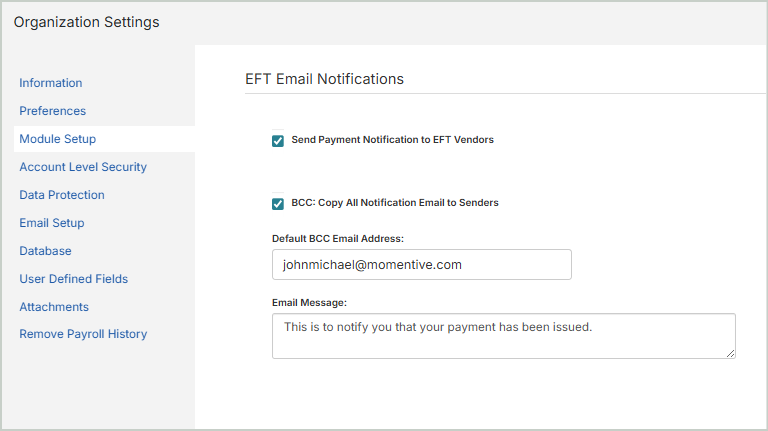
Scroll to the bottom of the page to the EFT Email Notifications section:
-
Select the option to Send Payment Notification to EFT Vendors.
-
Select the option next to BCC: Copy All Notification Email to Senders to send a blind copy to your organization's default Email Address (Administration > Manage Users).
-
If you'd like to send the blind copy to an email address that's different from your organization's default email, enter the Default BCC Email Address who will receive the blind copy.
-
Enter an Email Message for the notification. It could include information such as a contact person and telephone number that would be applicable to all vendors receiving electronic payments.
-
Save your changes.
-
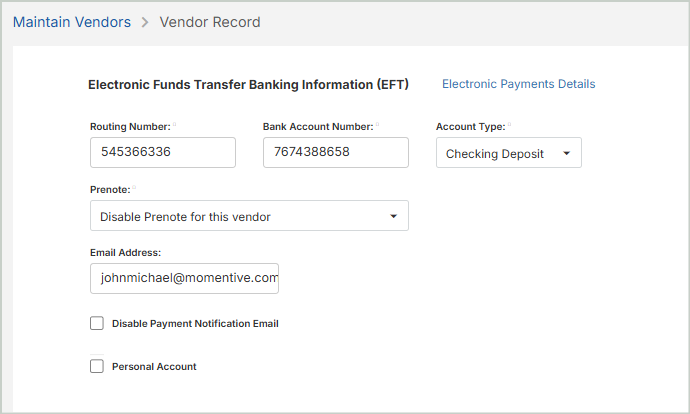
3. Ensure your vendors are set up to receive notifications on their Vendor Record.
-
Navigate to Maintenance > Accounts Payable > Vendors
-
Select the Vendor ID.
-
Open the Payments and Discounts tab > Manual Payments > EFT section:
-
Select the option to Disable Prenote for this vendor.
-
Enter a valid Email Address for the vendor who will receive the email notification.
-
Ensure the Disable Payment Notification Email option is not selected. If this option is selected, no email will be sent.
-
4. Once the email configuration and vendor settings are applied above, you can send automated email notifications to your vendors.
-
Select the voucher(s) from the grid to generate a file. Once you Save, you'll receive a confirmation message that the email was sent successfully and the notification will be delivered by email.